
Hi everyone! My name is Shilpa, and I’m here to share with you all a card using the gorgeous Sunflower & Blooms die set.
There are so many beautiful dies in this set, which makes it perfect to create luxurious layered and dimensional cards. I loved colouring some elements of cards I’ve made with this set. I’ve also really enjoyed paper piecing elements too. Such a pretty and versatile die set! Perfect for so many different occasions.
Step 1
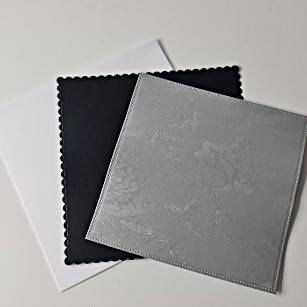
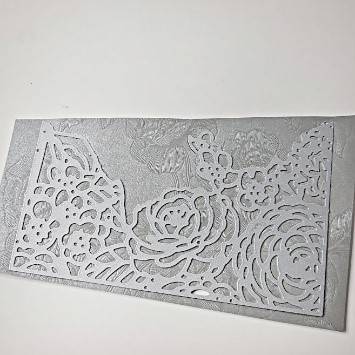
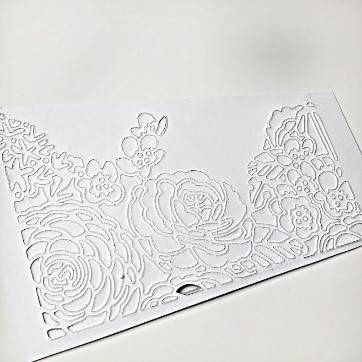
You will need a Tonic Studios 6” x 6” white card blank to create your easel card base. For the first couple of layers you will need an A4 sheet of Craft Perfect 300gsm Smooth Black Card and a sheet of A4 Luxury Embossed Card in Steel Toile. Taking the two largest square dies from the set, cut the black card with the scalloped design and silver card with the dot design. Glue both of these together using Tonic Deluxe Adhesive.
Step 2
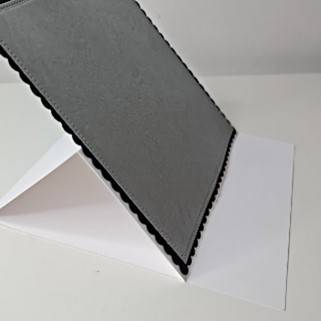
To create the easel card base, take the card blank and make a fold line using you Tonic Studios Scoring Board horizontally on the front (about half way up) and crease using Tonic Studios Precision Glide Folder. Now take the layered panel from step 1 and glue the on to the card base as shown in photo using Craft Perfect Adhesive Dimensional Foam Pads (only adding adhesive pads to the bottom half of black card).
Step 3

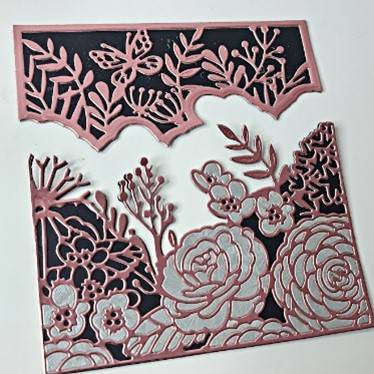
To start to create the decorative layeres of the card, you will need more of Craft Perfect 300gsm Smooth Black Card and cut out the dies shown below. And put aside.
Step 4
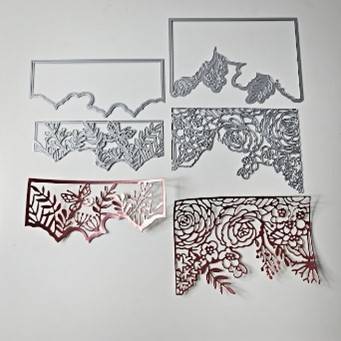
Take the dies used in step 3 and the coordinating decorative verso dies and cut into an A4 piece of Craft Perfect Burnished Rose Satin Mirror Card. Using Tonic Studios Deluxe Adhesive, glue the decorative layers to their matching black shadow layers.
Step 5
To create the little paper pieces to fill in the rose designs on the decorative section from part 4, you will need to cut the verso die into a piece of Luxury Embossed Steel Toile Card. Carefully remove the this from your die cutting machine and gently peel back the die from the card (you can add some low tack tape to the back to ensure your tiny cut pieces stay in place when removing the die).
Step 6
Add tiny dabs of Tonic Studios Deluxe Adhesive in the sections you want to add the paper piecing to (I’ve chosen the flowers), then using the help of a pair of Tonic Studios Precision Tweezers pick up the cut pieces and place in the desired sections.
Step 7

Take the decorative panels and stick them to the front of the card base using Craft Perfect Adhesive Dimensional Foam Pads. At this time you can also cut a little butterfly from the die set in Luxury Embossed Steel Toile card and stick it on top of the butterfly design already on the top panel. Only add Tonic Deluxe Adhesive to the body of the butterfly, this will make it look dimensional when you lift up the wings.
Step 8
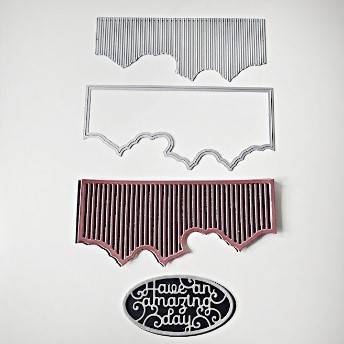

Now is the time to work on the inside of the card, to create the stopper for the easel. So, talking the two dies below, you will need to cut the shadow layer in Craft Perfect 300gsm Smooth Black card and the verso die in Craft Perfect Burnished Rose Satin Mirror Card. Then layer them up using some Tonic Deluxe Adhesive.
You can also cut the sentiment at this point in of Luxury Embossed Steel Toile Card and the shadow layer in black. You will also need to cut the second largest square die in 300gsm Smooth Black Card for the base of the inside of the card as shown in the photo.
Adhere the black square with Tonic Deluxe Adhesive and the other two pieces on with Craft Perfect Adhesive Dimensional Foam Pads.

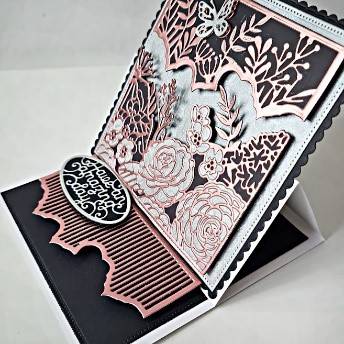
Here is the finished card
Hope you enjoy re-creating the card I have made for you today.
Crafty hugs
Shilpa xxx
Buy The Craft Project


