

Hi, I'm Terri (Veegstez/Veegstez Creates) and I'm delighted to be doing this Guest blog post for Tonic Studios. This die set is really versatile as you can create two different versions of it, as you will see.
What you will need
• Designers Choice Mini Desk Tidy Die Set
• Fresh Mint Pearlescent Card stock (or other card suitable for construction)
• Ivory Pearlescent card stock
• Baroque Rose mirror card
• 3mm Ivory ribbon (to attach the tag if using one)
• Peppermint Cream glitter marker for stamping the sentiment (Thank You, from Flower Power Craft Kit, or other suitable sentiment)
• Small scrap of white card (for making a tag)
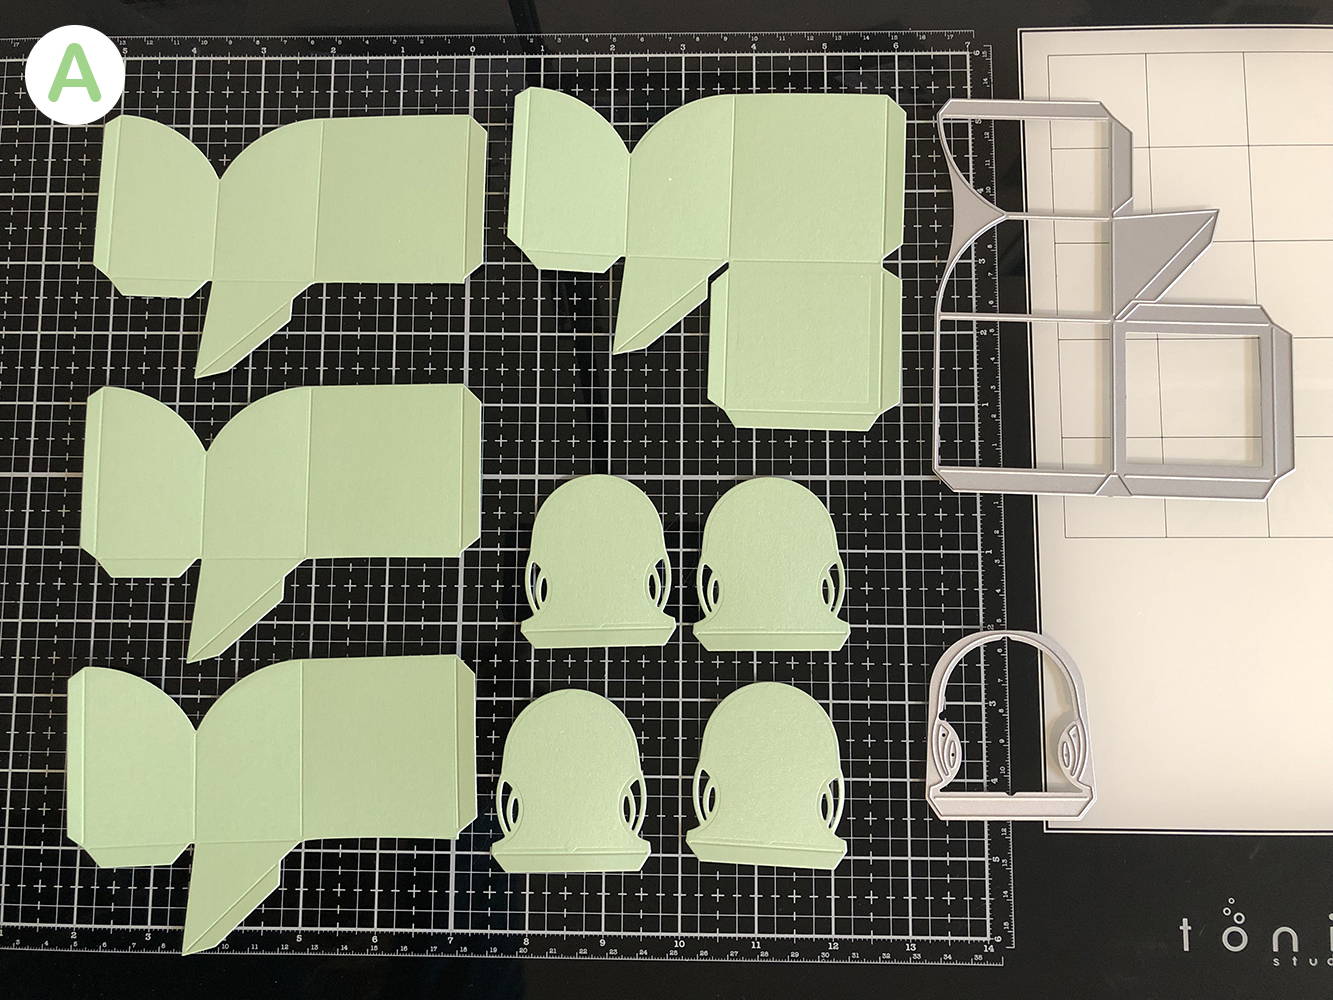
Step 1 – Die cutting the bases and lids
First use the largest die and cut this out 4 times in a card suitable for construction. Trim the base square from 3 of the 4 die cuts pieces.
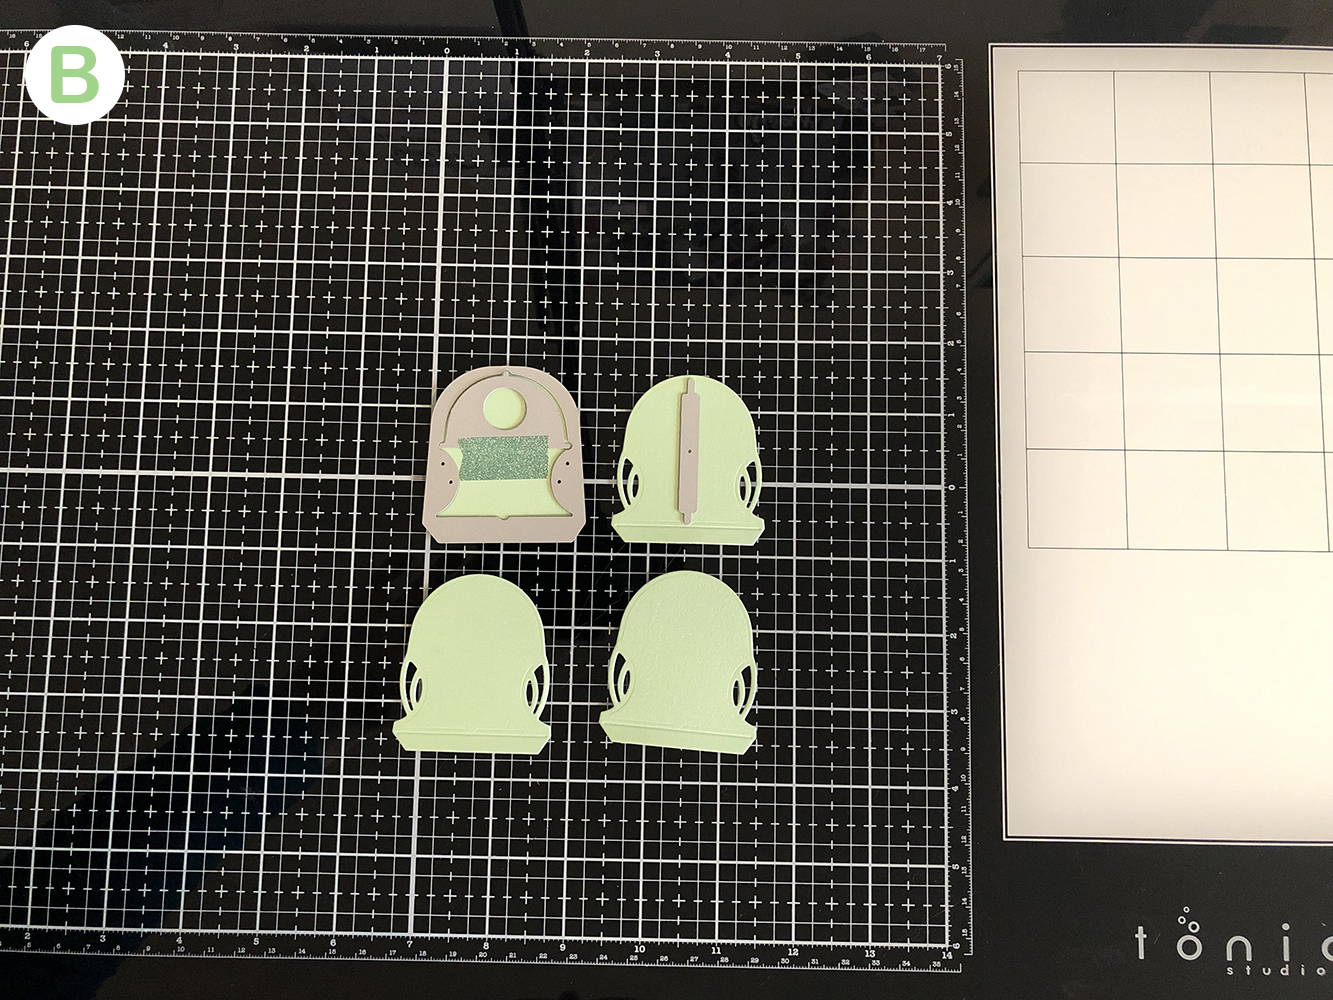
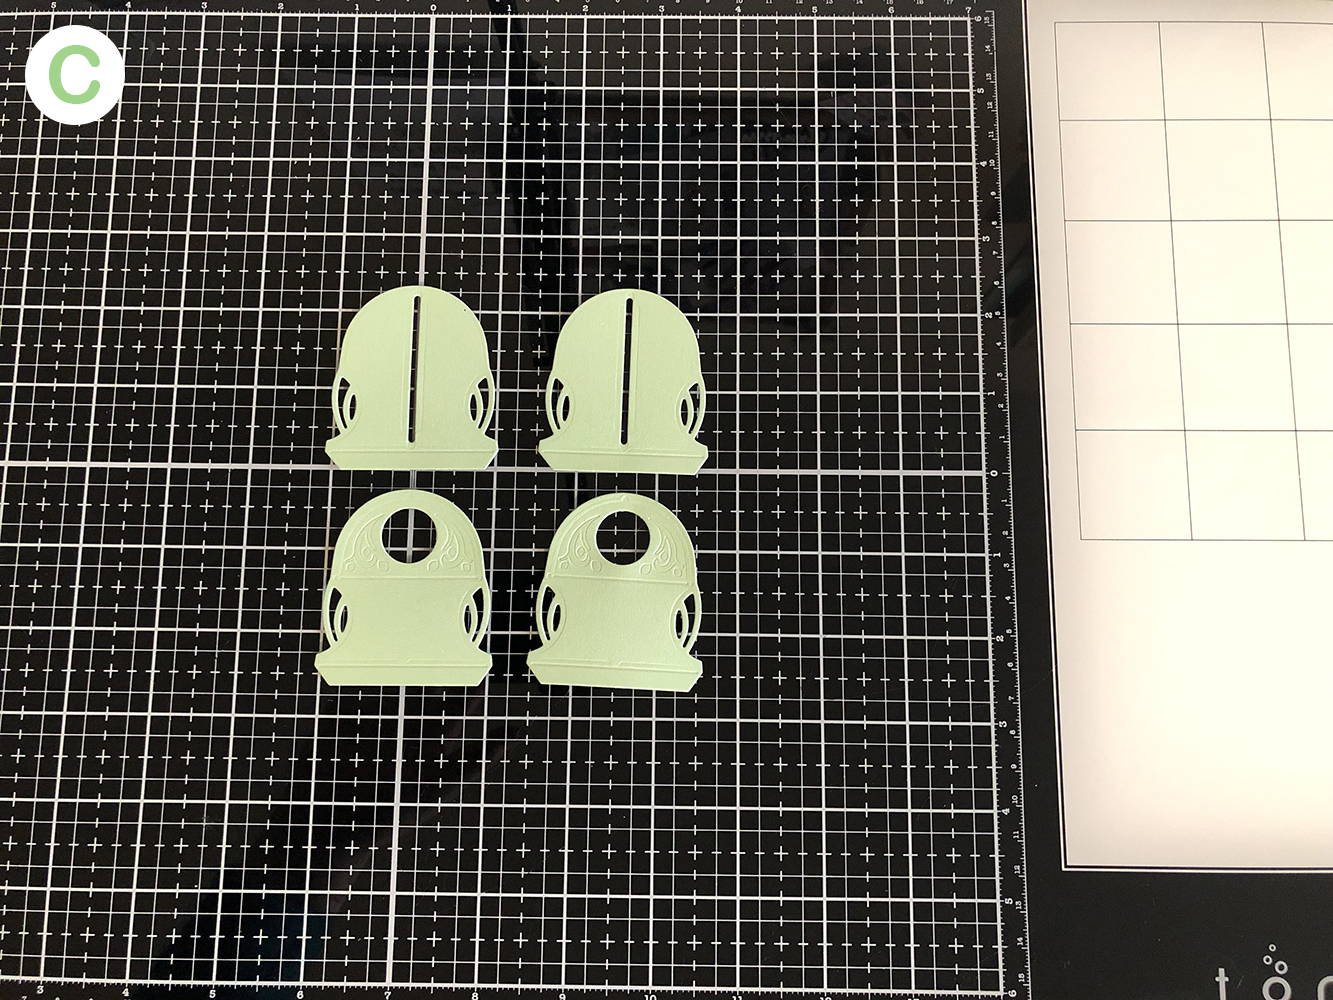
Next cut out 4 of the lid dies. Once the lid dies have been die cut, place one of the die cuts back into the die (it will fit like a puzzle piece and you will feel it is correctly in place) and tape the small decorative lid die into position (using the corresponding notches in each die for correct placement) with low tack/washi tape. Then remove the outer die and run through your die cutting machine. Do this again with another of these die cuts. Complete the same process with the small skinny rectangle die, which will create the slitted lids, again aligning using the notches.
Step 2 – Preparing for assembly


Adhere the lids to the bases using the glue tabs. If you want to make a box that folds in on itself, like in this tutorial, then you will adhere the lid tab so that the “pretty sides” are both facing the same way and the glue tab is not visible on the “pretty side”. If you want to create the Table tidy with the storage pouches on the outside, glue the “pretty side” of the lid tab to the “pretty side of each base die cut, so the lid tab is hidden when it is assembled.
Fold and burnish all of the score lines. If using red liner tape, add a strip to all glue tabs now.
*You could decorate all of your panels at this point, but I left it until the end.
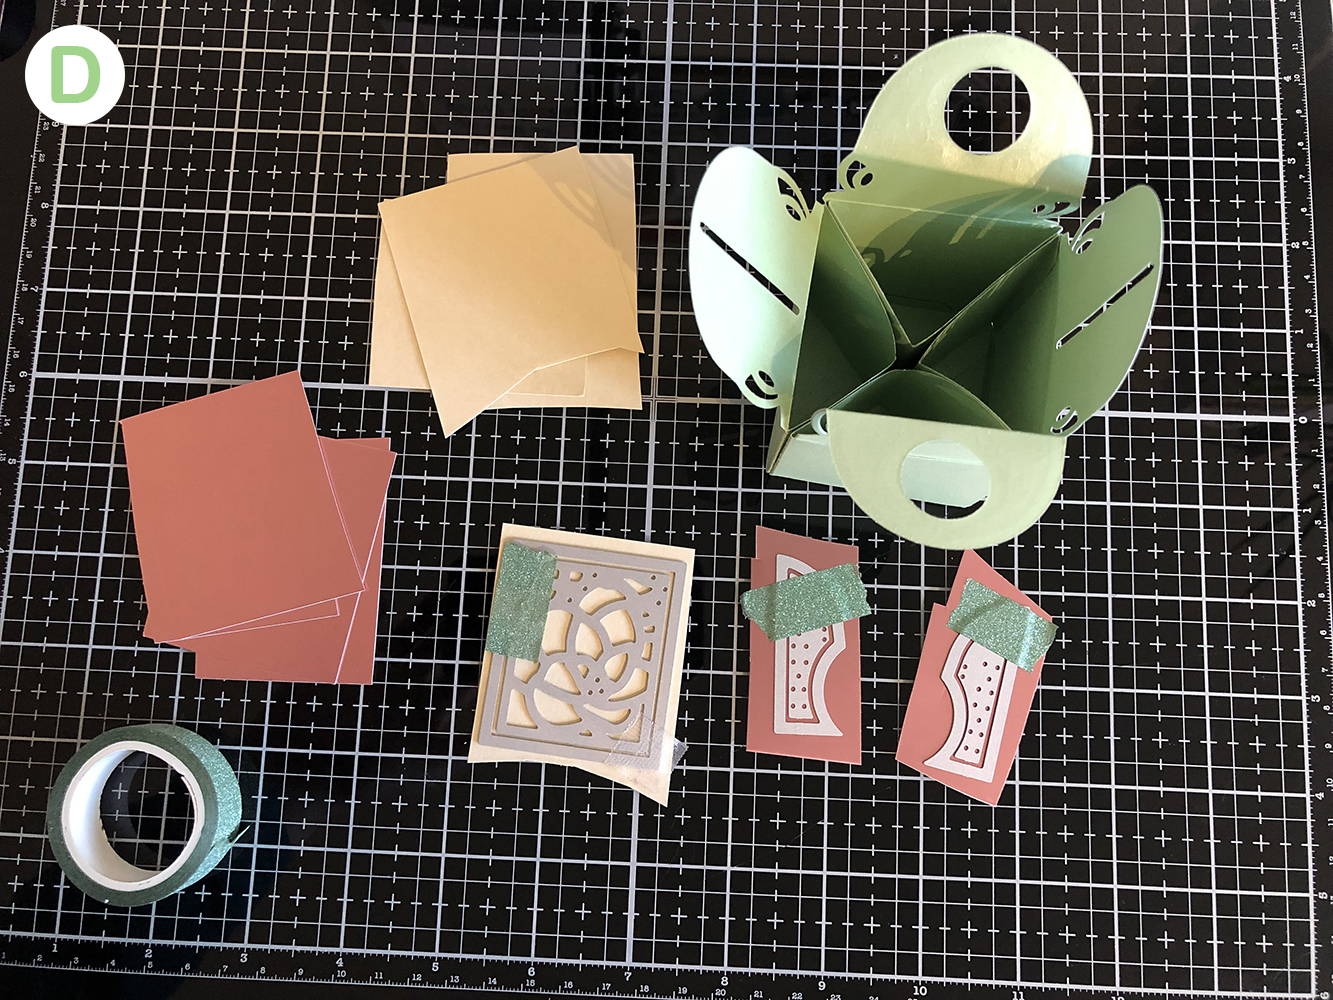
Step 3 – Assembling the Table Tidy Pockets/Compartments
Take one of your pieces and remove the adhesive tape and/or add strong glue to the bottom tab of the side of the pocket which has a tab on it and adhere to the side of the triangle with no tab (pic 6). Then adhere the other 2 glue tabs to what will be the back of the storage pocket (pic 7). Burnish these with a small bone folder/ruler/pen. You have now made one storage pocket, well done! Construct the other 3 in the same way.
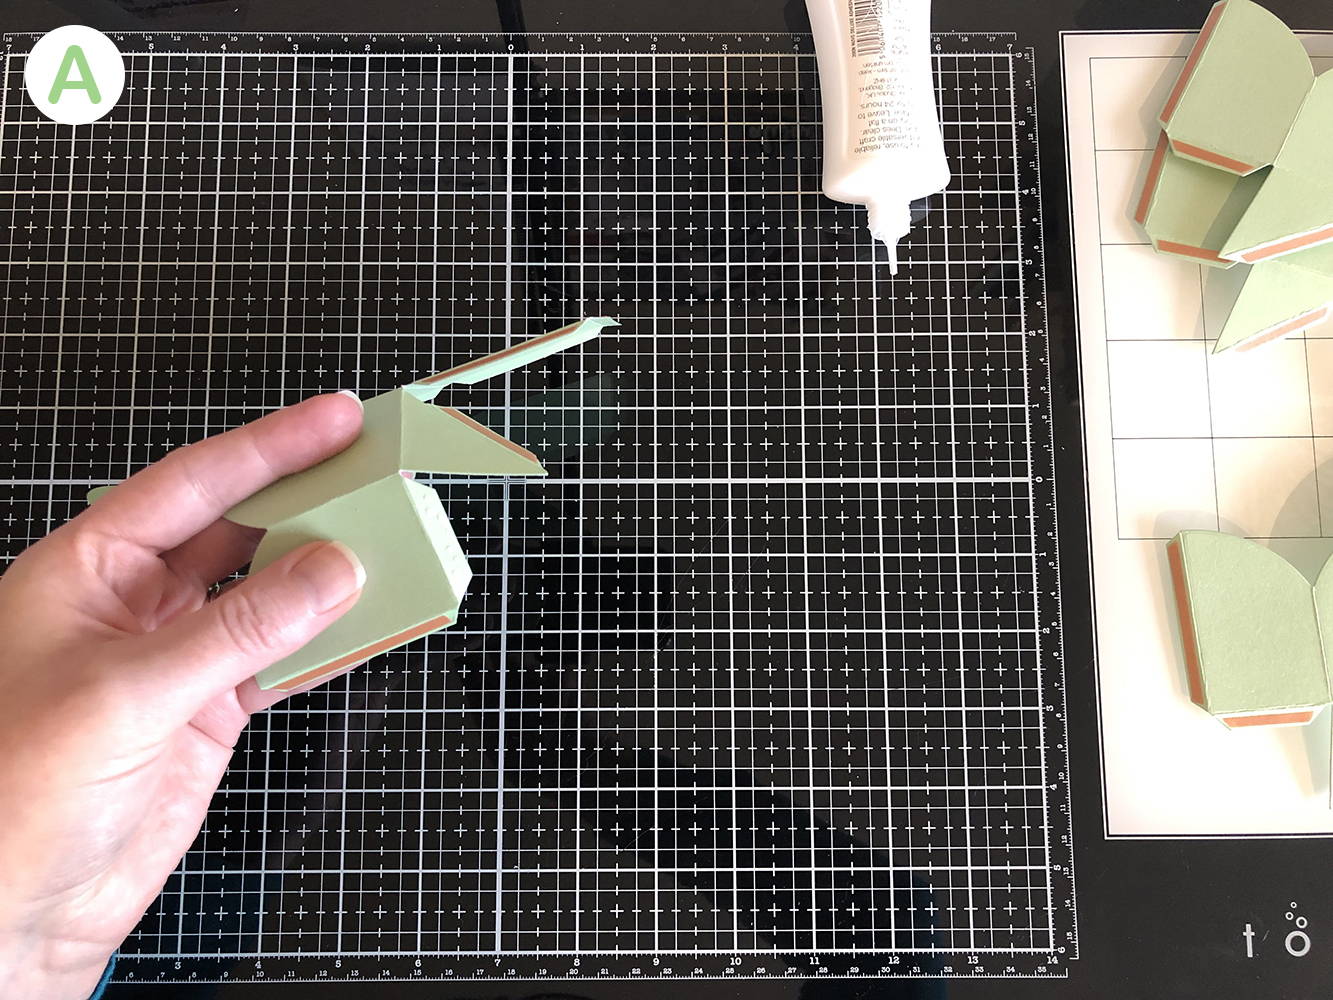


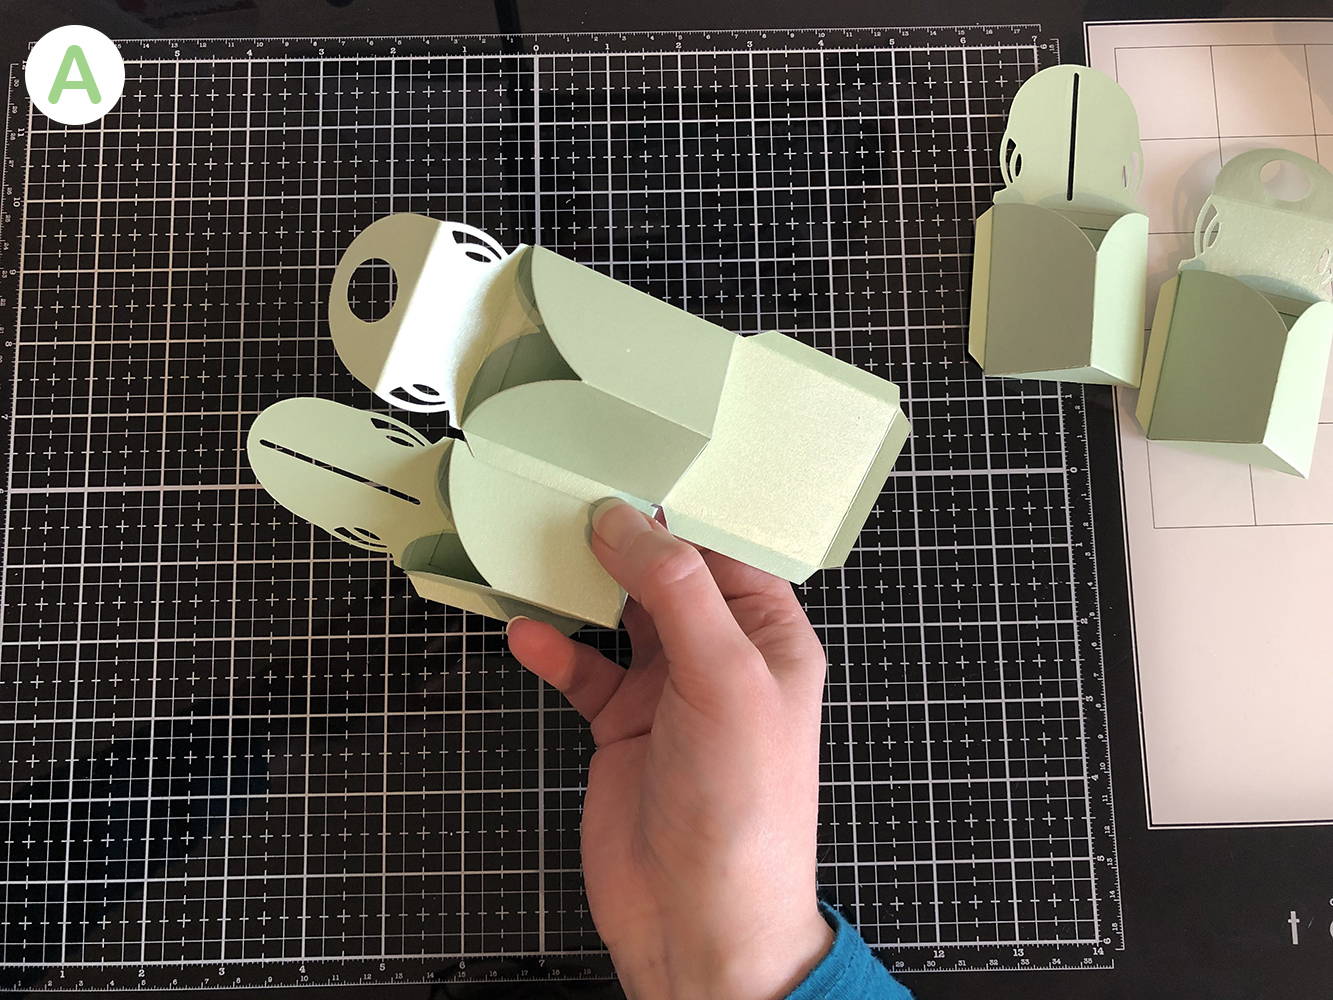
Step 4 – Assembling the Table Tidy in the “square box” format
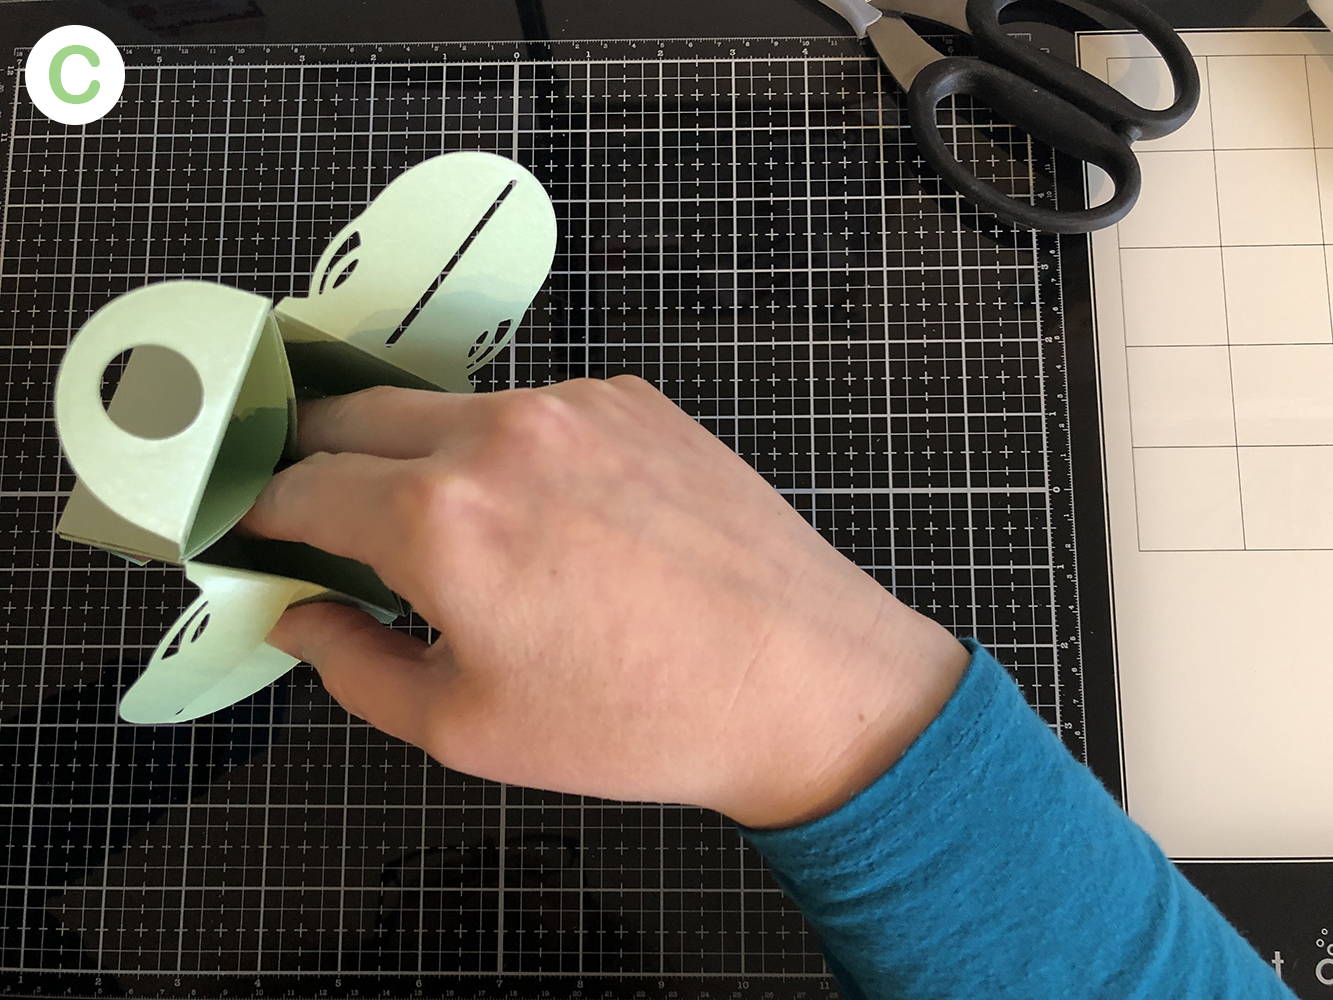
Adhere one storage pocket to another (remembering to alternate lid types) starting with the pocket that still has the base attached. When making the Table Tidy in this format, the glue tab will be adhered as in Pic 9, so will be hidden when the pockets are folded in on themselves. Adhere the 3rd and 4th pockets to the first 2. When all the pockets are adhered to each other and you have a line of them, apply a liberal amount of Nuvo deluxe adhesive to the sides of the pockets and to the glue tabs (or remove the red liner tape) including from the base of the Table tidy and gradually fold the pockets in on themselves, adhering the base tabs to the insides too, so it is neat from the outside. In pic 11 I am holding the compartments together for a few moments to let the glue adhere. You can also reinforce the tabs by burnishing with a bone folder or small tool.

Step 5 – Finishing touches

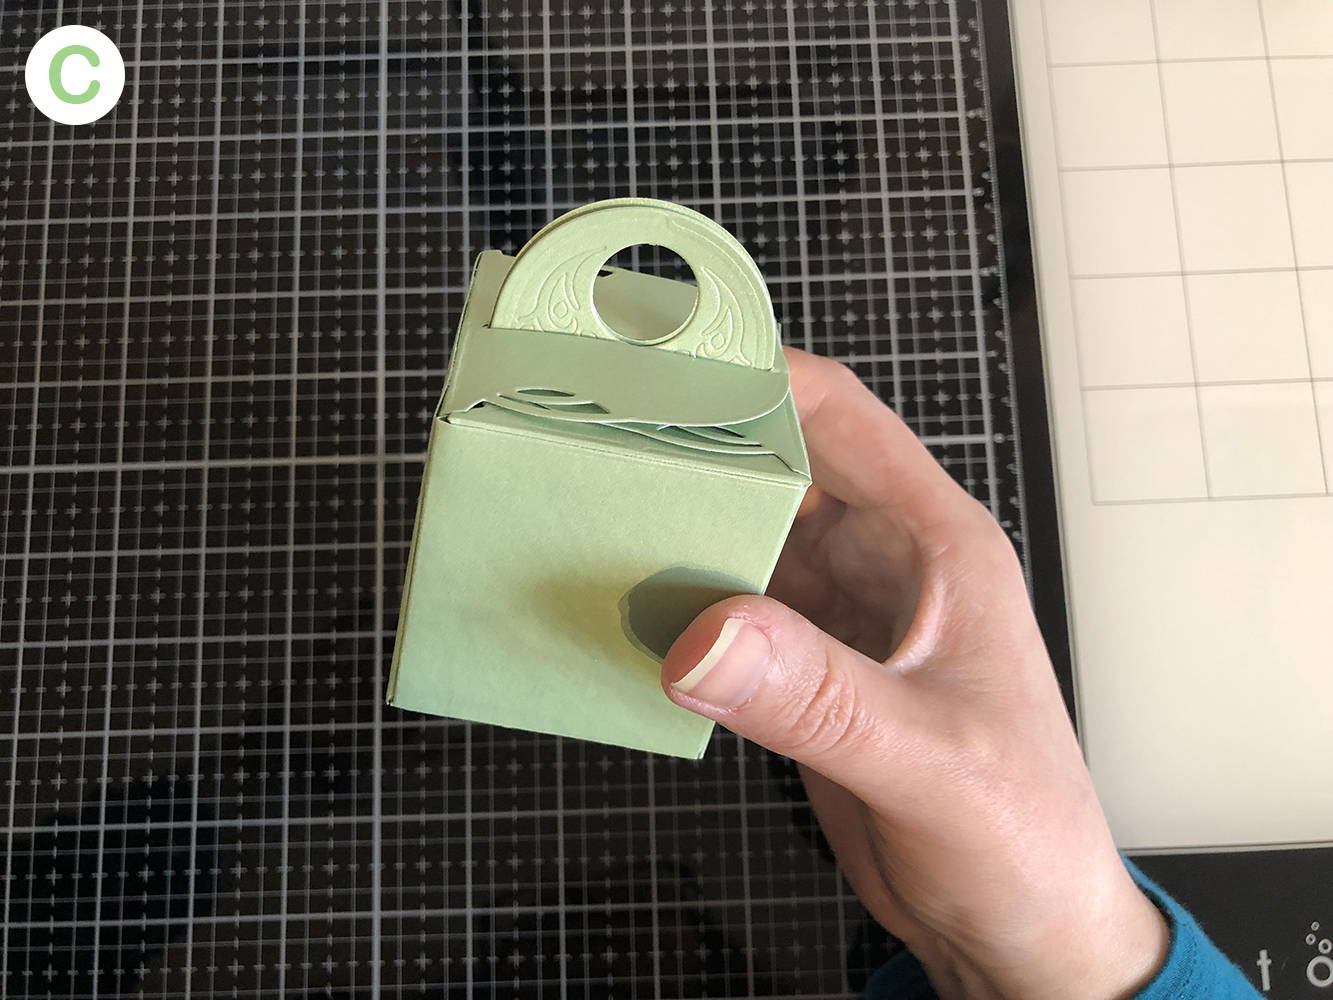
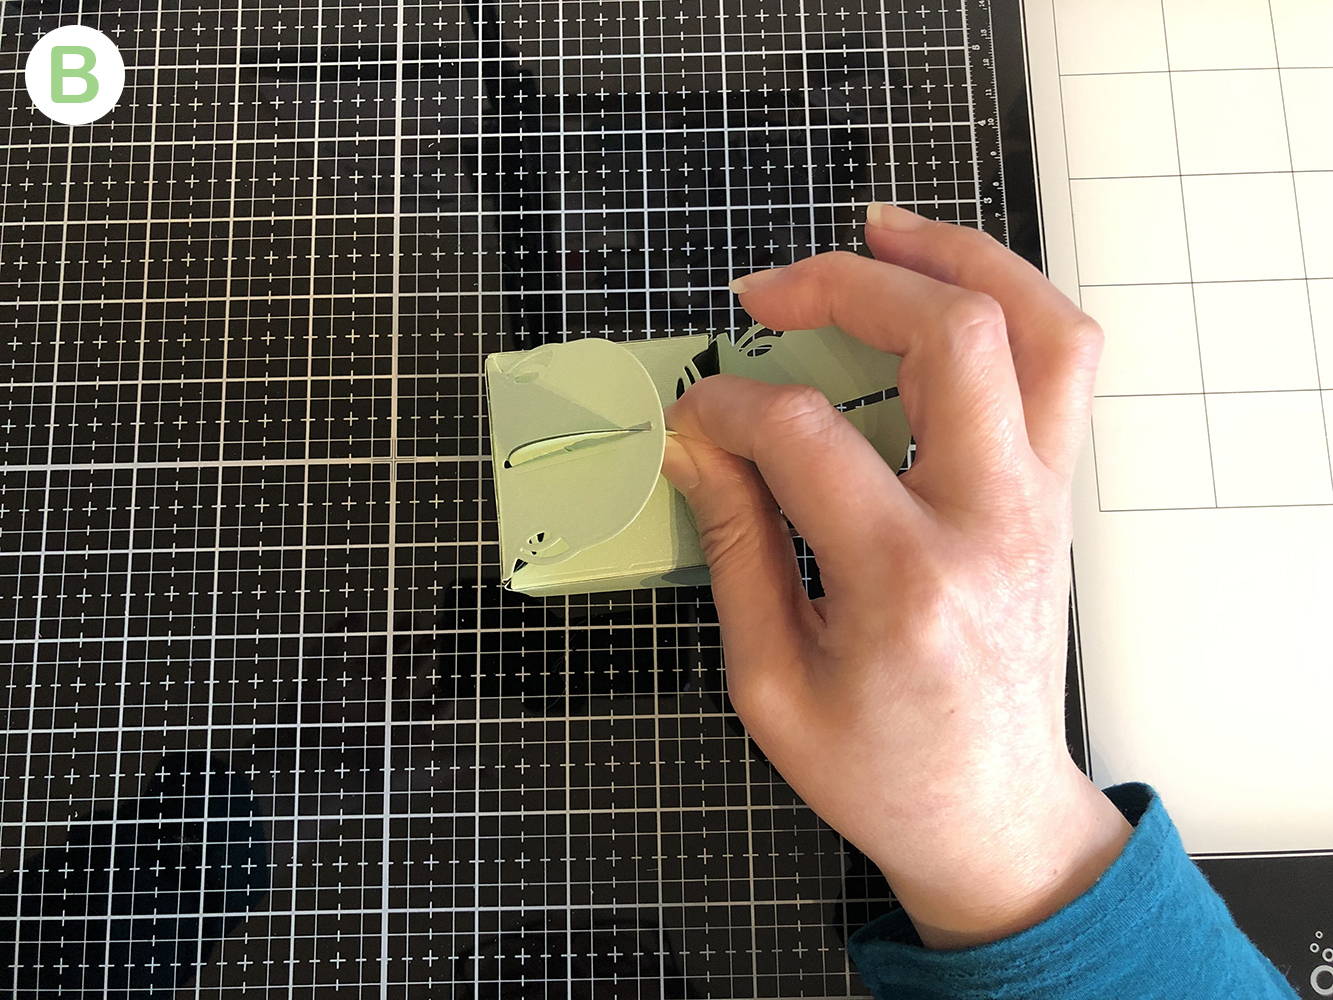
Your Mini Table Tidy is now complete! To close it, gently pinch the 2 rounded lids together, then slide one slitted lid over top, then the other. At this point, you can decide which of your beautiful Craft Perfect Paper and Card you want to use in conjunction with the decorative dies in the kit to decorate your sides and lid. You only need to decorate one of the slitted lids, as that's all you will see.
You could have equally done this step before you started to assemble your Table tidy, either way is fine.

The steps above allow you to make a small table tidy, with the storage compartments on the inside. If you want to, during step 4 when you have your line of assembled pockets, you can fold them back on themselves, so that the compartments are on the outside. This makes a larger Table tidy with 4 outer compartments and a square box in the centre, which the lid closes over, to give extra storage. I could easily fit in 2 small pots of Nuvo glitter with room for other bits and pieces. As I used foiled craft card on this project, I cut small triangles to adhere to the inside of the outer pockets, for a more finished look.
So there we go – 2 gorgeous and useful little table tidys. I also think the smaller one would be great for using as a gift box for small items like jewellery or money. I can see me using these to keep small dies in one place while working on a project, so they don't get lost under pieces of card, or fall on the floor!
Buy The Craft Project
