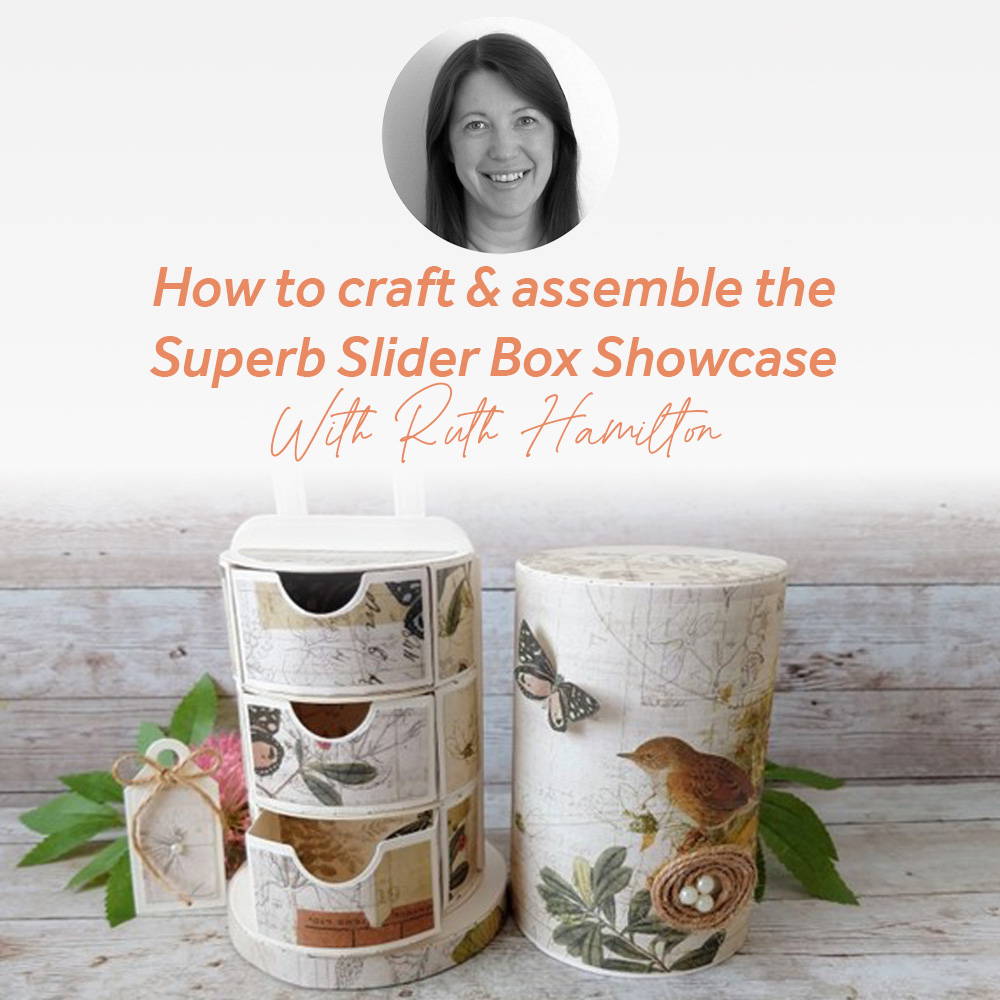

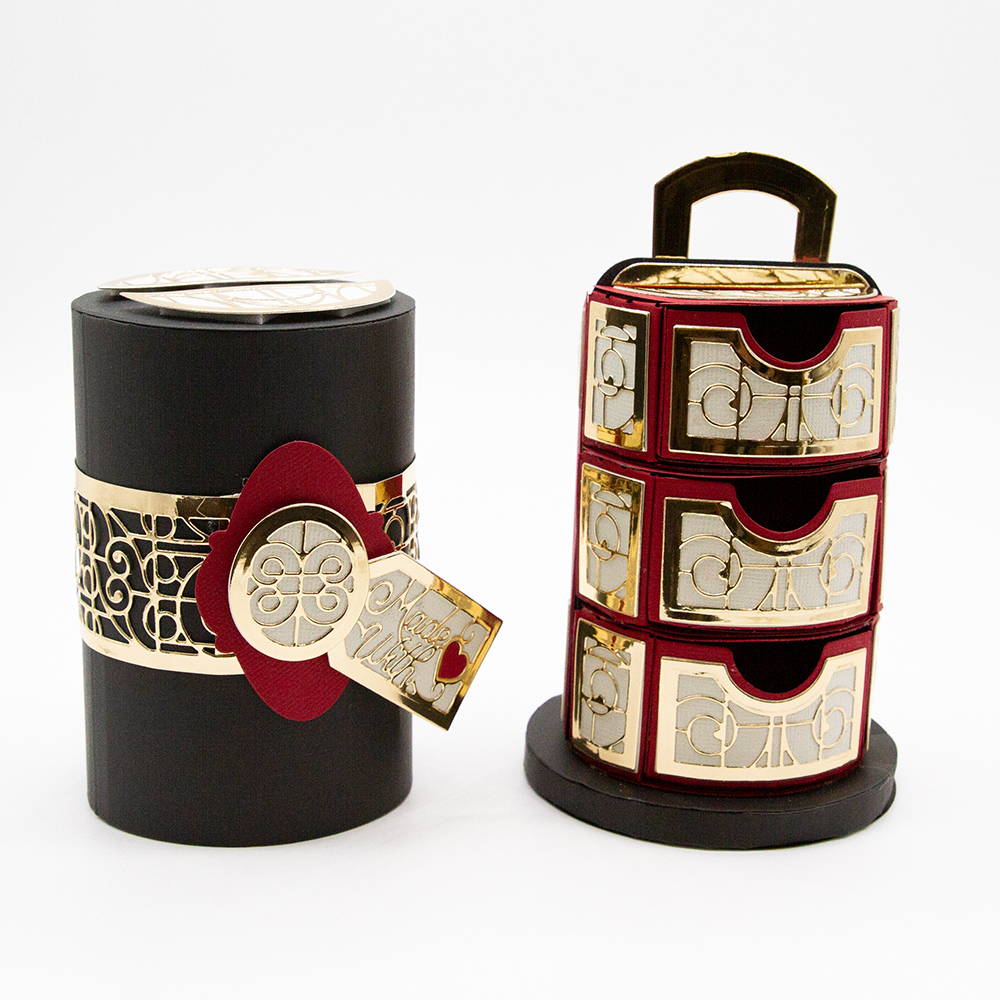
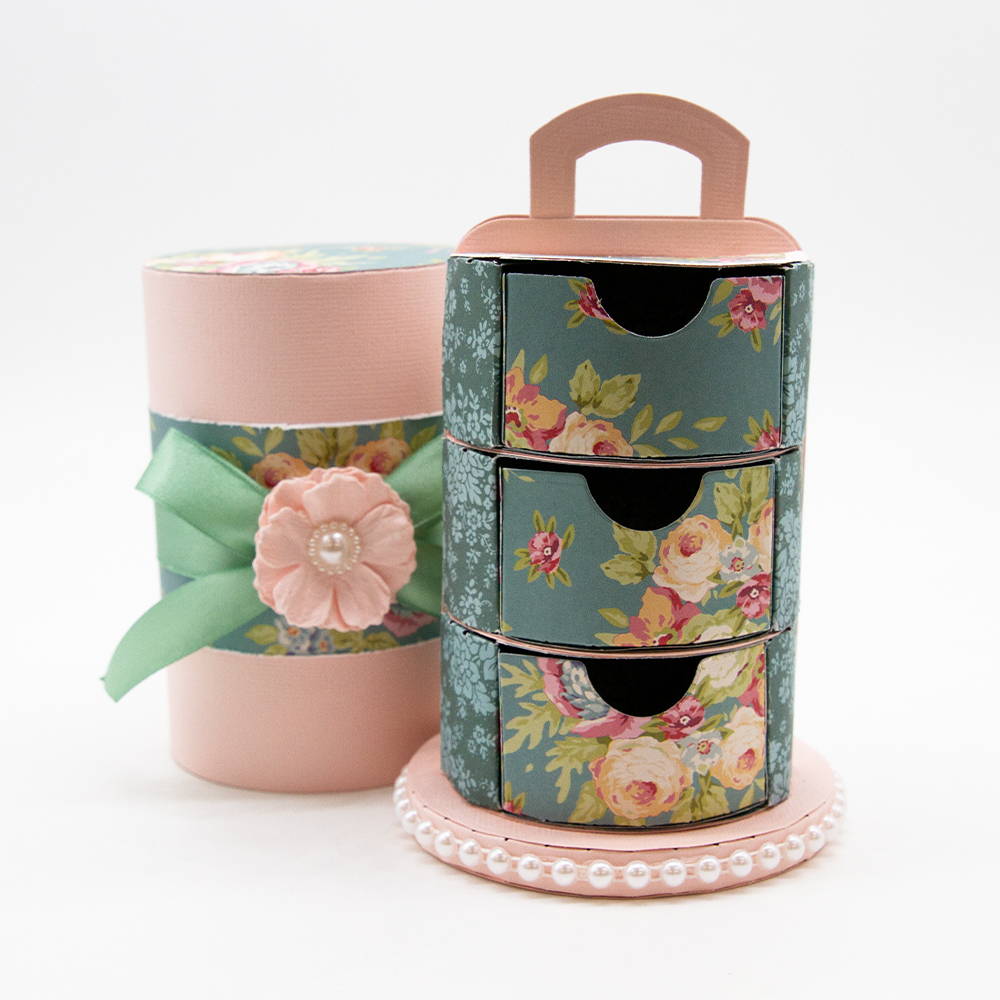
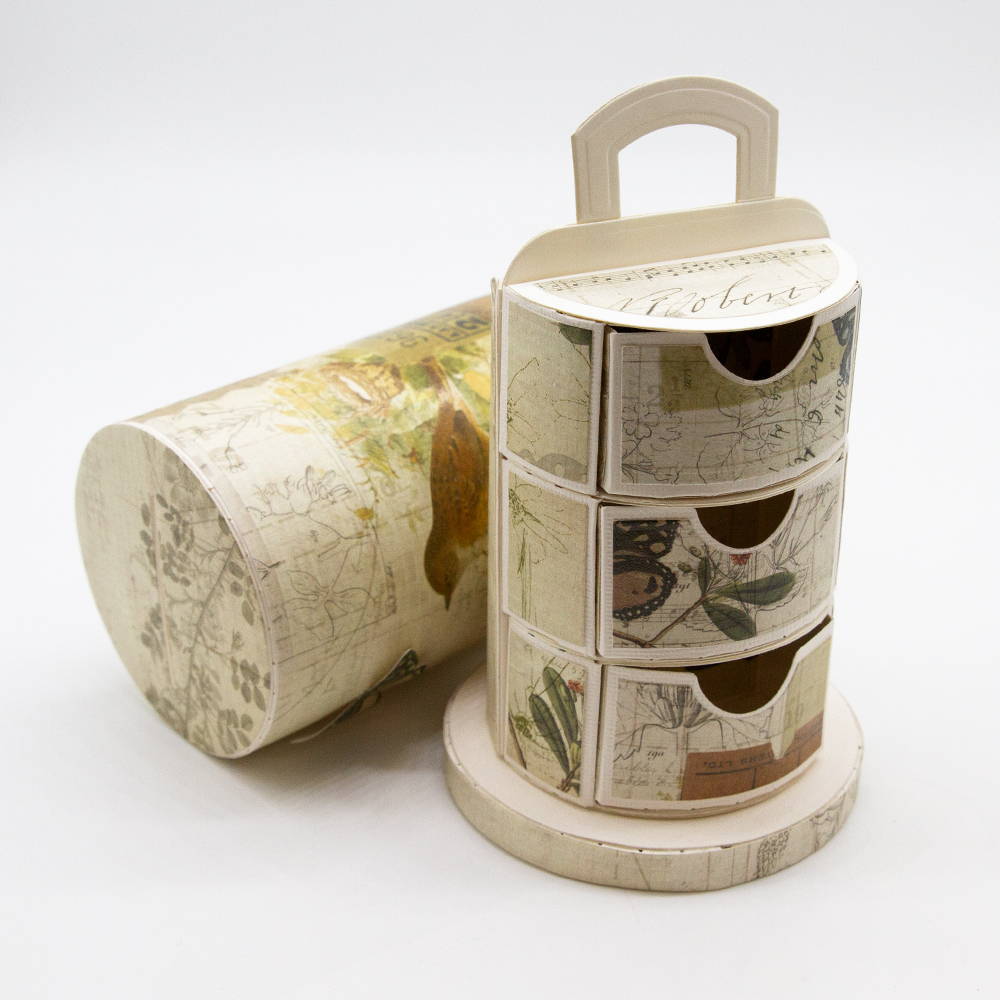
The beautiful Superb Slider Showcase die set has 43 different dies which can be used in several combinations to make pockets, shelves and drawers which fit together and are enclosed in a removable cylinder.


What you will need


- Showcase “Superb Slider Box” die set
- Tangerine A4 die cutting machine
- Craft Perfect Ivory 300gsm Smooth Card
- Craft Perfect Classic Card – Ivory White
- Craft Perfect Satin Effect Mirror Card - Baroque Rose
- Nuvo Deluxe Adhesive
- Patterned paper of your choice
Step 1

Die cut the above pieces in the quantities shown, using the 300gsm card for all the pieces except the top left, which you will cut from Classic card. You may wish to cut extra large circles to strengthen the base.
Step 2

Join the ling strips with the glue tabs to form a circle and fold in the tabs.
Step 3

Glue one large circle into the ring and then add another on top.
Step 4

This will form the base.
Step 5

Use the “slit “ die along with the medium circle die (lining up the notches)
Step 6

Give the large die cuts a little curve with your bone folder and glue together to form a cylinder.
Step 7

Glue one of the slit circles into the bottom of the cylinder and glue the other on top of the glue tabs, lining up the slits.
Step 8

Cut a 27cm x 12cm strip of patterned paper and glue around the cylinder. Cut a 1cm strip of matching paper and glue around the base.
Step 9

Die cut both shapes shown from Classic card (cutting 2 of the hinges)
Step 10

Glue the hinges to the pocket and then attach to the back of the central card. Glue the 2 handles together and attach to the top.
Step 11

Glue the other central card to the back. (You can leave this and attach the drawers to the second card before gluing them both together, as I have done in my video)
Step 12

Die cut the same shape from patterned paper, removing a sliver from each side and the glue tabs from the bottom. Glue to the pocket.
Step 13

Make the drawer compartment. (Repeat for each drawer)
Die cut 2 of the compartment shapes from Classic card and 2 little rectangles for the sides.
Step 14

Fold and burnish as shown.
Step 15

Glue the bases together as in the photo.
Step 16

Die cut 2 semi circles from 300gsm card. Glue on to the top of the compartment. Curve the tabs around the sides and glue onto the semi circle.
Step 17

Repeat for the bottom.
Step 18

Glue on the patterned paper side panels.
Step 19

Make 3 compartments and glue together as a stack.
Add another semi circle on top and add a decorative panel.
Step 20

Glue the stack of compartments to the central panel.
Step 21

Make the drawer (Repeat for the 3 drawers)
Die cut the shapes shown from Classic card and a decorative panel from patterned paper. Glue together in this configuration.
Step 22

Add decorative panels to the sides and inside.
Step 23

Use the 2 dies shown to make a decorative panel for the outer cylinder. Glue in place.
Step 24

Die cut a medium circle from 300gsm card and glue to the base. Then glue the cylinder to the base platform.
Step 25

Because I have used paper with a bird on it, I used some Craft Perfect Jute twine to create a little nest and added some pearls into it. I also made a little tag to match.
Use Ruth's guide to create a variety of gorgeous Superb Slider Boxes


Crafting Essentials


