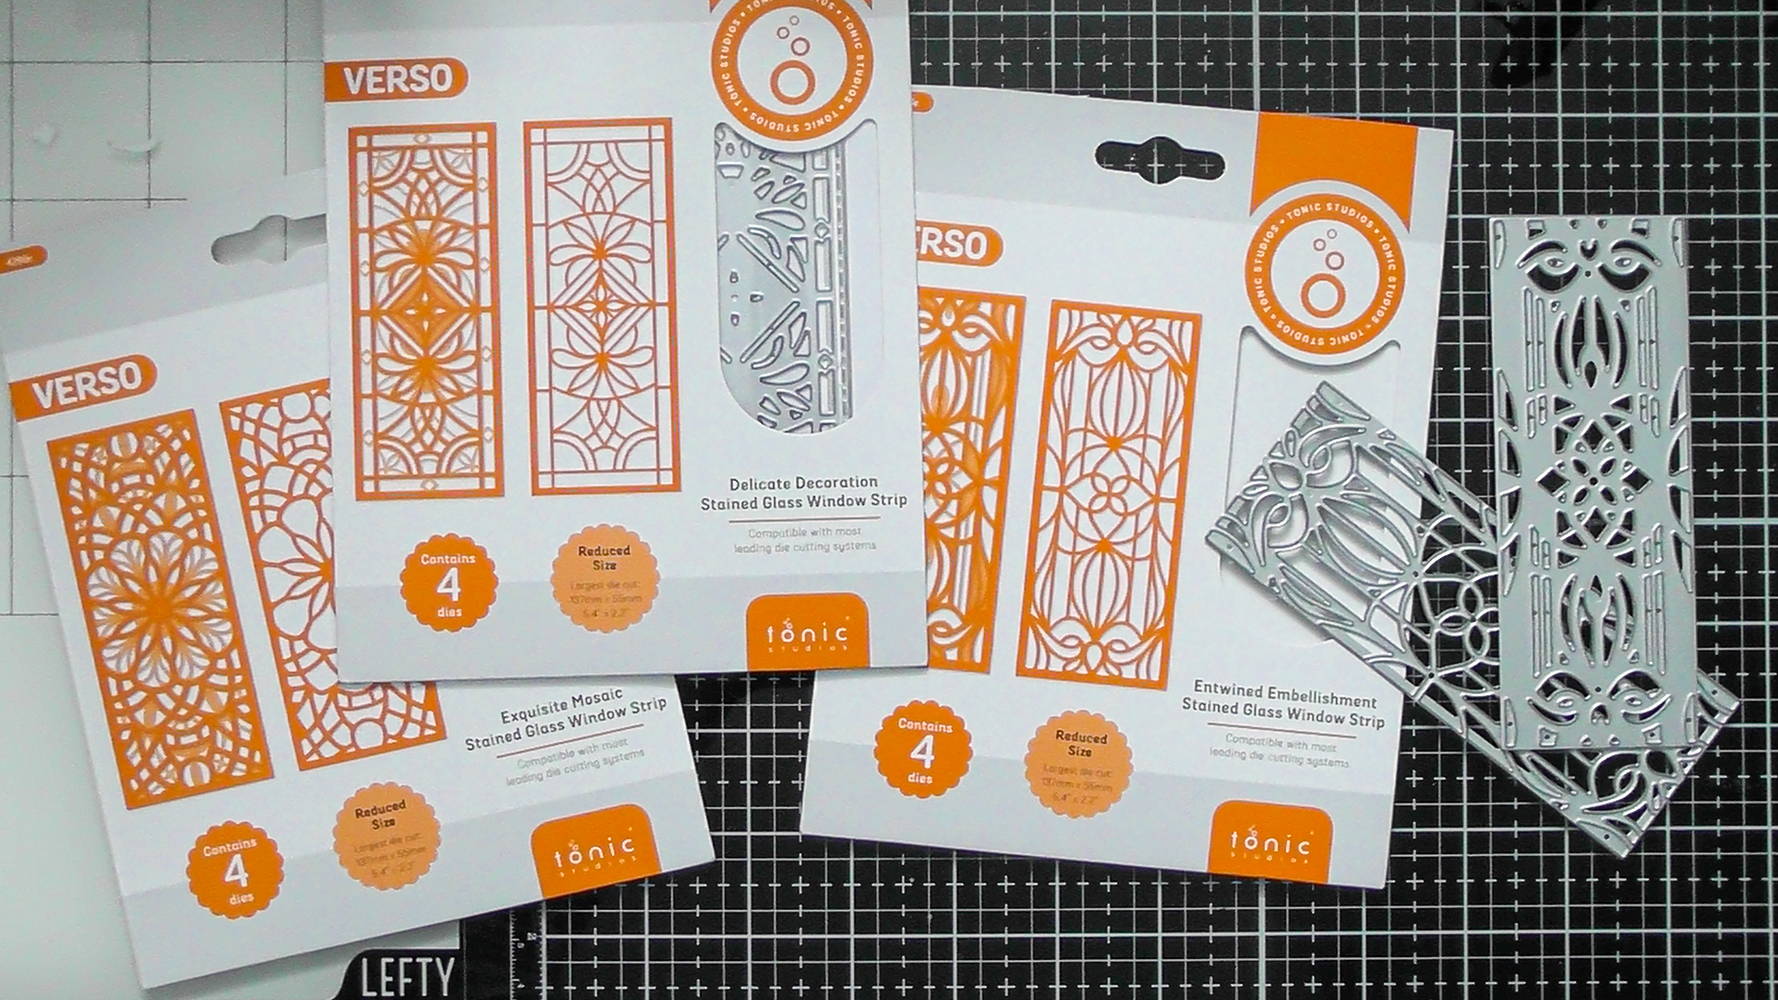
There are 3 gorgeous designs for these fab Stained Glass double layer dies there’s Entwined Embellishment, Delicate Decoration and Exquisite Mosaic :D And mentioning the word Mosaic, these dies are a similar concept to the Mosaic dies from a couple of years ago, Orchid Meadow and Gates of Atlantis, so if you loved those you’re going to love these as they have that same dual layered design! And they’re perfect for your paper piecing too! So for my step by step I chose to use the gorgeous Entwined Embellishment, and I just had to do a smidgen of paper piecing too
Step 1
So the first step is to decide on which die set to use
Step 2

Once you’ve decided, the next step is to decide on your colour scheme! I decided to go for Miami Mint for the back panel, Water Sprite for the bottom detail and Smooth White for the top detail, then later we’ll add the Copper Mine as an accent colour
Step 3
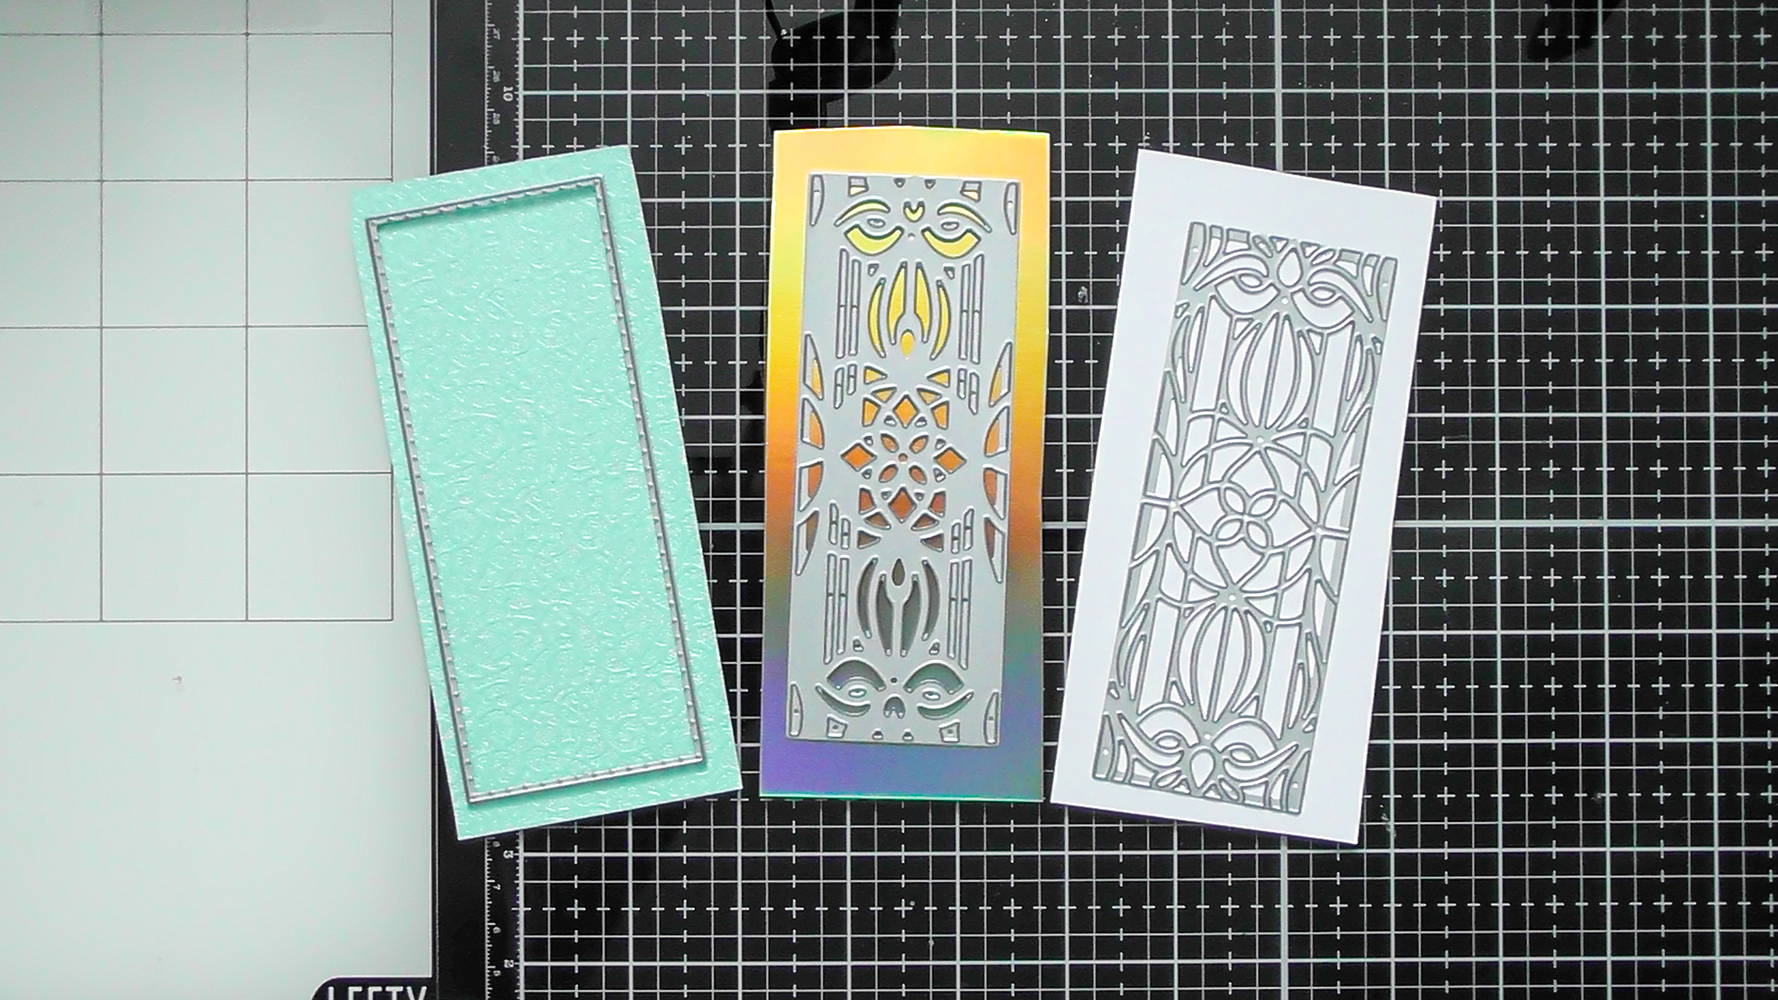
Allocate your dies to your pieces of card, and die-cut, making sure to use the outside edge on all 3 pieces so they all line up perfectly for a neat finish.
Step 4

So, the next step is to die-cut the Copper Mine for the paper piecing, and for this you have 2 options, you can use the bottom detail layer OR the top detail layer. For my card I decided to cut the bottom detail layer, so when you add the white detail on top you’ll see Water Sprite and Copper Mine showing through (see photo in step 6)
Step 5
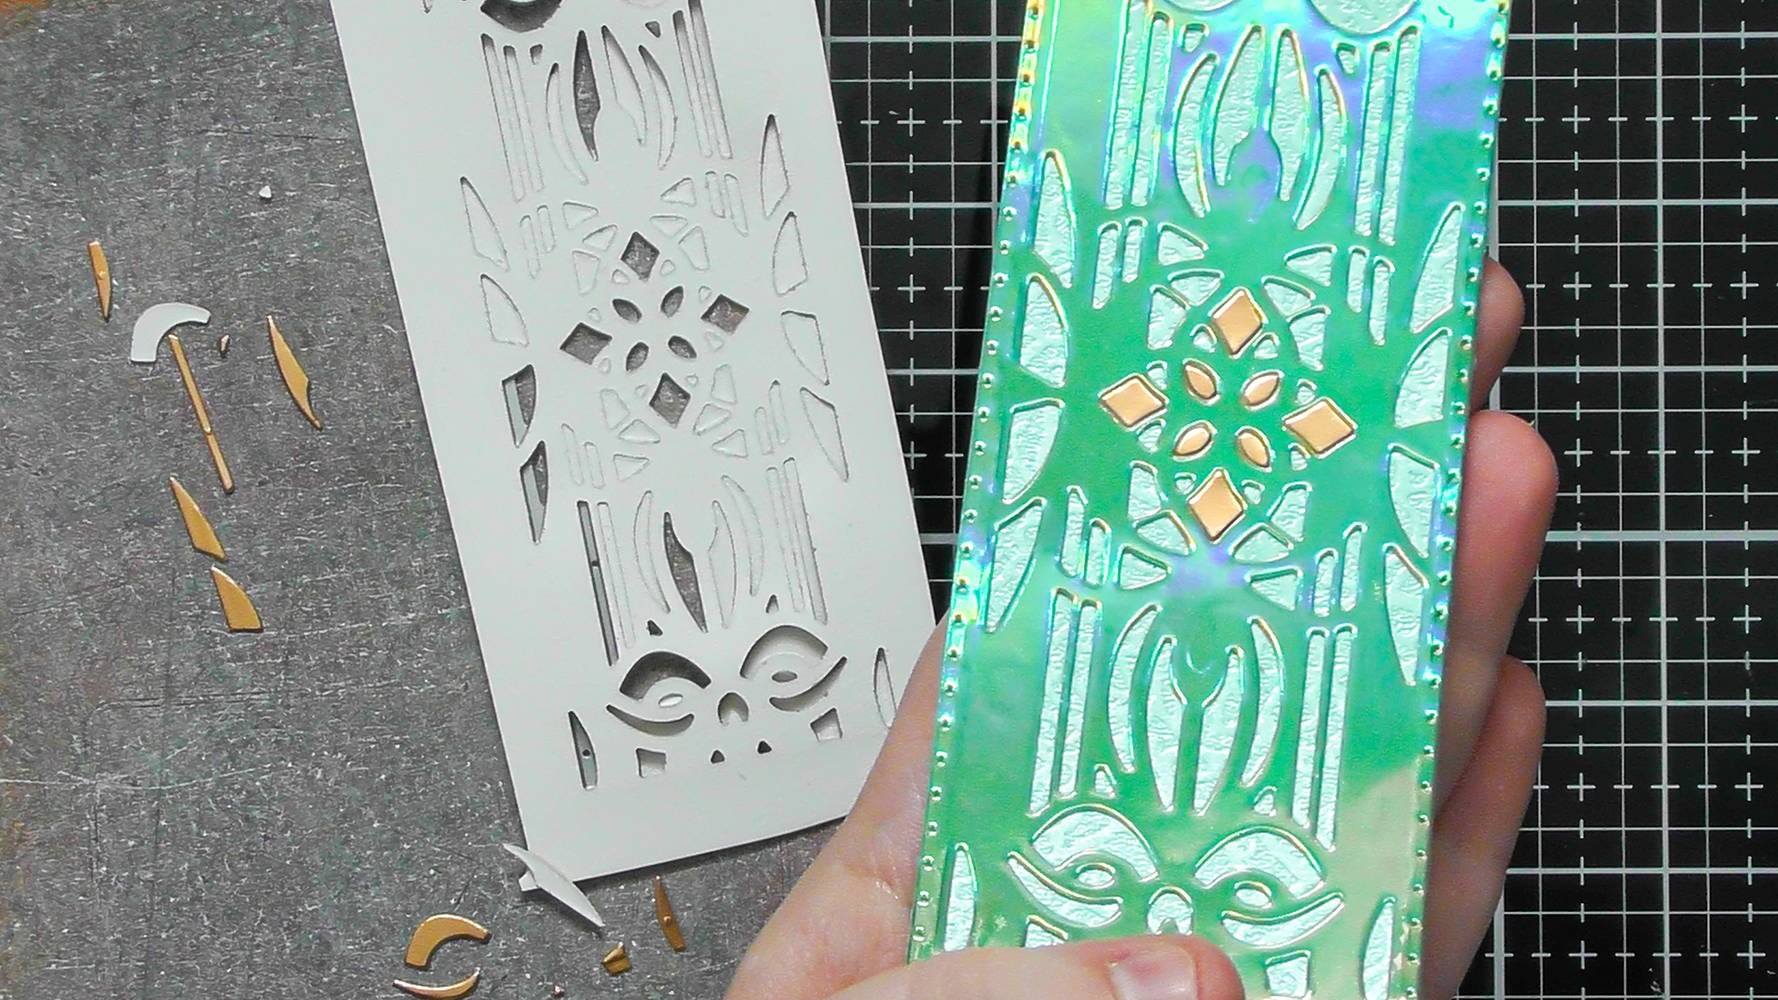
Start adding your Copper Mine pieces into your Water Sprite layer that you’ve backed with the solid Miami Mint rectangle, you can add in as many pieces as you like, but make sure to leave some of that gorgeous Miami Mint showing through too
Step 6
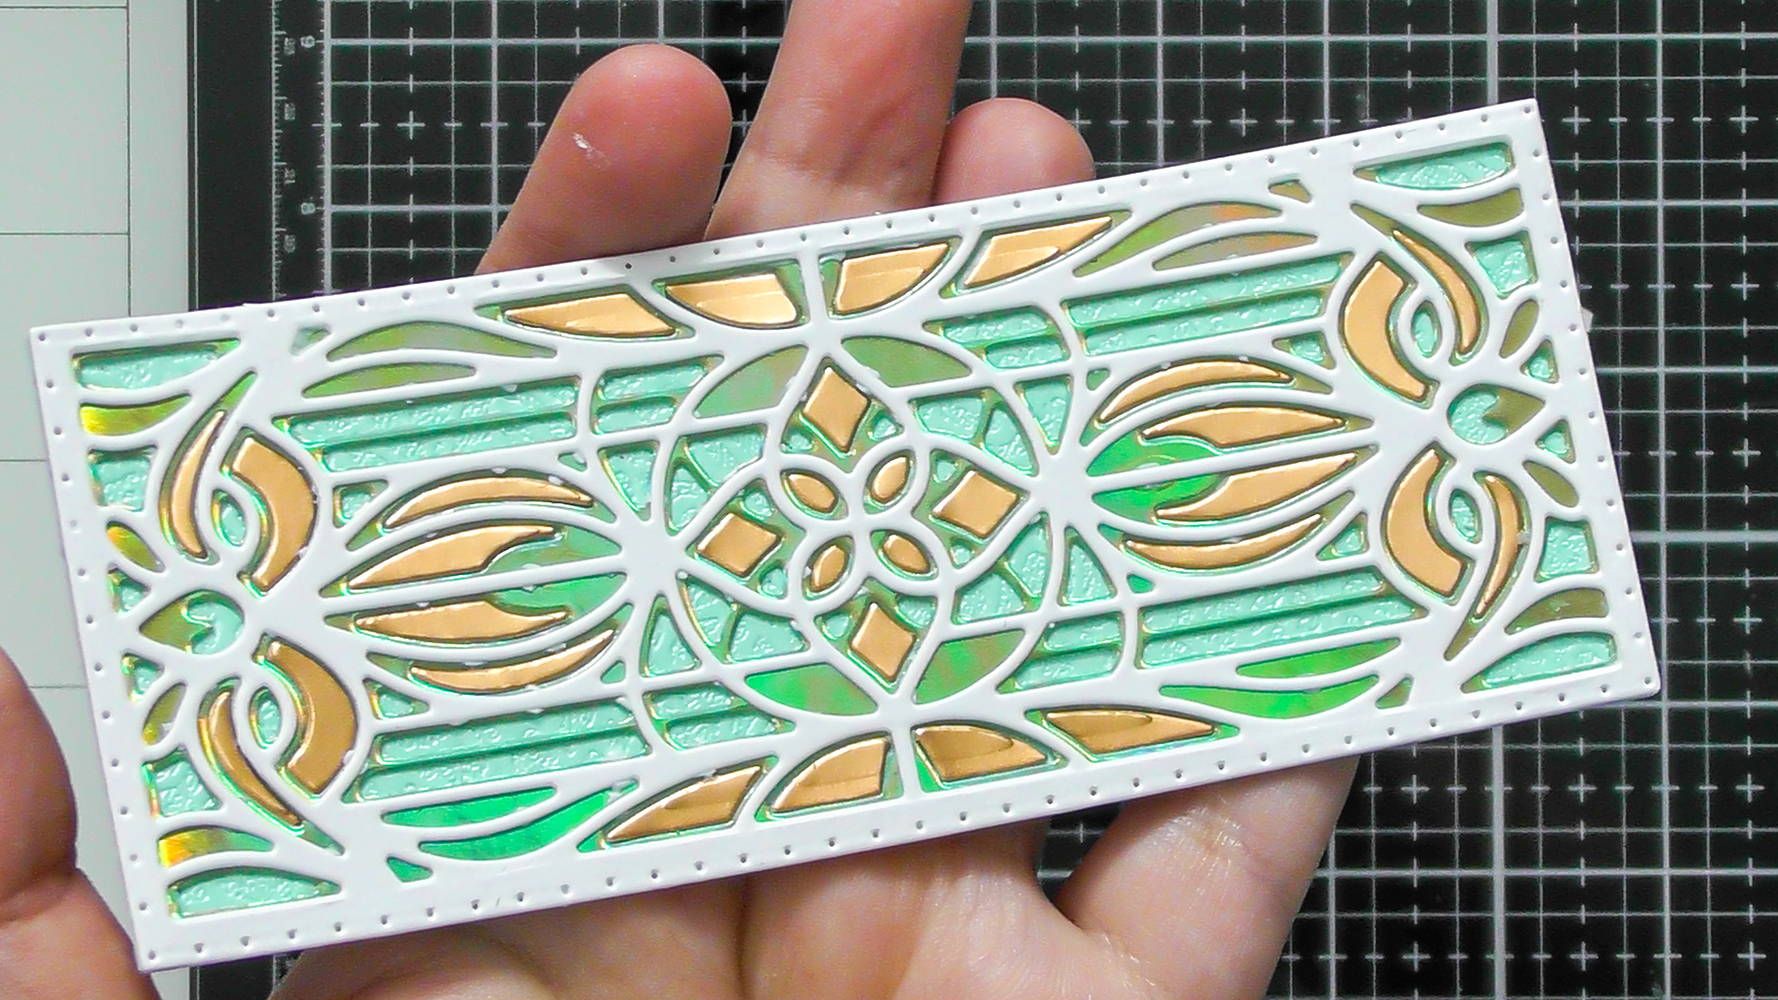
And Voila! Just stick your white top detail layer on top to give your finished panel! And you can see what I mean about piecing into the bottom layer, but there’s nothing to stop you adding some pieces from the top layer too, maybe even bring that Miami Mint back up to the top
Step 7
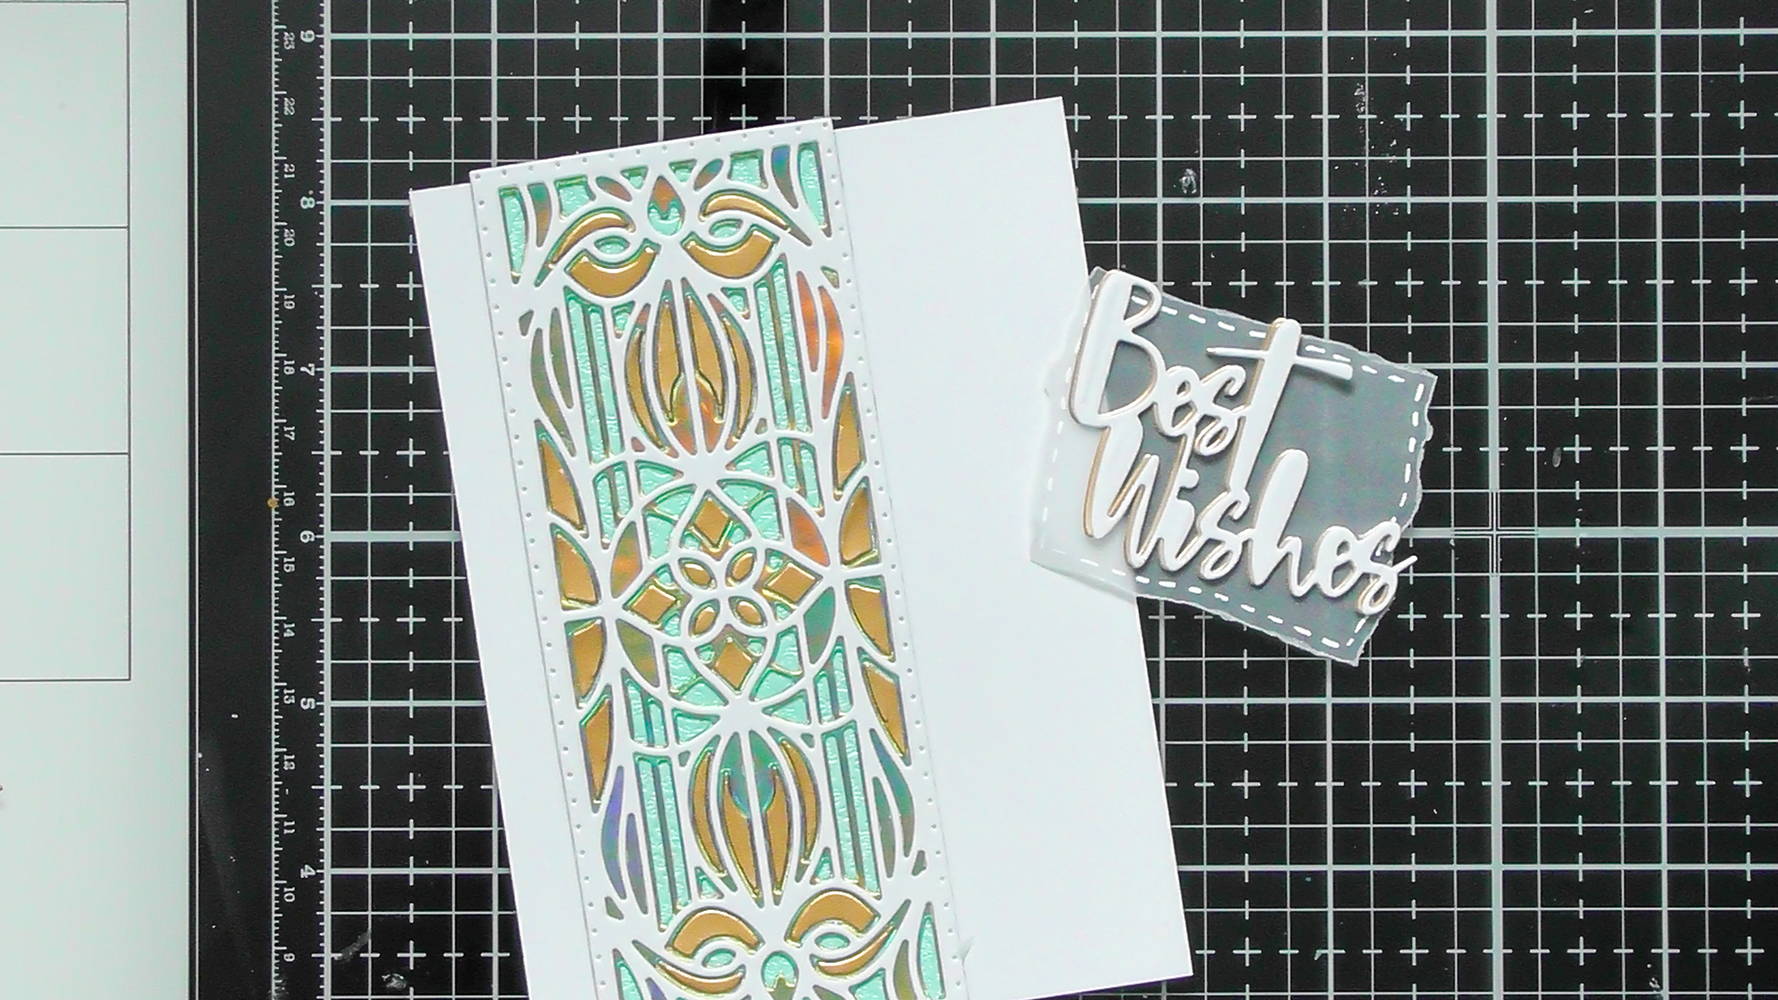
Pick a sentiment to add to your card, I went for Best Wishes and I shadowed a white die-cut with the Copper Mine to bring in that accent colour again, and to help it stand out I added it onto a ripped vellum rectangle with some white gel pen faux stitching
Step 8

And there you have your finished card! I also think this would look fabulous embellished with a few Dragon Scales Dream Drops too, to go with that iridescent finish of the Water Sprite cardstock
Hope you liked this clean and simple paper pieced card! I do like my small cards, but if you prefer to make larger cards these dies are very versatile with their separate cutting edge so you can easily multiply up the design, or combine the designs together to make a larger element! I particularly love adding them end to end on a DL card :D Christine
Buy The Craft Project


