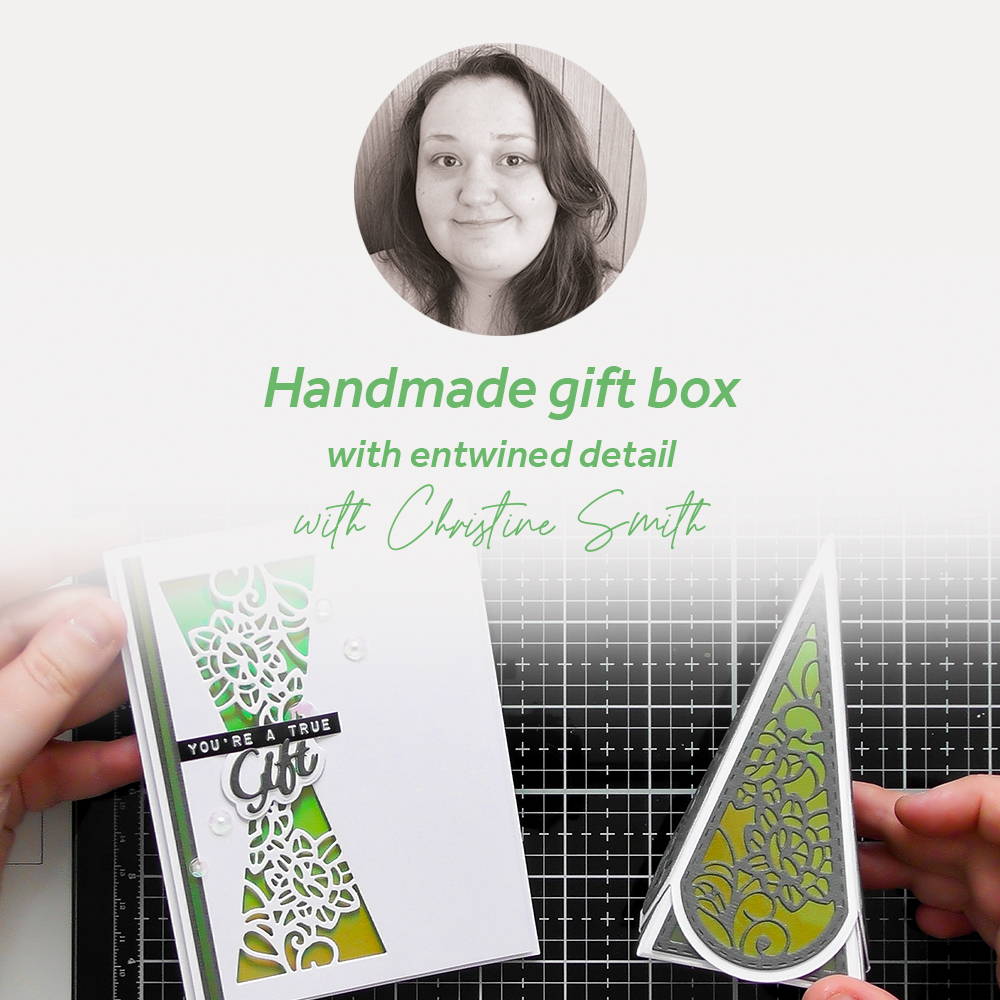

There are 2 beautiful boxes in the Pandora’s box style, Magical Entwine which I’ll show you how to construct today and Enchanted Favour :D Both sets have some beautiful patterned panels to decorate the boxes, however if you want to adapt them to be used for Christmas there is also an extra die set, Festive Panels Add On, that gives you Christmas panels for both Pandora’s Boxes :D I used these festive panels to turn the Magical Entwine box into a mini Christmas tree for the Create and Craft shows, and I even used a spare Nuvo Deluxe Adhesive lid as the trunk for the tree, it’s the perfect scale and works so well :D But let’s get back to today’s post and a detailed step by step on how to construct the Magical Entwine box :D
Step 1

Chose a colour for the base of your box and cut 2 of each piece from the card (don’t forget, you can use a different colour for the top and bottom too :D) then add adhesive as shown above.
Step 2

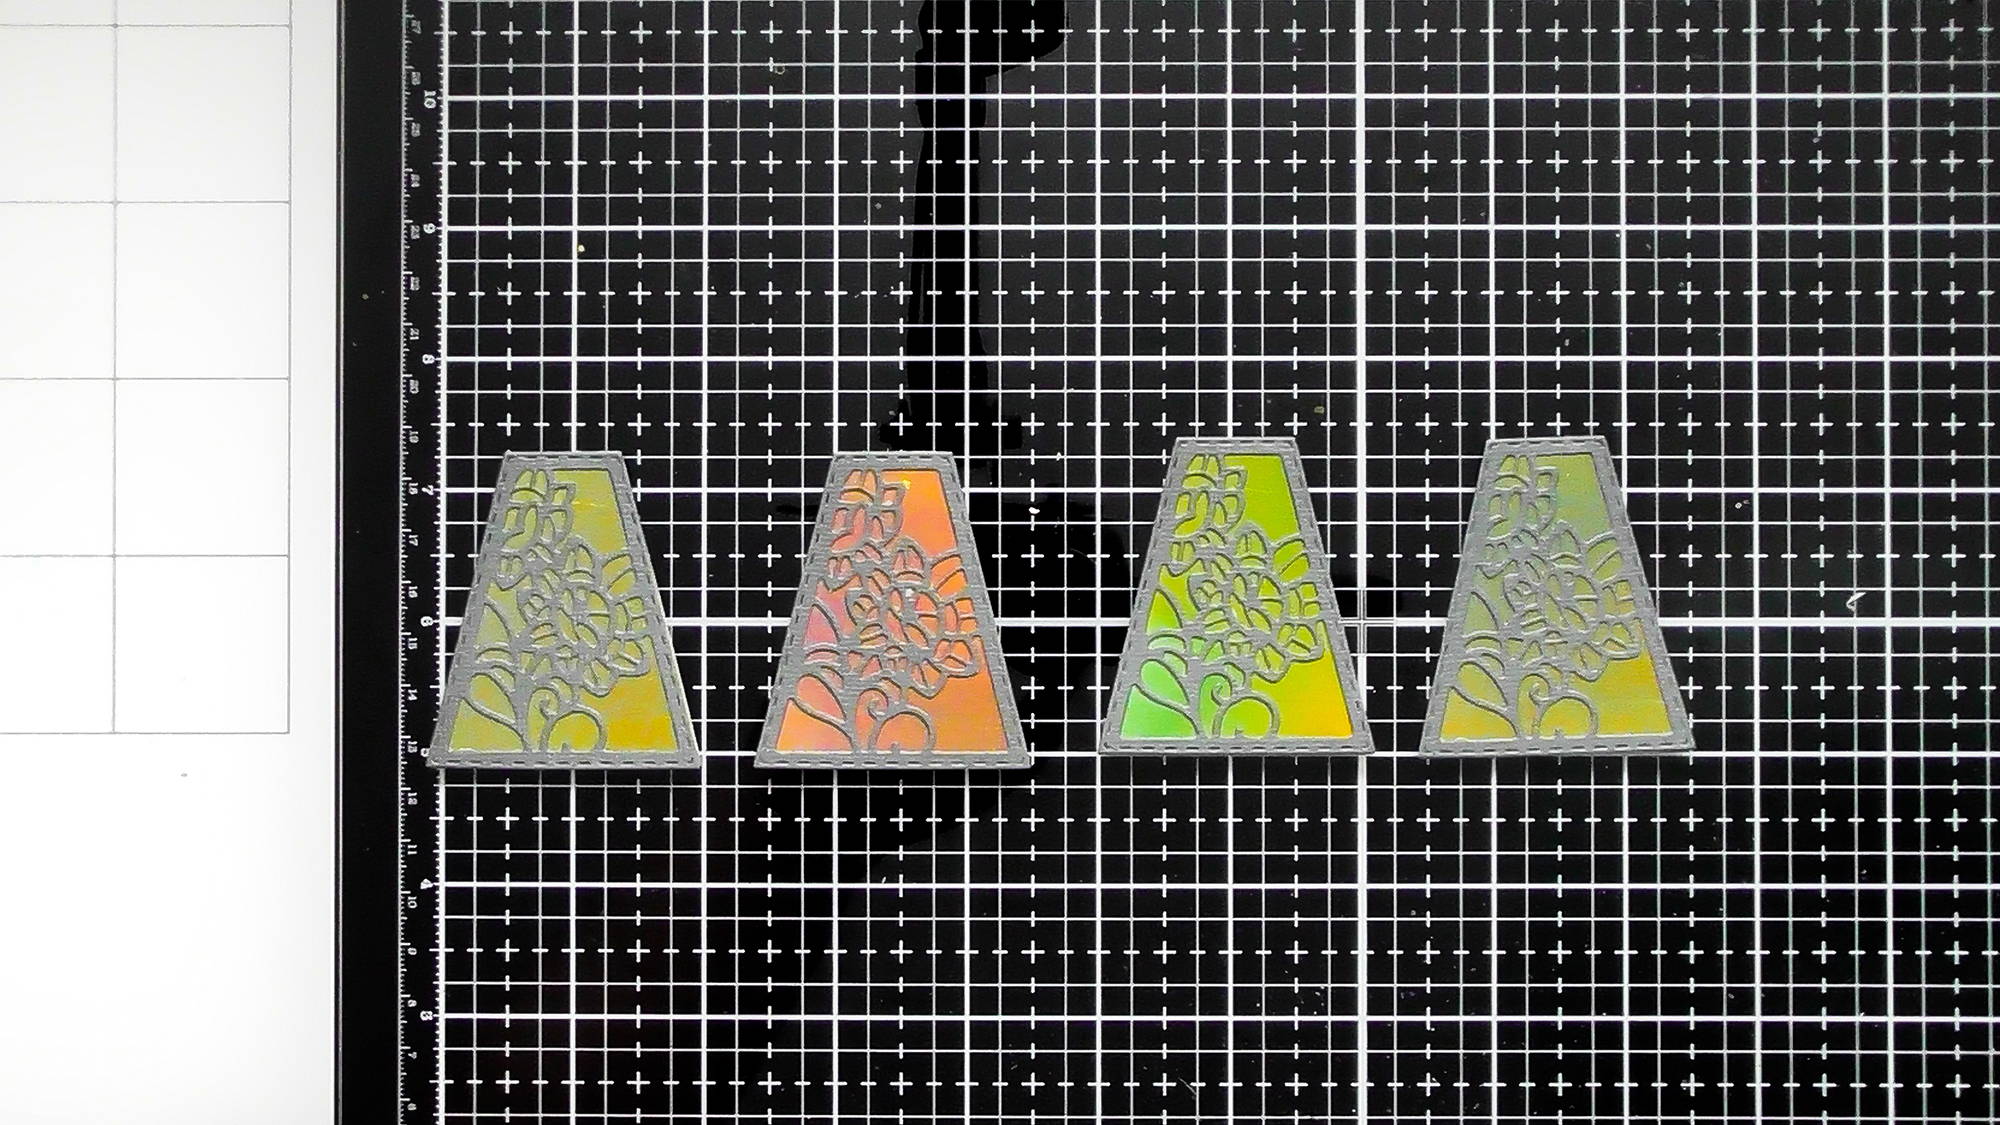
Starting with the lid of the box… Pick 2 colours of card for your decorative panels, and cut 4 solid panels from one card and 4 detailed panels from the other (you can also cut the detail straight into the box itself, or just use one or other of the panels, they’re so versatile :D) I used Seafoam Green Iridescent Card and Pewter Grey Textured Card for my panels.
Step 3

Adhere the detailed die-cuts to the solid ones and allow to dry, then glue them onto the main box pieces.
Step 4
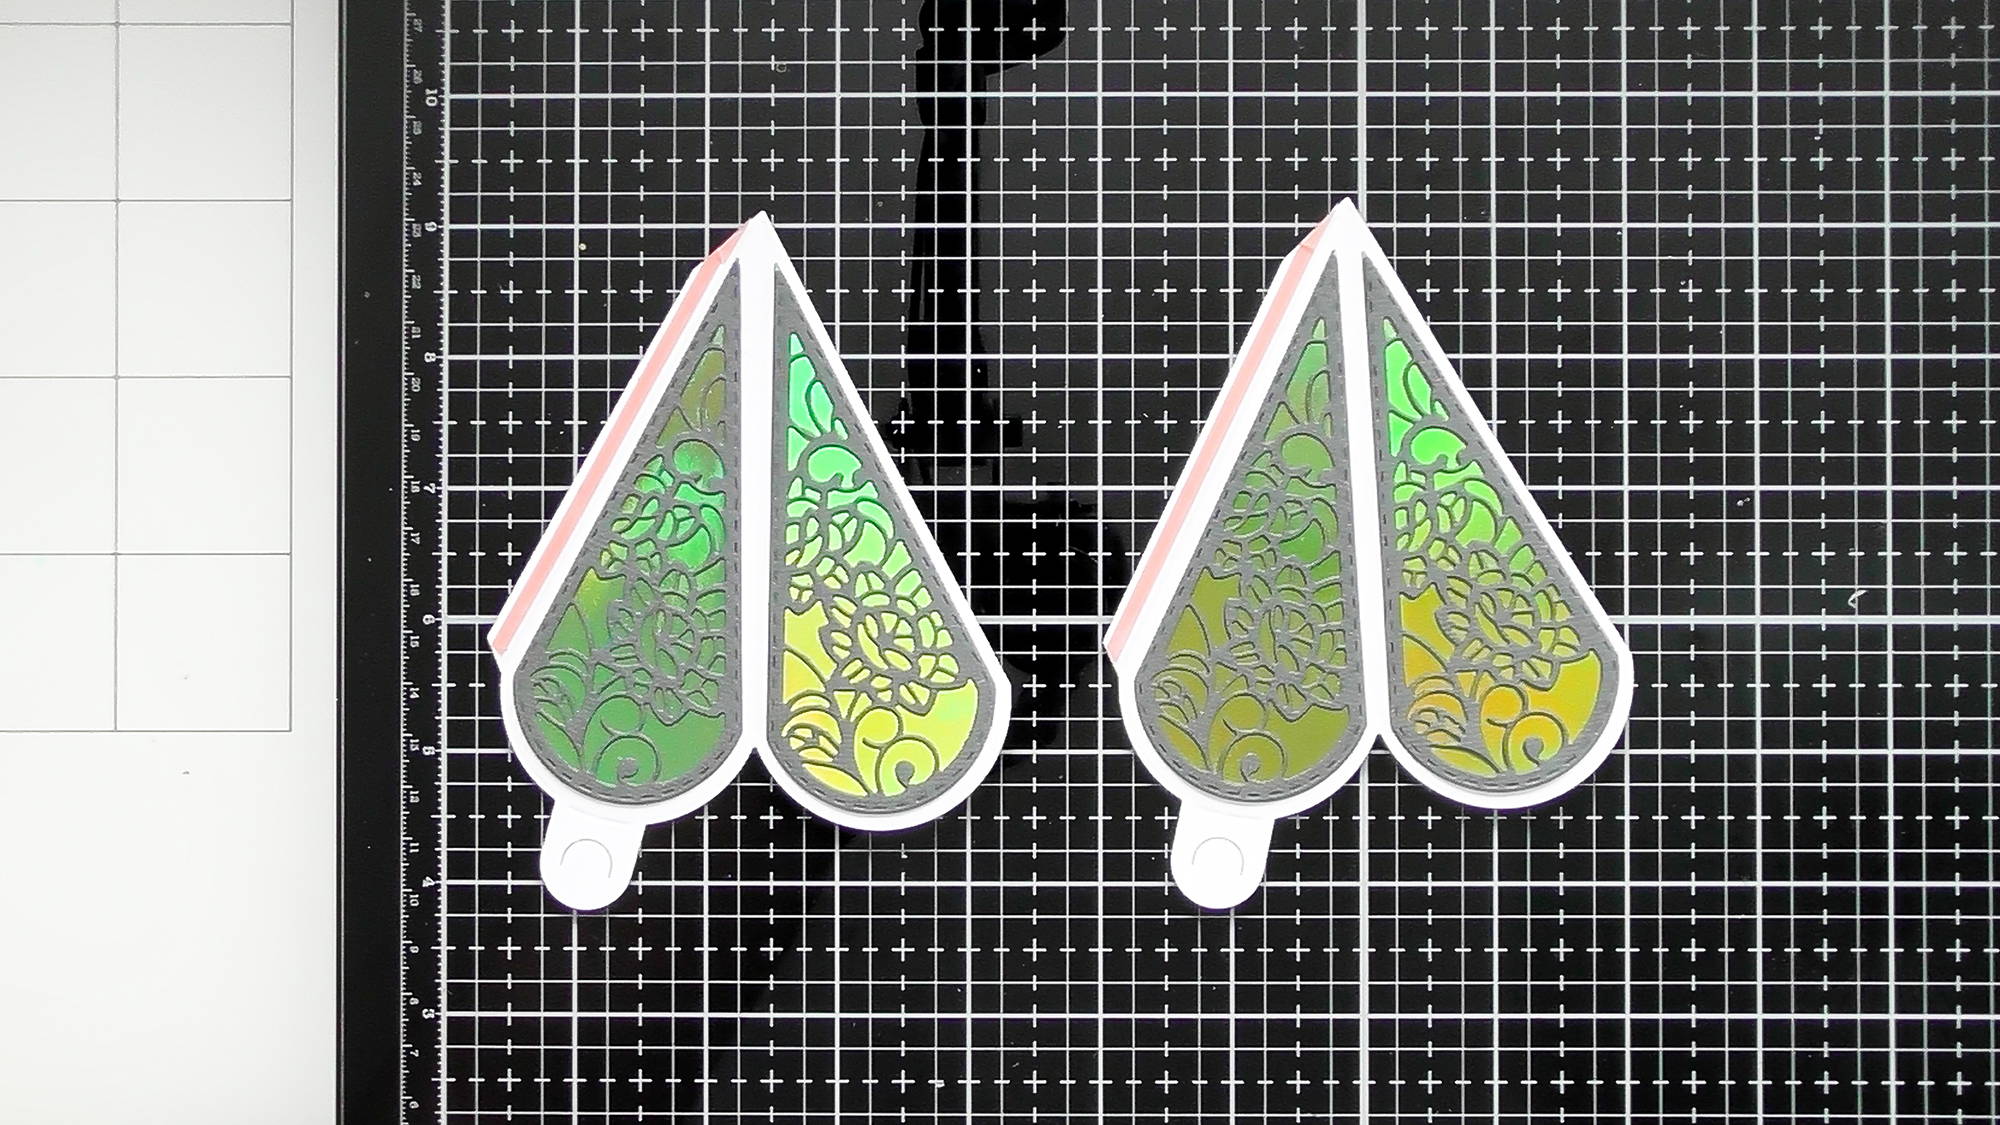
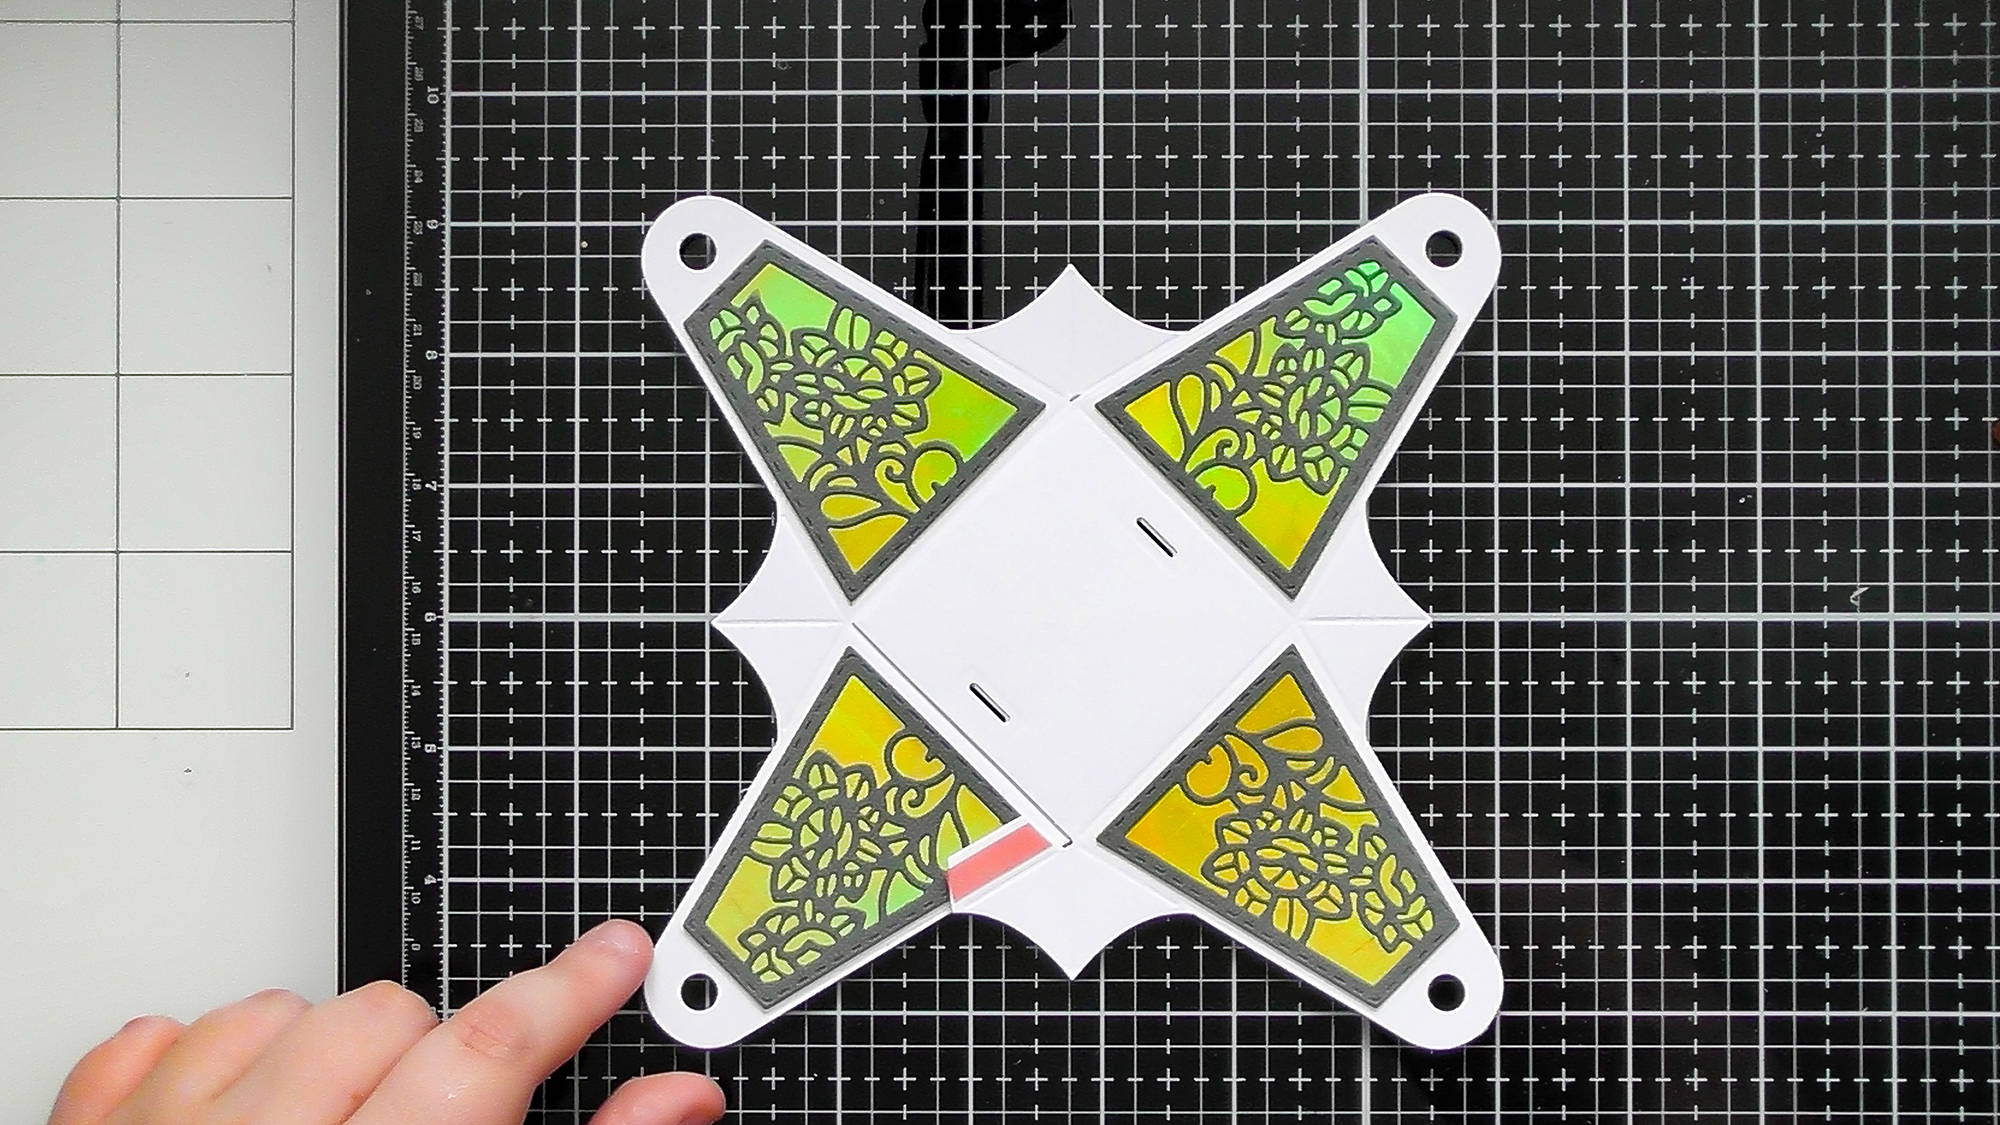
You’ll then have 2 pieces that look like this. Pre-fold all of the score lines to help when you come to construct it.
Step 5
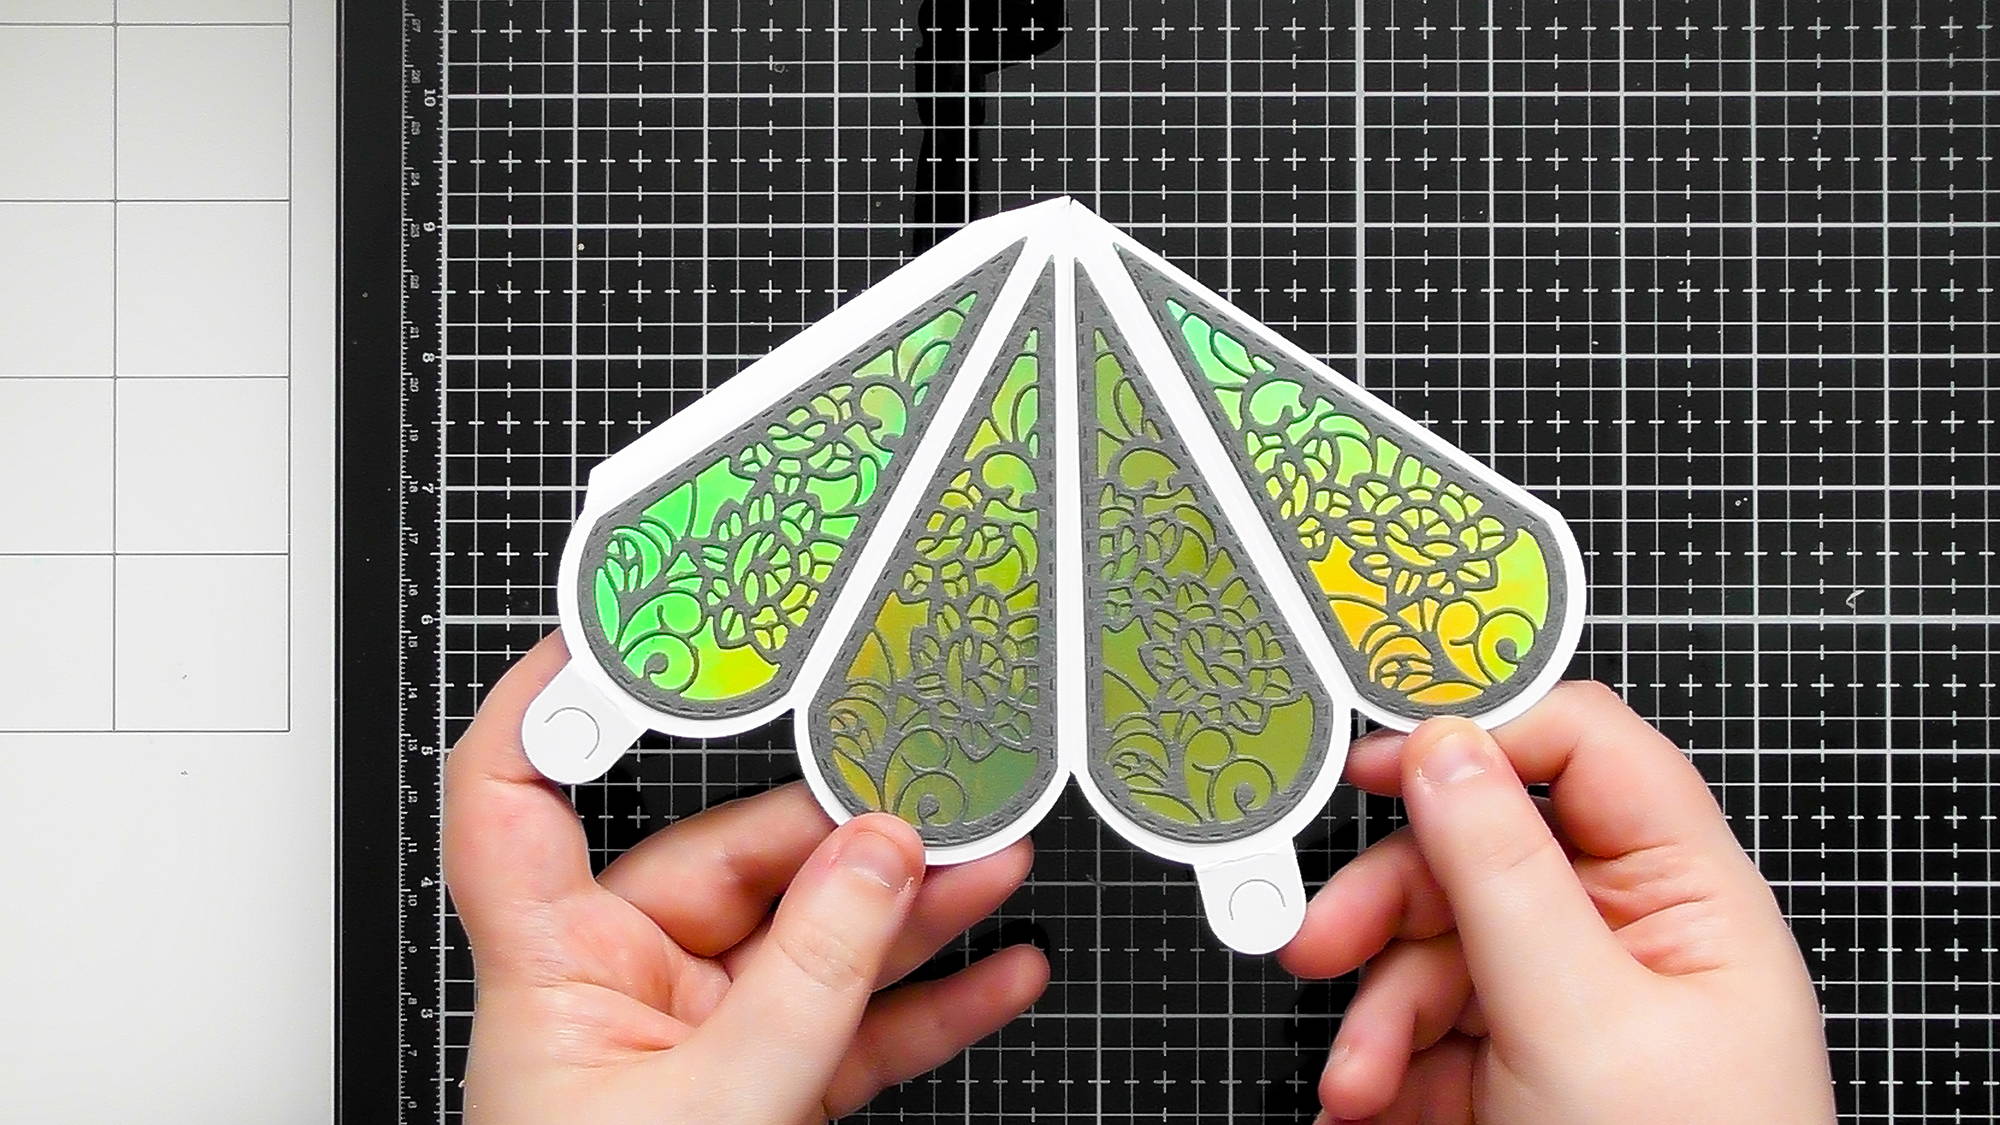
Remove the backing from the red liner tape and adhere these 2 pieces together to give this fan shape.
Step 6
Repeat on the other seam, this time the whole piece will fold flat on top of itself.
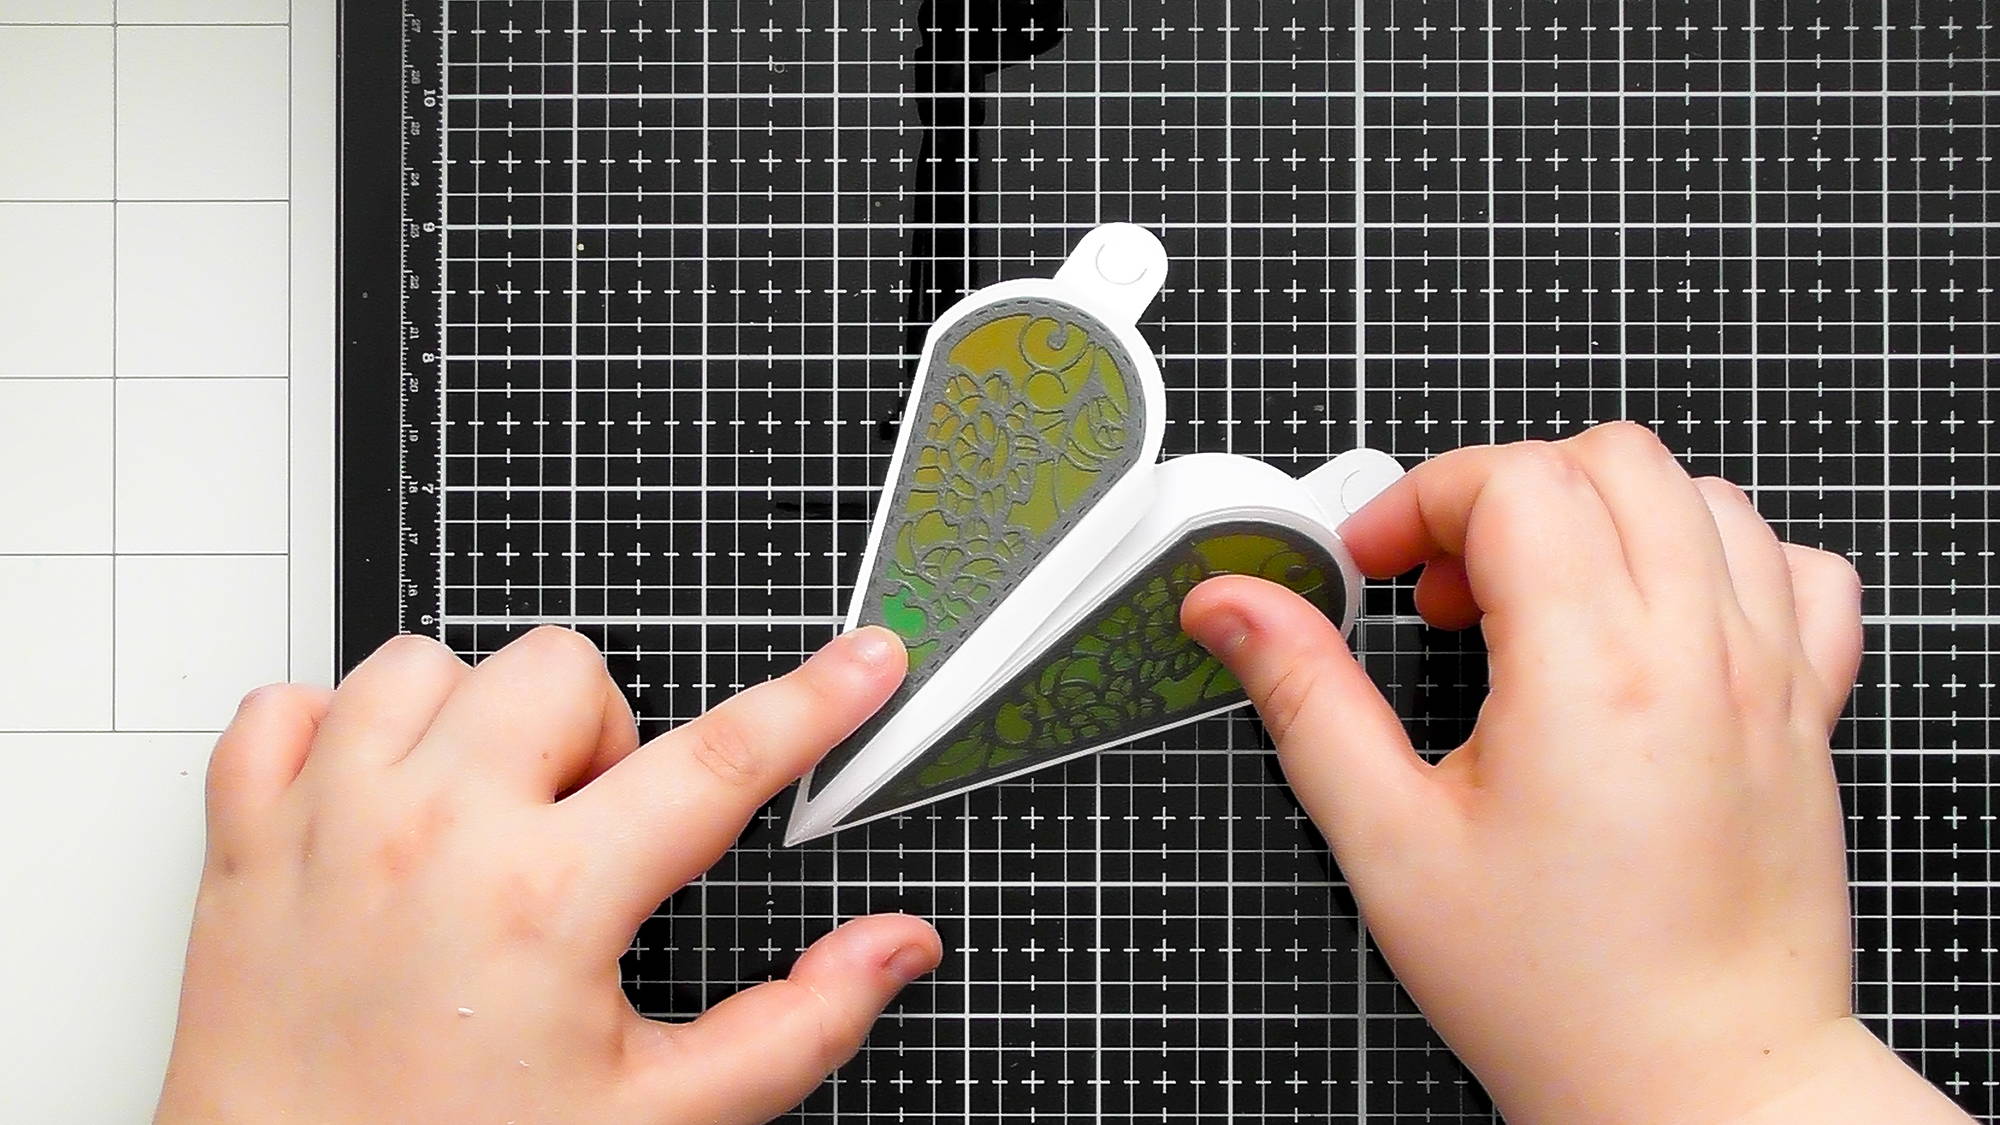
Step 7

You’ve now got the lid for your box.
Step 8

Now for the base of the box… As we did in Step 2, pick your colours of card and die-cut the relevant panels (you don’t have to stick to the same colours either, mix it up and make the inside different too :D).
Step 9
Stick your detail and solid panels together, be careful not to use too much glue, especially when sticking onto mirror card. To avoid too much glue, simply tap the excess off on the back of your hand, or if you’d prefer, onto a piece of scrap paper or kitchen roll.
Step 10

Then adhere all 4 panels into your base pieces. I’ve stuck them to the outside, but you can also decorate the inside or both as well.
Step 11
Stick both base pieces together, the 2 large squares overlap and the little slots will line up with each other. Then pre-fold all of the score lines to help with assembly.
Step 12
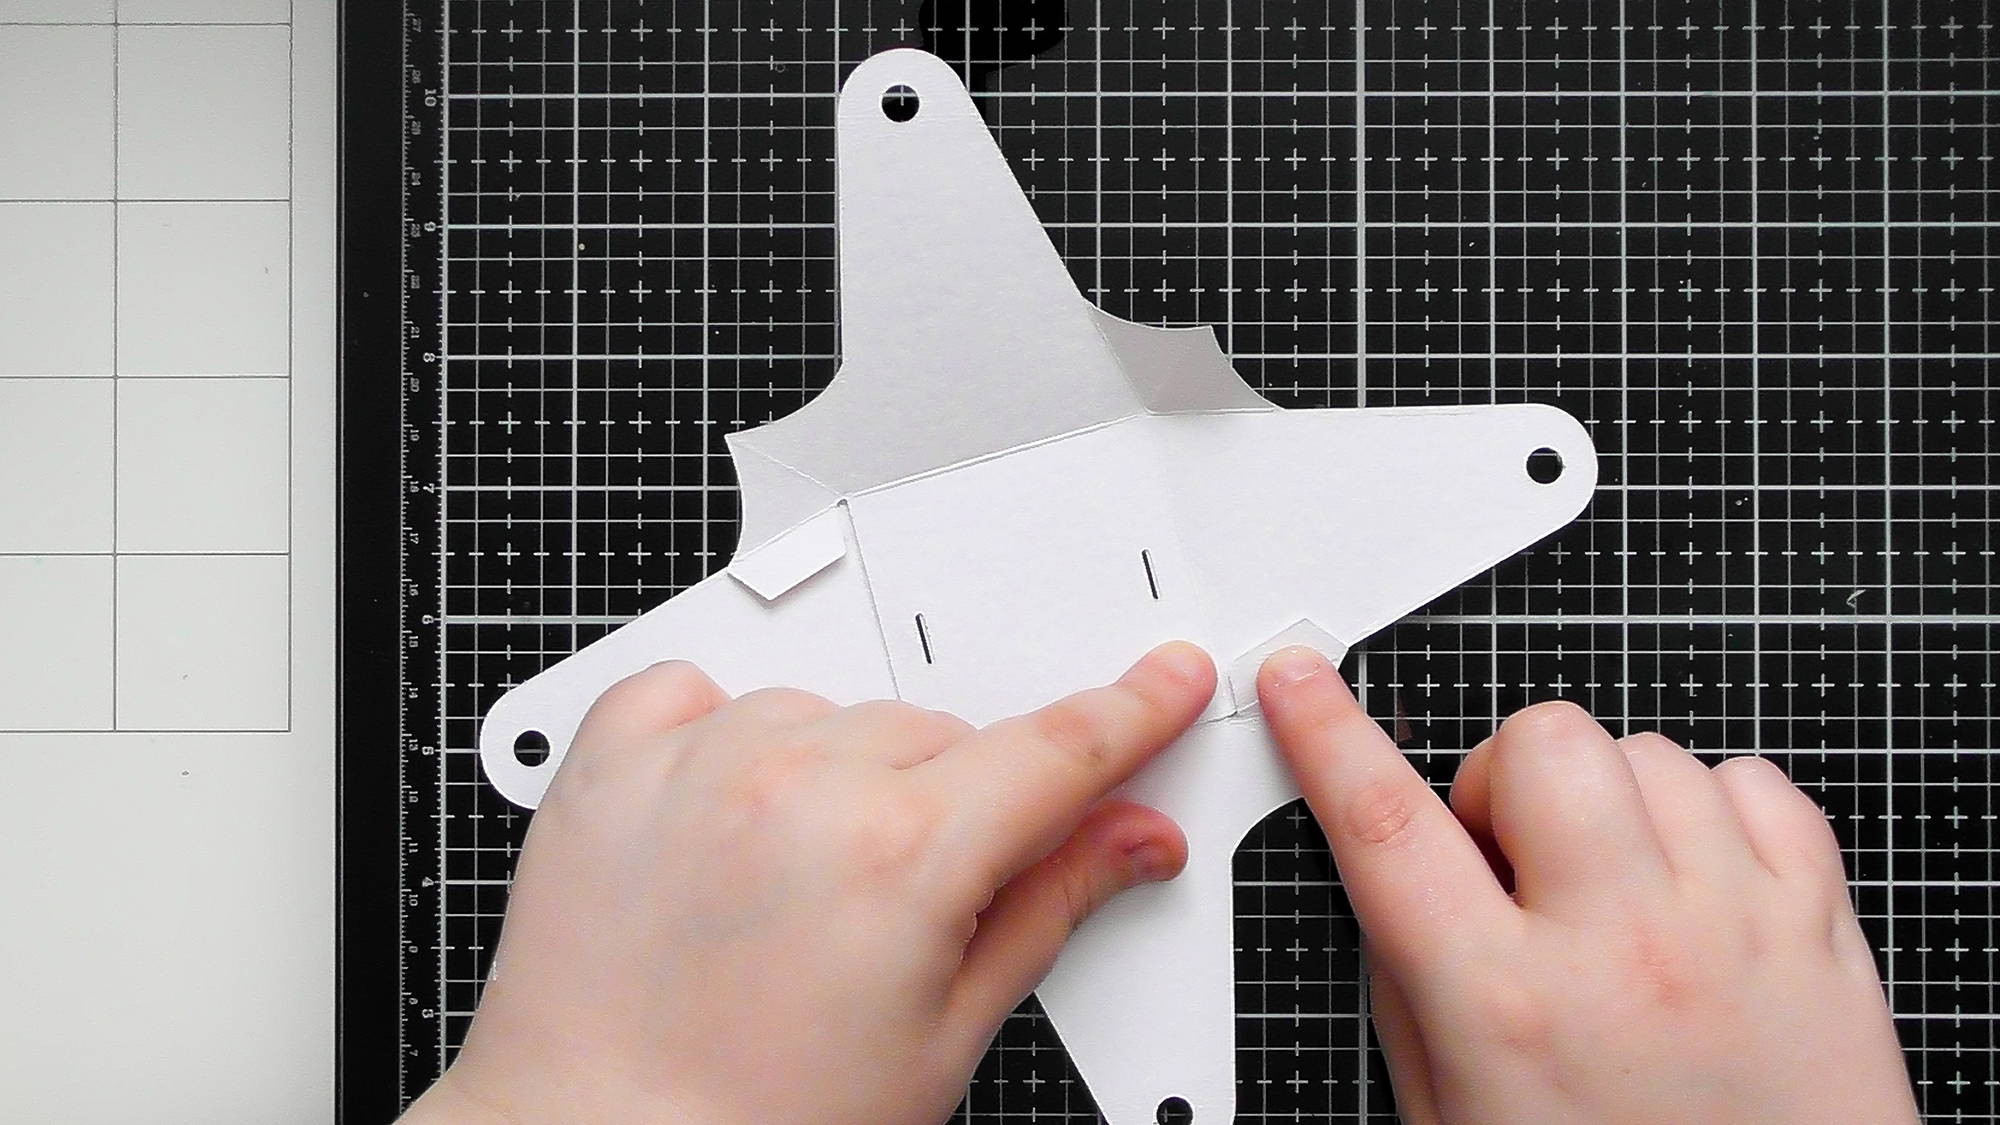
Lay your base piece flat and stick down the remaining 2 glue tabs, simply pull them to the inside of the box, lay it decorated side down and glue them so the whole thing lays flat.
Step 13

Pick up your base piece and ease the corners to fold inwards like this.
Step 14

Take some bakers twine or ribbon and thread it through the holes around the top to hold the bottom of the box together, this will also help hold your gift inside too.
Step 15

Place the lid we made earlier over the top of the base piece as so, making sure the tabs on the same sides and the slits.
Step 16

Then simply lock the tabs into the slits to secure the lid to the base. This is also fab if you want to make it a hanging decoration as the base will stay attached to the lid.
Step 17

Finally, why not make a matching card to go with your box? Here I used the inside panel twice and I even used the word die ‘gift’ from the set as part of my sentiment too ‘You’re a True Gift’
I hope you found these photographed steps easy to follow and it’ll help you to easily assemble the Magical Entwine box as well as the Enchanted Favour box as the general concept is the same :D And I hope you also liked seeing an examples of a card made with the decorative panels too, if you’ve watched any of my videos before you’ll know I LOVE to use panels from box die sets to create cards as it gives them such a unique look :D Happy Crafting! Christine aka CRaFTi PoTeNTiAl :D xxx
Buy The Craft Project


