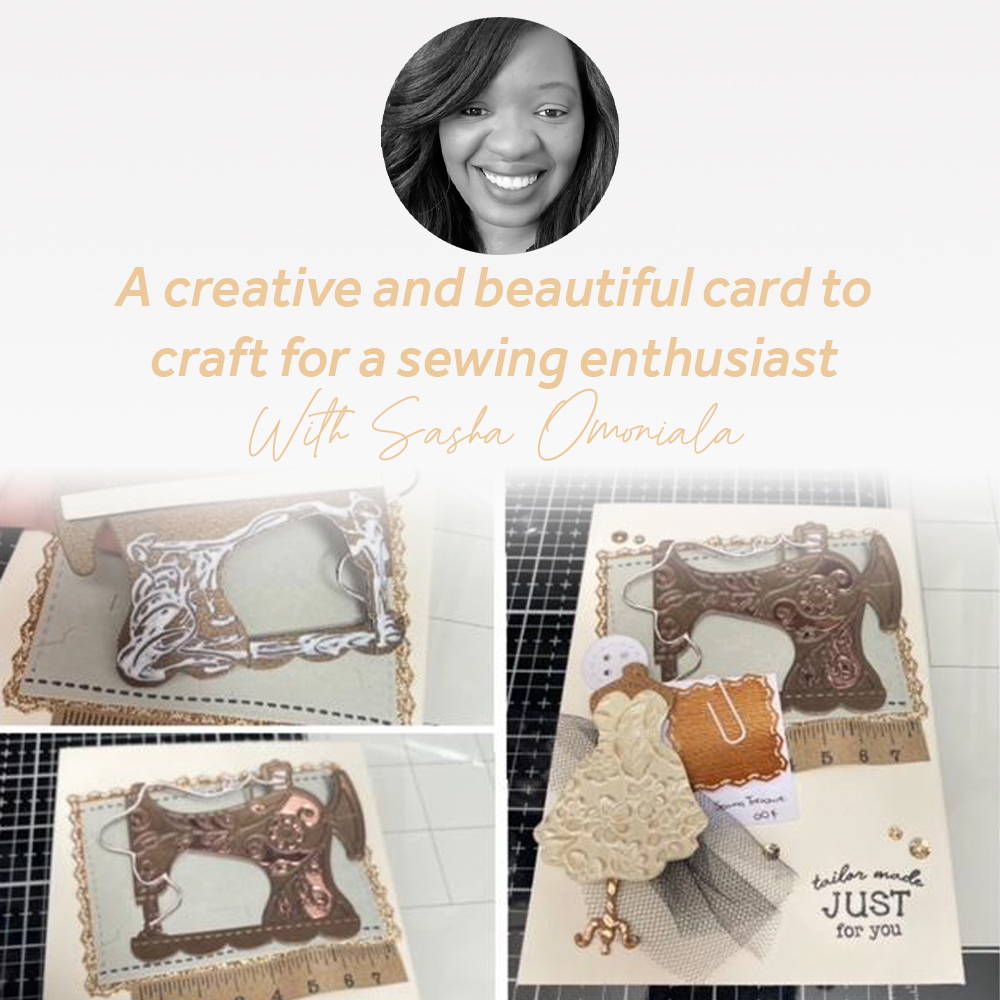
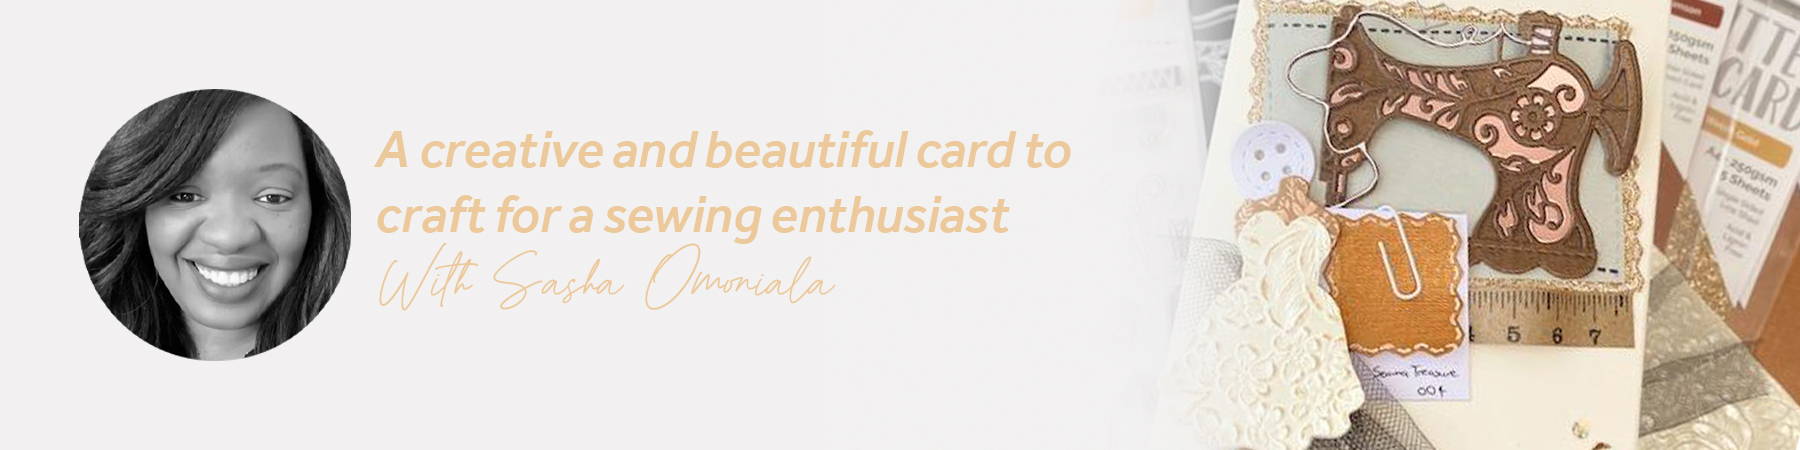
Hello lovely crafty friends. I sure hope the new year has been good to you all so far. Today we will be making this collage style card which is a new style for me so something new for the new year :) I’m “sew” glad to be sharing this with you all.
What you will need
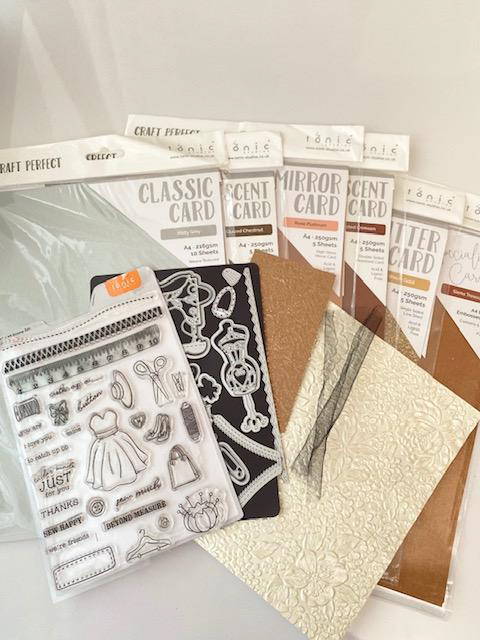
Sew happy stamp and die set
1x Ivory white 5 x7 Card base
1x A6 misty grey classic card
1x A6 welsh gold glitter card
1x A6 glazed chestnut
pearlescent card
A bit of Rose Platinum mirror
card, Sienna Treasure
specialty card, Rose Gold
Blossom foiled kraft card,
embossed specialty paper of
your choice, kraft card and
white card
A bit of black tulle (or whatever
colour you want)
Redline tape
Nuvo deluxe adhesive
Die cutting machine
Step 1
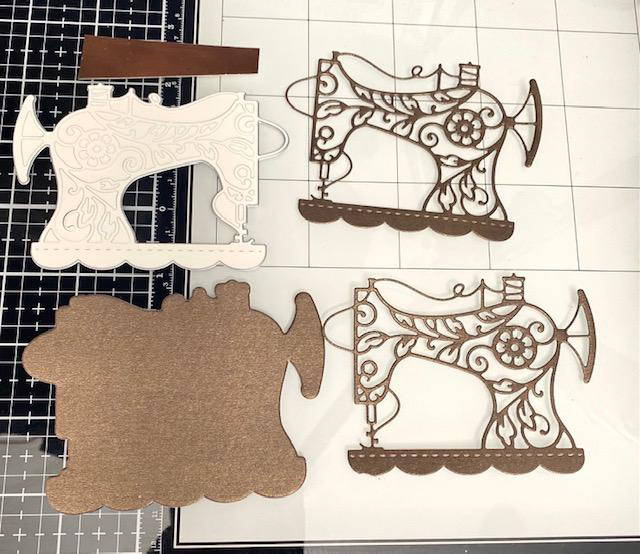
We will make all the elements then put the card together. So let's start with the sewing machine. Die cut x2 detailed sewing machines and x1 outline out of the glazed chesnut card. Also, die cut one detailed machine from the platinum rose gold mirror card but leave it in the die to make it easier to paper piece.
Step 2
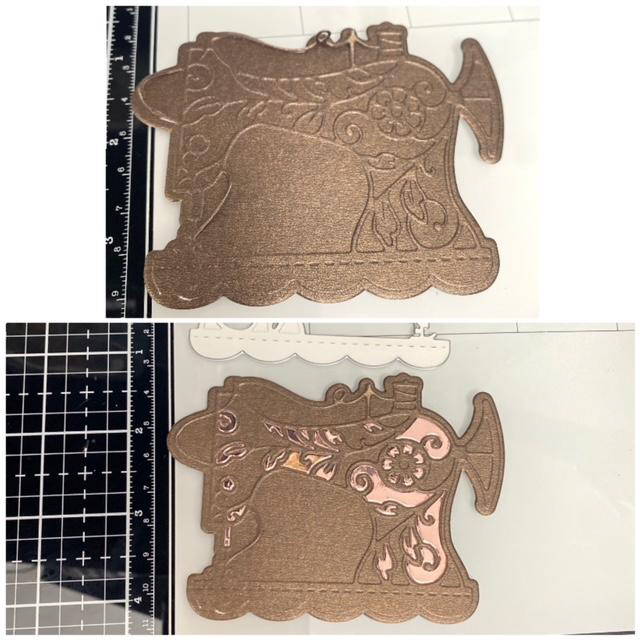
Stick your detailed machine die cut over the outline die cut,be careful not to glue down the thread bits of the machine so that we can do step 3. Inlay (put the pieces in the coordinating holes) the rose gold pieces.
Step 3
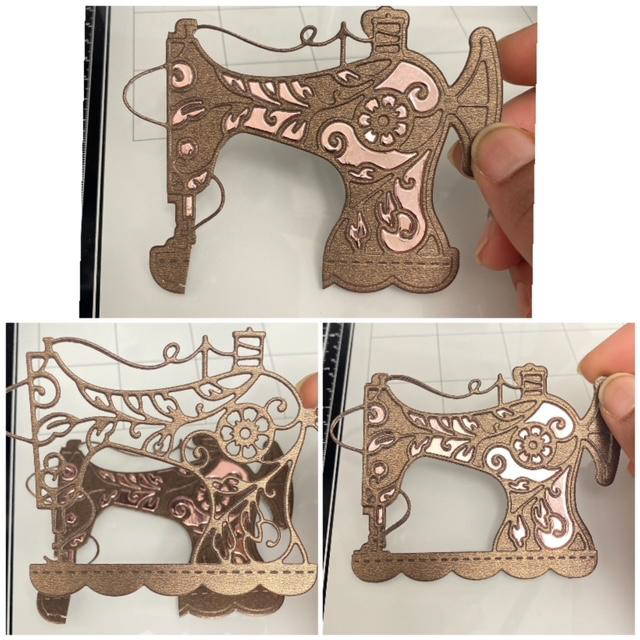
Trim off the excess card around the machine so that you are left with a machine that looks like the picture, then add the other detailed machine die cut over the top. If at any point you are confused please refer to the pics.
Step 4
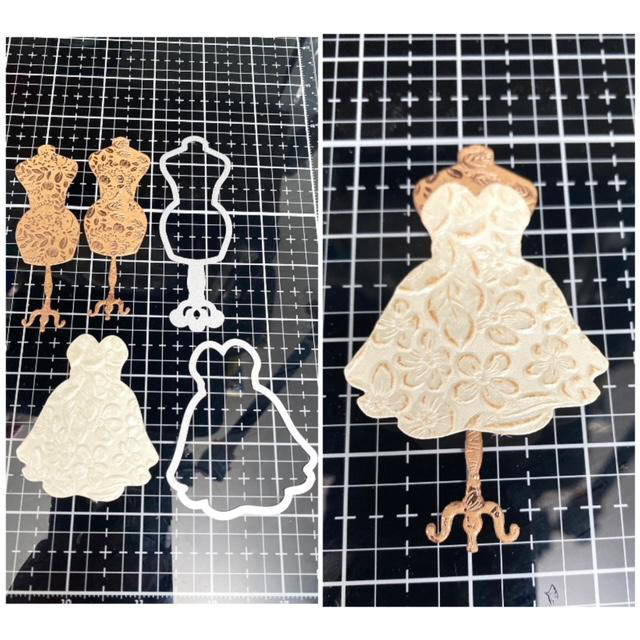
Next we are going to die cut x2 dress forms from the foiled kraft card and 1 dress die cut from the embossed specialty paper. Glue the dress forms together to create a stronger one piece then glue the dress over it. If only it was this easy to make a dress right?!
Tip: I rubbed some soft suede over the top of my embossed paper dress just to add some interest to the design
Step 5
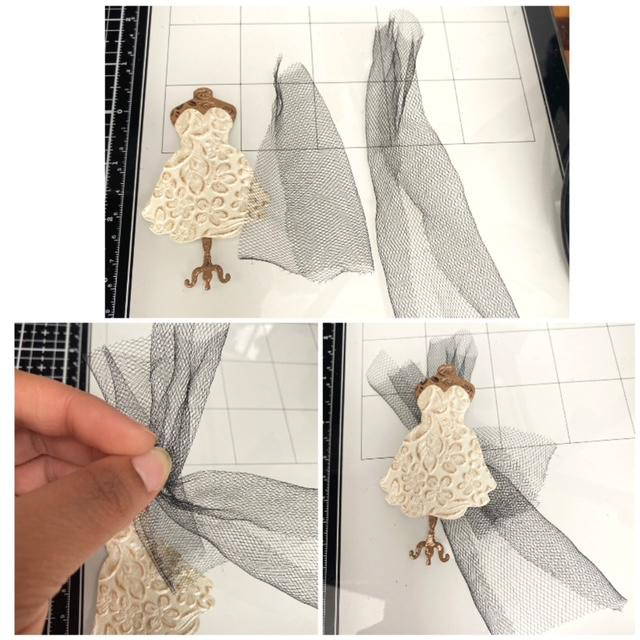
Add some redline tape to the waistline of your dress form piece. Grab your pieces of tulle and pinch them together just to create some shape, then stick them to the redline tape at the back of the dress form.
Step 6
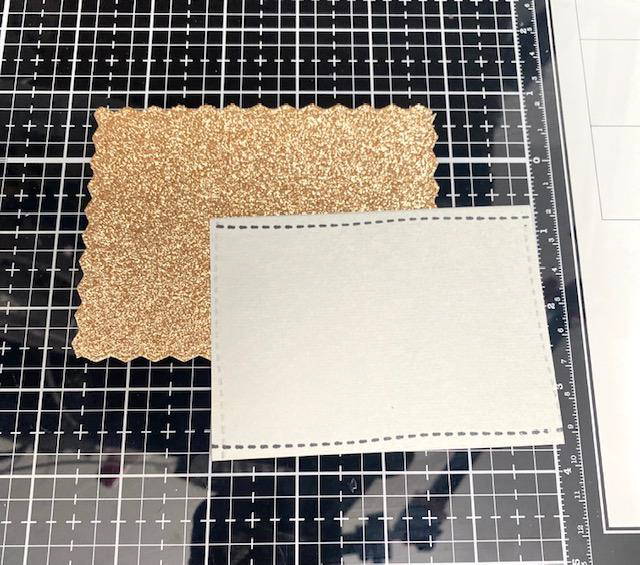
Cut a panel that's 3.5” x 4.5” from the glitter card and a 3” x 4” panel out of the misty grey. Card. Use the edge die to give the glitter card a zig zag stitch edge and use the stitch stamp to add some stitch lines to the edges of the grey card.
Tip: you can use white gel pen to make the stitches on the glitter card more visible.
Step 7
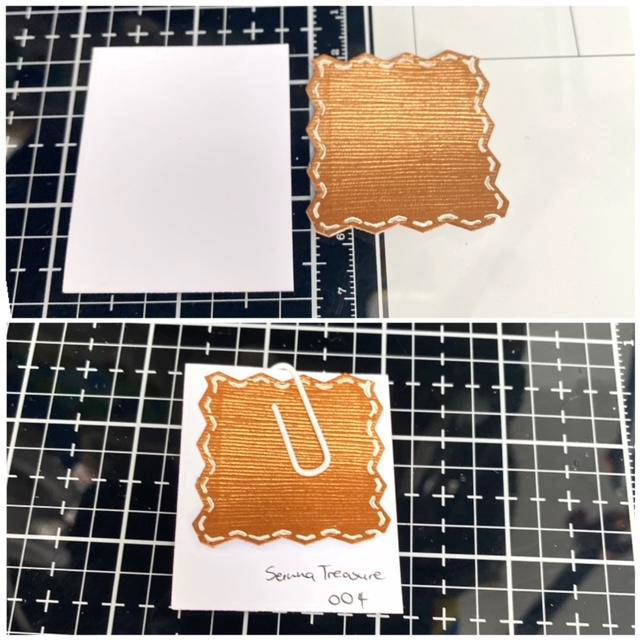
Cut a 1.5” x 2” piece of white card and a 1.5” x 1.5“ piece from the sienna treasure card. Use the edge die to give your sienna treasure piece the look of a fabric swatch. You can use a paperclip to hold the pieces together. Also, use pens to add details and make it really realistic.
Step 8
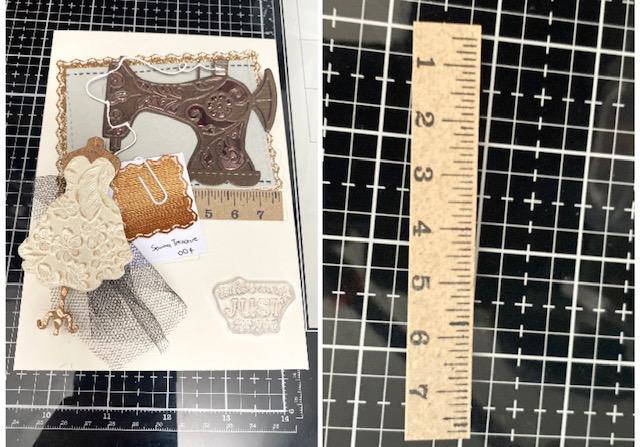
Grab a small piece of kraft card and stamp the tape measure design onto it. Use a bone folder to curve it slightly. All the elements are ready, lay them on your card to figure out the layout then use a pencil to mark the placements. Once you know where everything is going, stamp on your sentiment.
Step 9
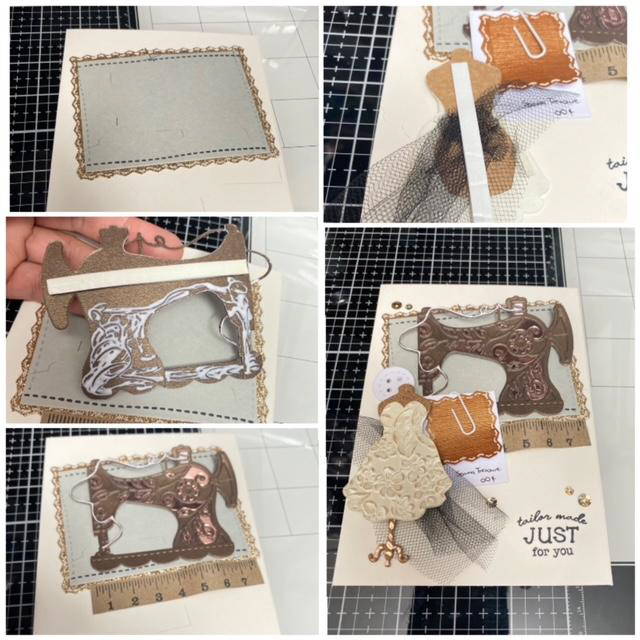
Glue down your pieces in this order. Start by adding the glitter gold and misty grey faux fabric pieces at an angle. Next add your sewing machine and try to place it as straight as you can. (You can add foam tape just to the top of your machine die cut to add some dimension.) Then add your tape measure right under your machine. Next, add your fabric swatch piece and lastly your dress form with a bit of foam tape as well to keep the dimension of that tulle.
Step 10
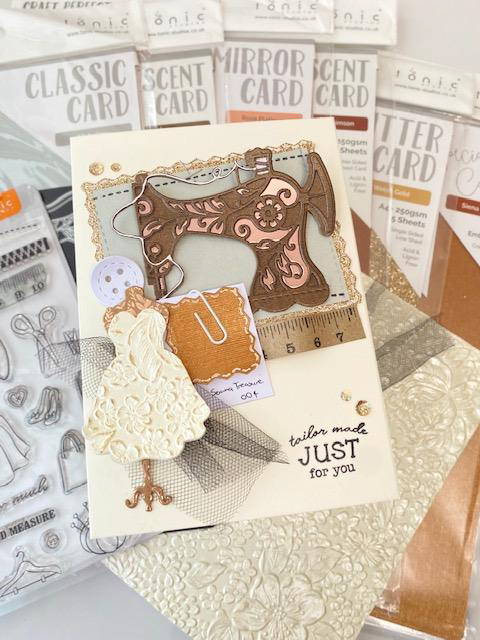
Finish your card with some accessories. I have gone for some staples, a button and some sequins. But you can add any extra detail you want there's definitely plenty of die and stamp options in this set. Just remember this is a collage card so the placement is always flexible just make sure you are having “sew” much fun as your craft always!
Buy The Craft Project


