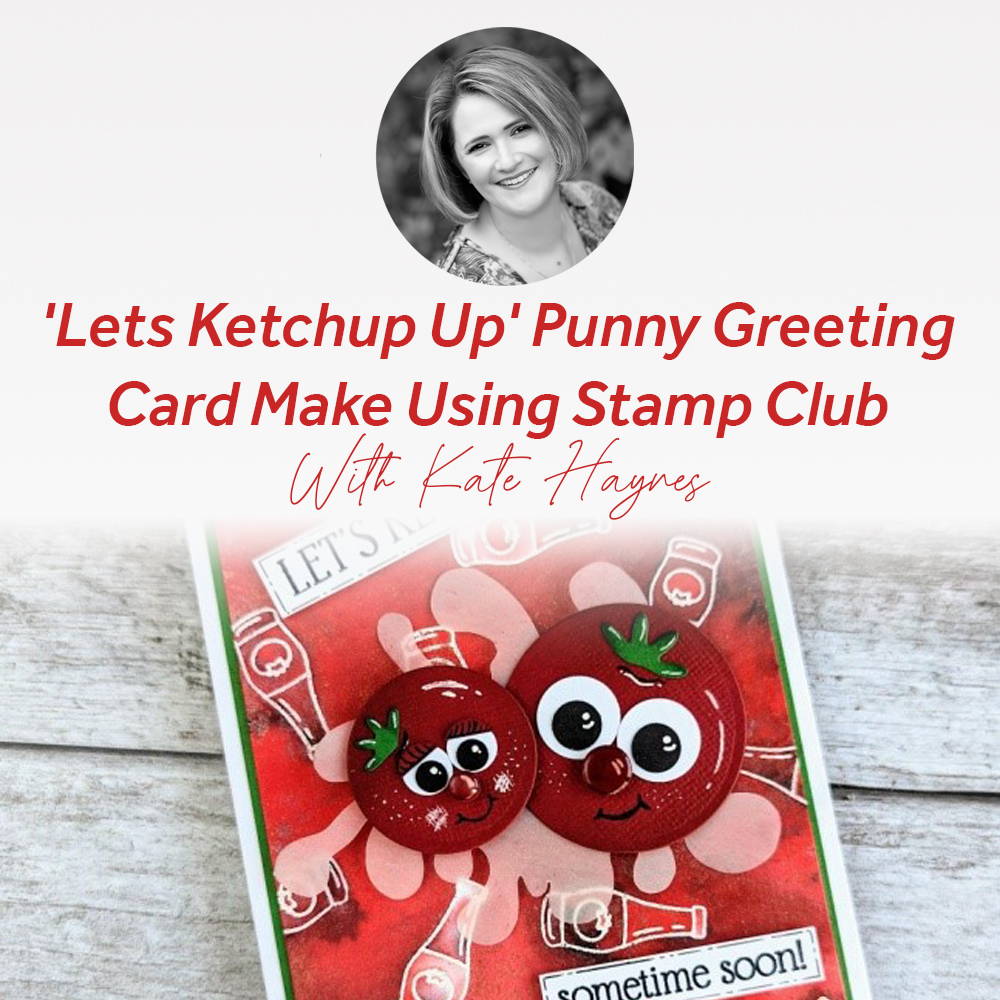
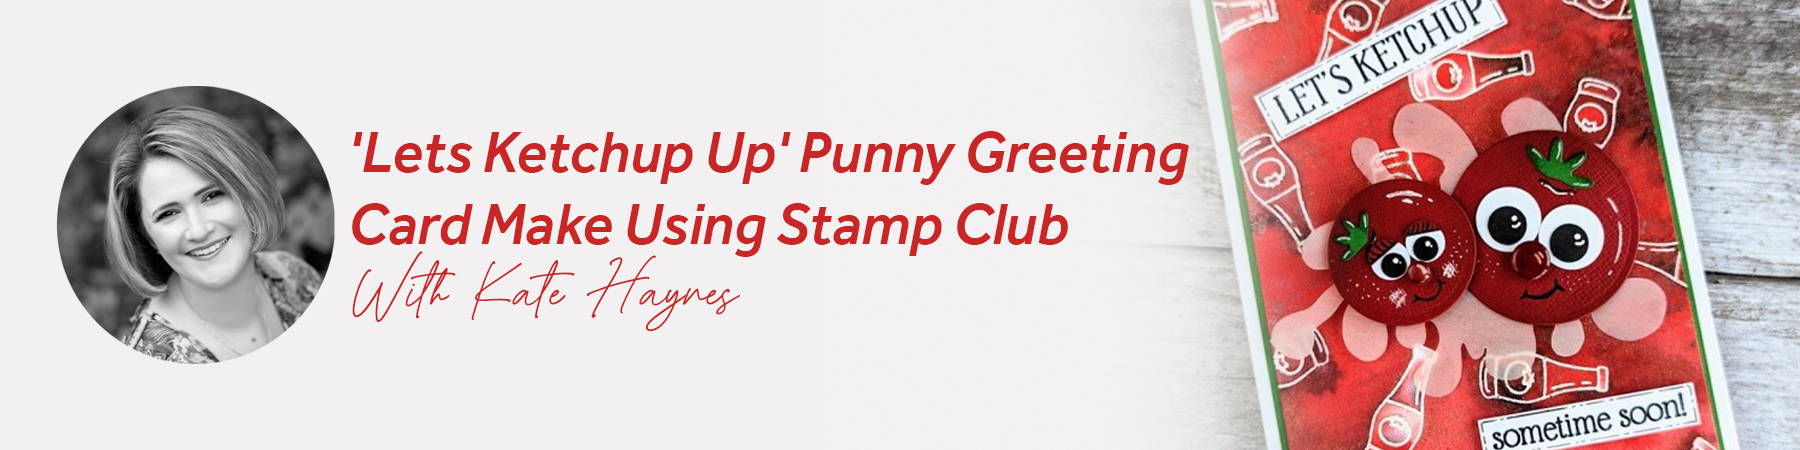
Hi crafty friends!
I’m back on the Tonic blog today, to share with you a fun make I created using this month’s new Tonic Stamp Club release - Picnic Party; where I have combined a stamped background along with some cute ‘tomato’ characters I made using basic die cut shapes. If you don’t have dies of similar shapes in your crafty stash, these could just as easily be recreated by hand-cutting them.
What you will need
- Stamp Club: Picnic Party
- Craft Perfect - US A6 ‘Bright White’ Card Blank
- Craft Perfect Watercolour Card - A6
- Nuvo Clear Mark
- Nuvo Embossing Powder - Glacier White
- Nuvo Shimmer Powders - Catherine Wheel & Maroon Spark
- Craft Perfect Classic Card - Fern Green & Cherry Red
- Craft Perfect Smooth Cardstock in Black & White
- Craft Perfect Vellum - Pure White
- Nuvo Hybrid Inks - Black Shadow, Rich Rosewood & Parkeet Green
- Craft Perfect 12mm Double-sided Tissue Tape
- Nuvo Deluxe Adhesive
- Craft Perfect Dimensional Foam Pads
- Nuvo Crystal Glaze
- White Gel Pen
- Black Fineliner Pen
- Clear stamping block
- Various sized circle dies
- x1 larger, x1 small flower die
- Blending dauber & pad
- Anti-static bag
- Water spray bottle
- Heat tool
- Trimmer or guillotine
Step 1
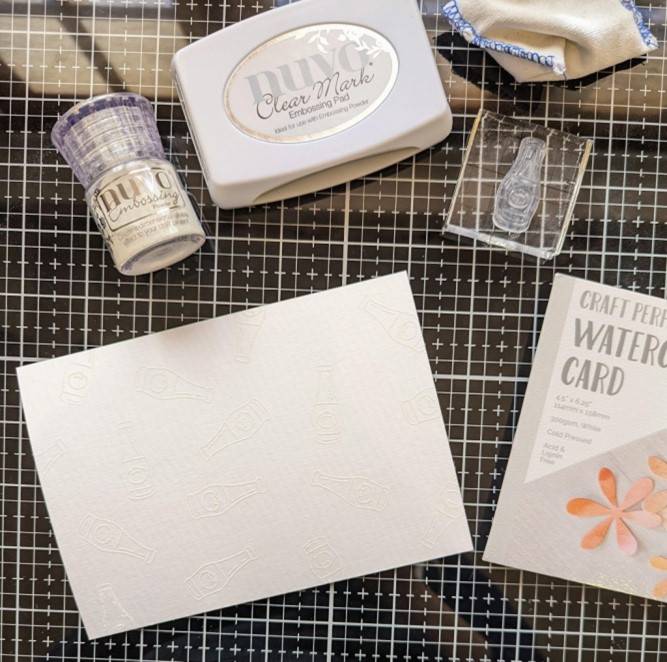
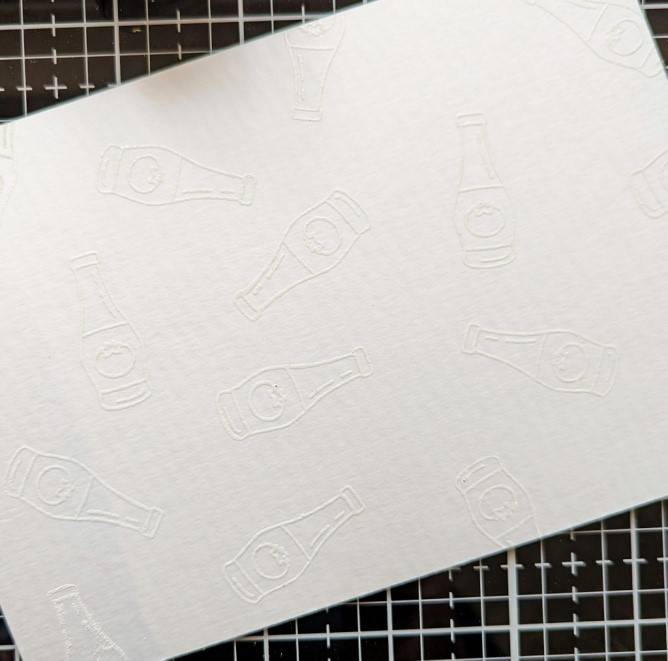
On the ‘smooth’ (overside) of A6 Craft Perfect Watercolour Card, randomly stamp out the small ketchup bottle at various angles, overlapping the page edges in areas. Use Nuvo Clear Mark to stamp your bottle images and then cover the entire A6 page in White Embossing Powder. Tap off the excess powder and heat set all of your ketchup bottles
*TIP* An anti-static bag is my best friend when using embossing powders, especially when multiple stamped images are involved, as it stops any powder sticking in unwanted places!
Step 2
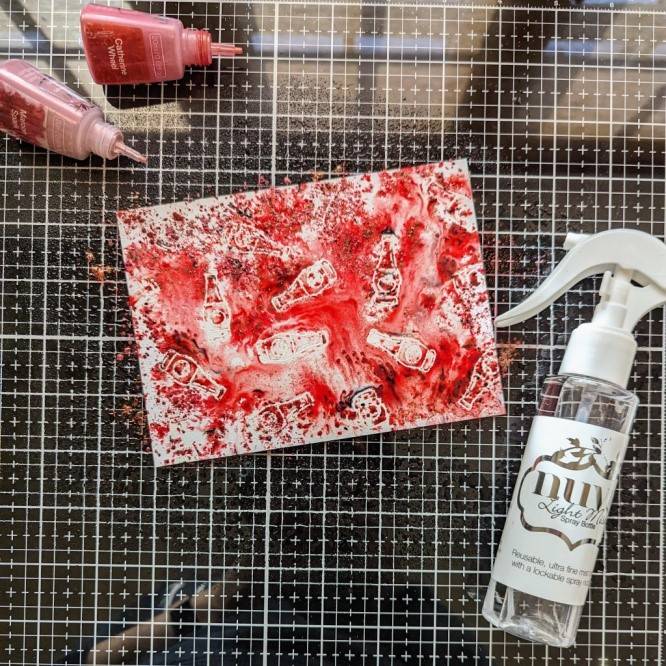

Spray both the front and back sides of your embossed cardbase (a crafty friend shared with me the tip of spraying the back at the same time to stop the card from curling and it works brilliantly!) Apply both shades of red shimmer powders all over the page and watch how they all start to move around - I absolutely LOVE this bit. It’s so mesmerising!
Step 3
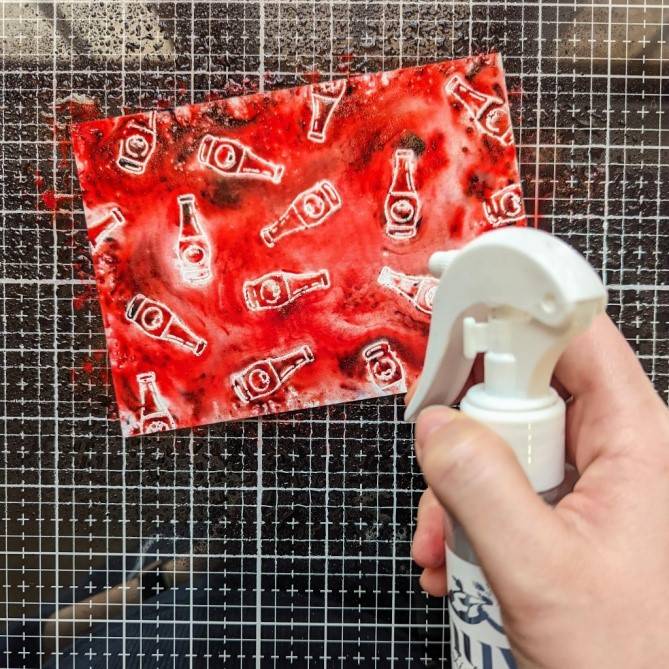
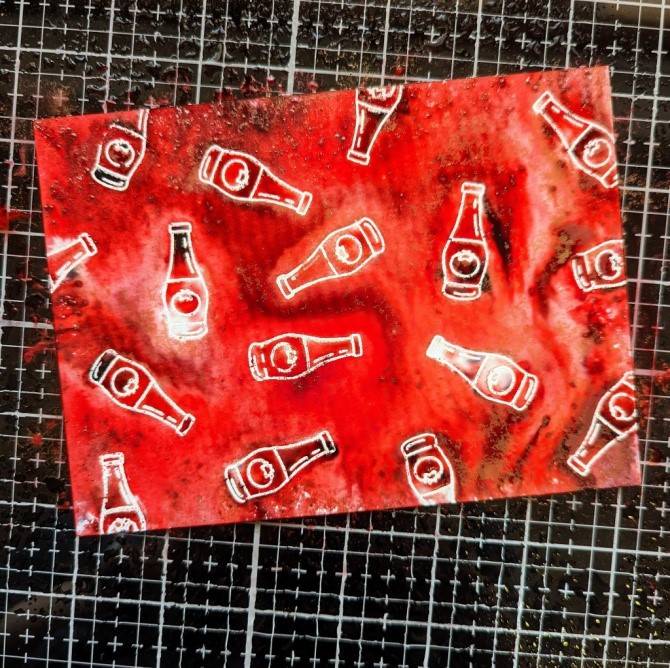
I wanted my powders to leave more of a ‘watercolour effect’ so to make it less patchy looking, I applied further sprays of water to help them to spread and merge. If you prefer the more speckled effect you could leave out the extra water - It is totally up to you!
Set aside to dry.
Step 4
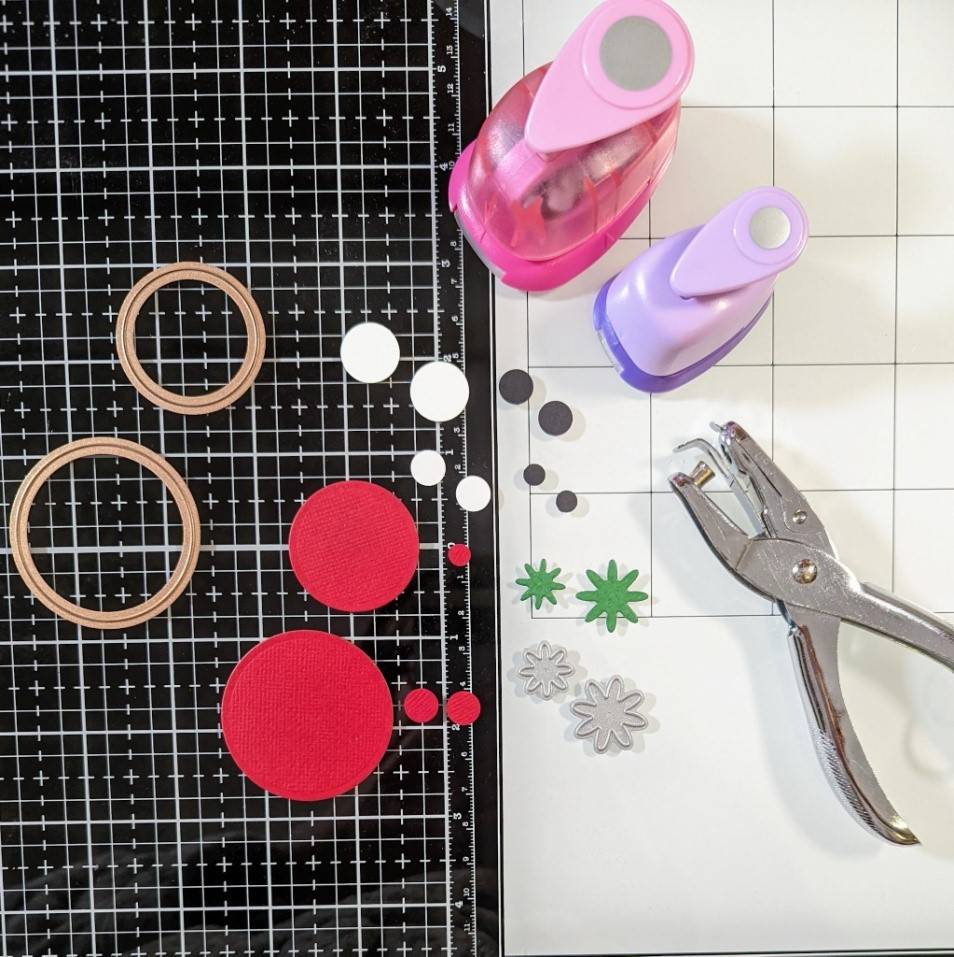
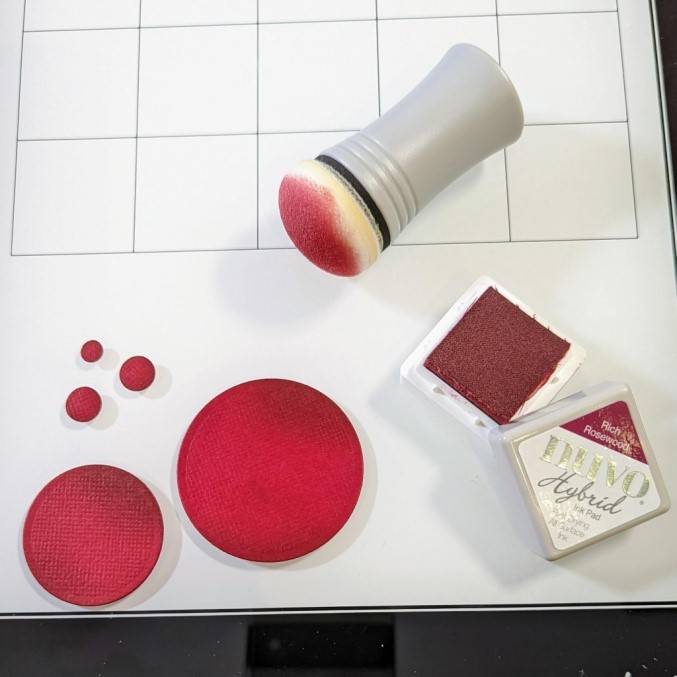
Meanwhile, out of your red, green, white and black cardstocks, cut the pieces needed to create your tomato characters. This bit is a lot of fun, playing around with and combining different basic shapes that form many parts of the various die sets we crafters own! You may not have the exact same sized dies in your supplies but to give an idea of the dimensions, I cut the following:
● x1 larger red circle, approx 4.8cm wide
● x1 red circle, approx 3.6cm wide
● x2 small red punched circles, approx 1cm wide
● x1 very small red punched circle, approx 0.6cm wide (done using a hole punch)
● x2 white circles, approx 1.6cm wide
● x2 smaller white circles, 1cm wide
● x2 black circles, 1cm wide
● x2 very small hole-punched black circles, approx 0.6cm wide
● x1 lager and x1 small green ‘spiky’ flowers
These are just a guide. Have a play around with the different sized circles you own. Equally, these shapes could be cut by hand by drawing around objects such as coins and pen lids.
Step 5
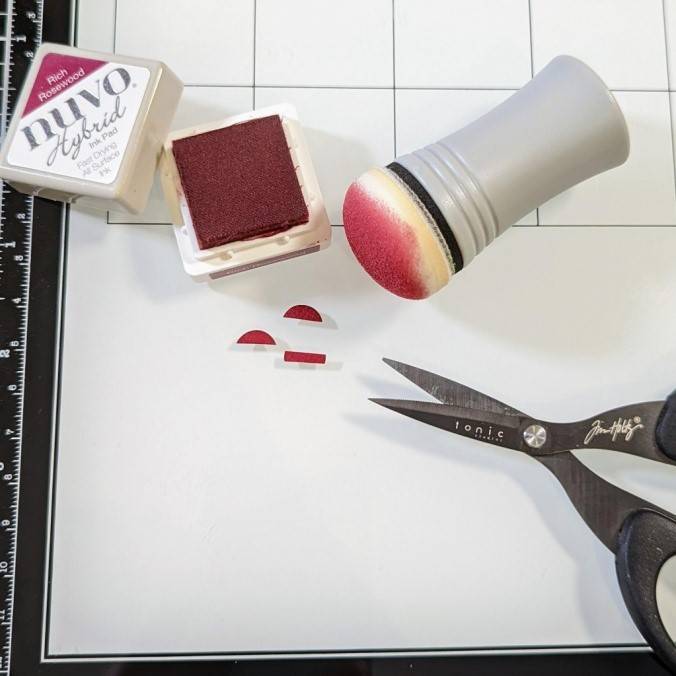
Using a blending dauber, apply some ‘darker’ red ink to the top right and bottom sides of circles to create a bit of shadow and give them a more ‘3D’ effect. Next, take one of the two smaller sized circles and cut it down into two slim semi-circles, as shown. Carefully ink-blend the cut edge also.
Step 6
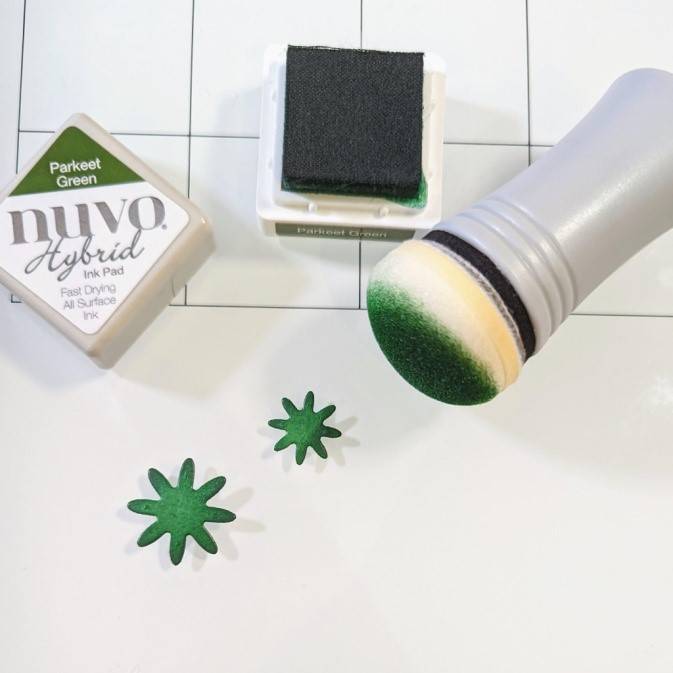
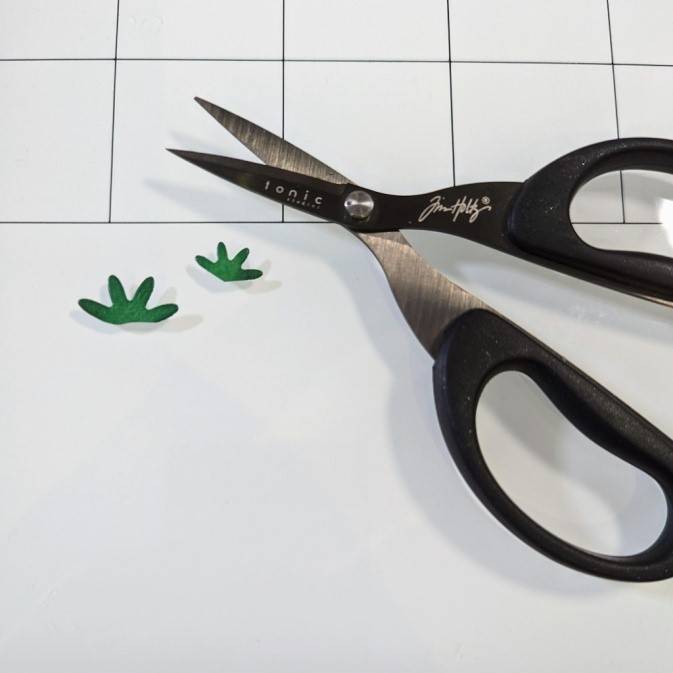
Using a dark green ink, apply to the tips of your green flower shapes. Using a small pair of scissors, trim them down as shown to resemble the leafy tops of your tomatoes.
Step 7
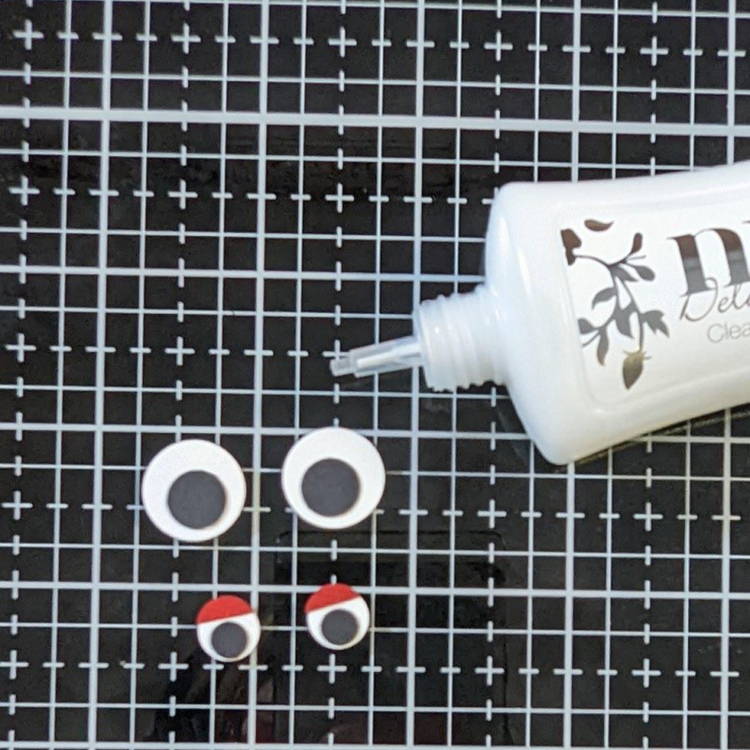
Glue the white and black circles to create your characters’ eyes. On the smaller of the two eye sets, glue the small red semi-circles to appear like eye-lids.
Step 8
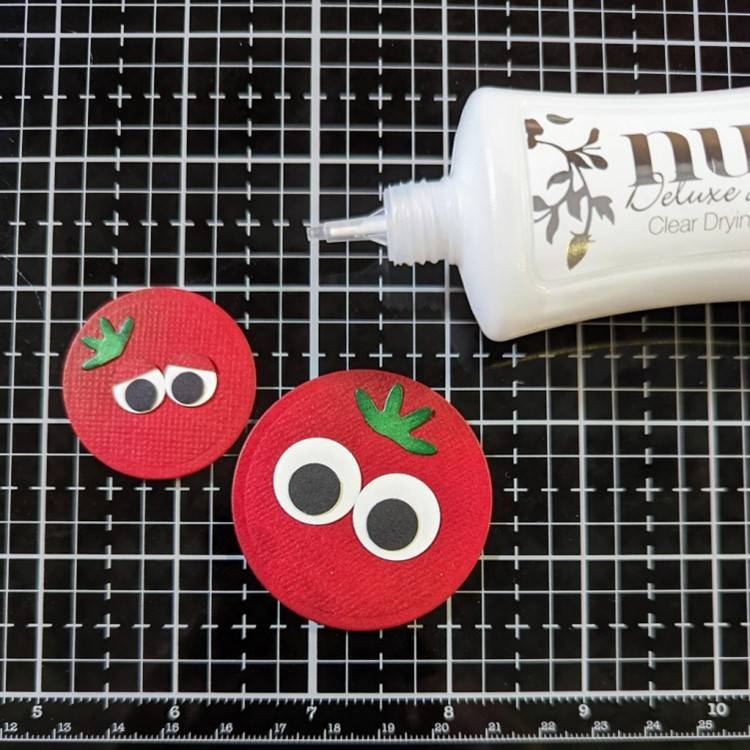
Attach to your eyes and leafy tops to the two largest red circles.
Step 9
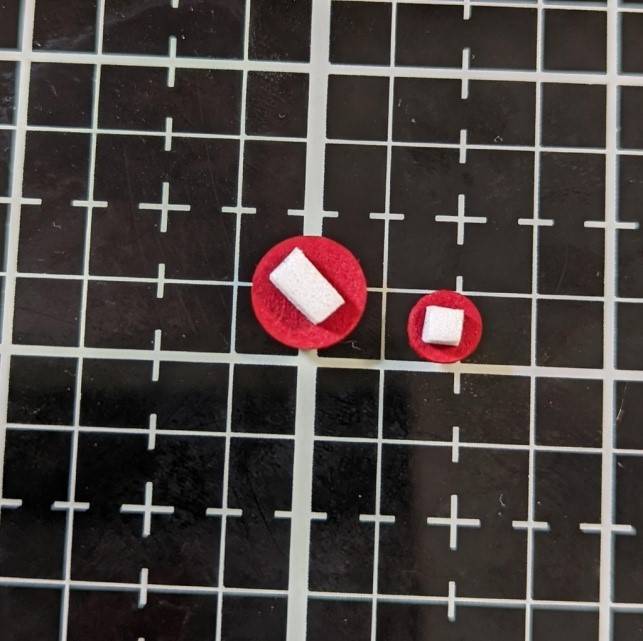
Cut down two small squares of adhesive foam pad and attach to the back of the remaining two red circles.
Step 10

Attach the circles to form ‘noses’ and then using a black fineliner and white gel pen, add in some details to give your tomato faces a bit of extra cheeky character!
Step 11
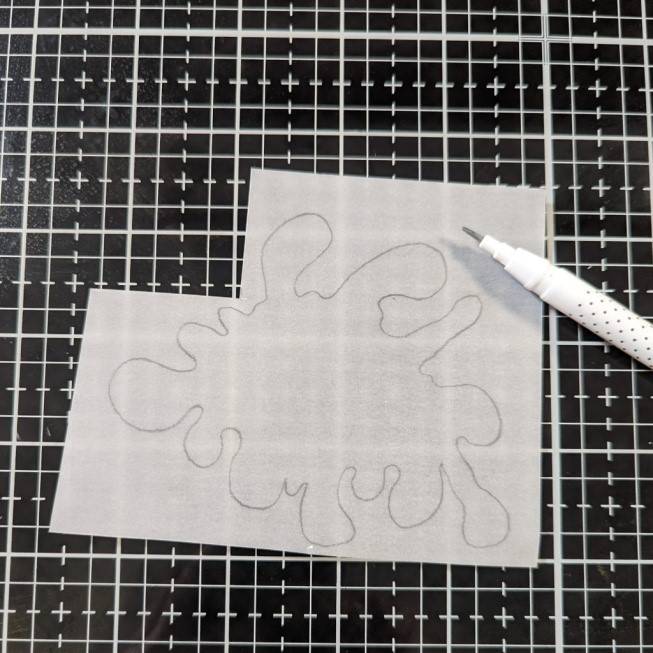
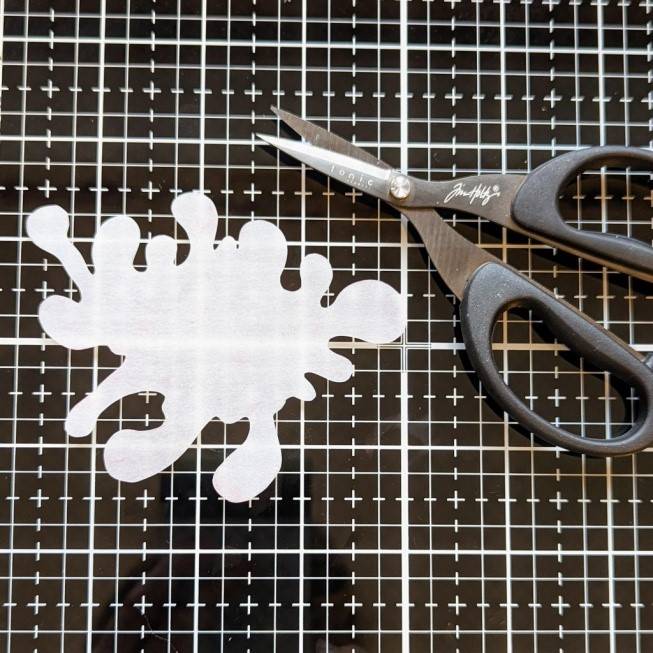
Draw out a ‘splat’ shape on a piece of vellum and then cut out.
Step 12
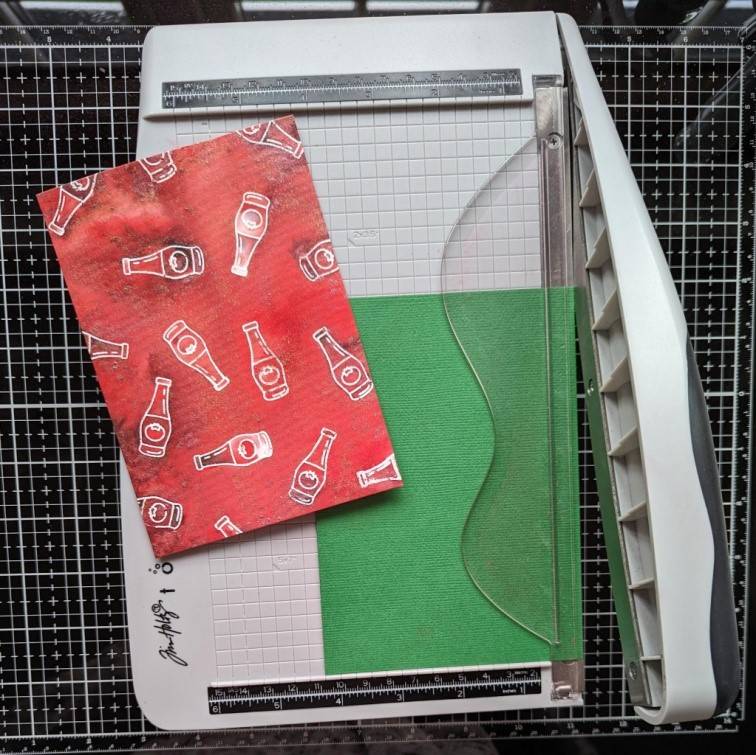
Trim down your ketchup card base to measure 10.3cm x 14.8cm and cut a second green base measuring ever so slightly larger at 10.7cm x 15.2cm
Step 13
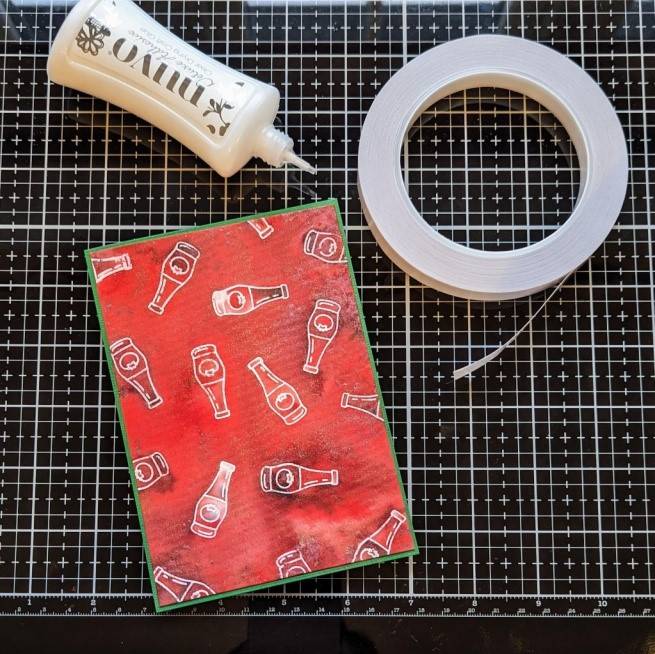
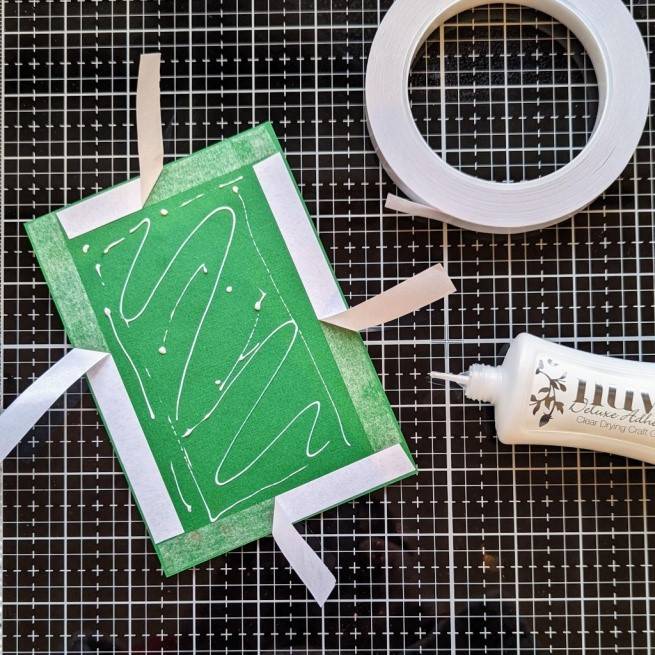

Using double-sided tissue tape along the edges and wet glue in the centre; attach the ketchup card base to the green base and then attach this to an A6 card blank.
*TIP* By nature of the watercolour card,once made wet its edges tend to dry warped therefore I find using the tissue tape on the outside gives a far better adherence without any ‘wobbly’ lifting. It is, however, not very forgiving when needing to stick down with any kind of precision. The wet glue in the centre allows some ‘wriggle room’ to allow the card base to be attached evenly before fully committing the edges. I lifted the protective tape cover slightly as shown, to form easy pull tabs which I find are very handy once I have ‘wriggled’ my cardbase into position!
Step 14
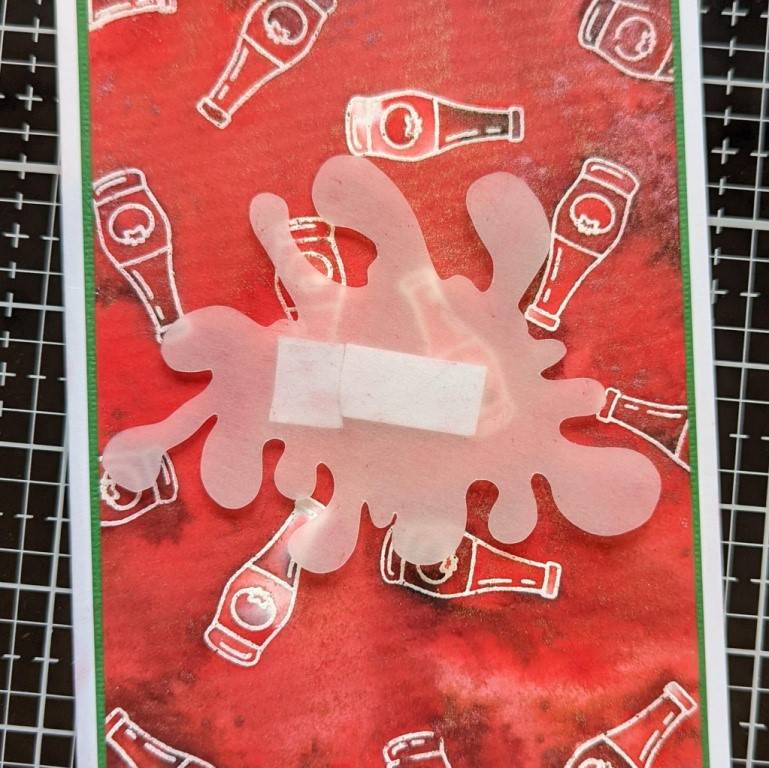
To make your splat shape stand proud of the card, stick some trimmed down adhesive foam pad to the back of the vellum shape (only in the centre so that your tomato characters will cover it). Attach the splat to sit roughly in the centre of your card.
*TIP* Have a dry run first and play around with the orientation of your splat shape to decide how it works best with your tomatoes.
Step 15
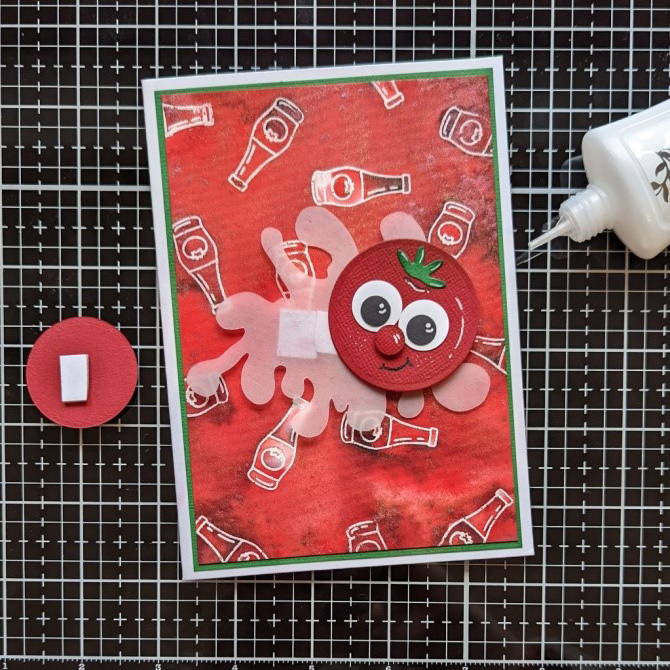
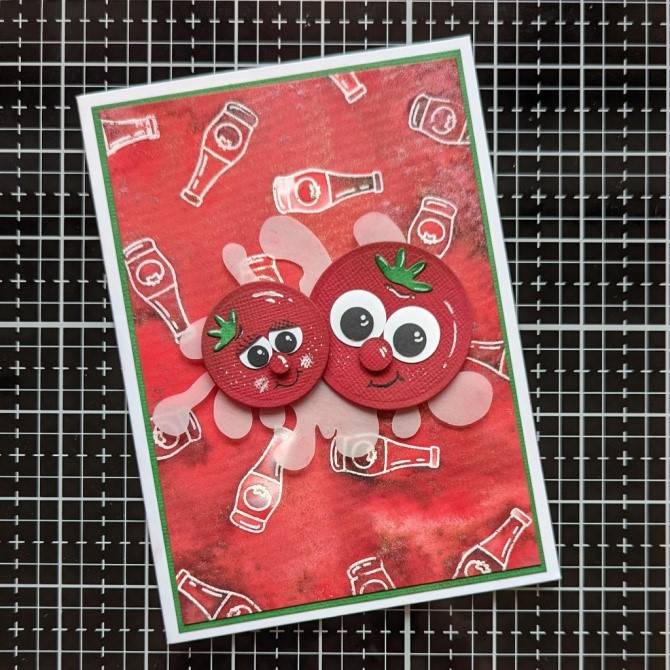
Glue the larger tomato directly onto the vellum. Put some adhesive foam pad onto the back of the smaller tomato and attach, slightly overlapping the bigger one.
Step 16
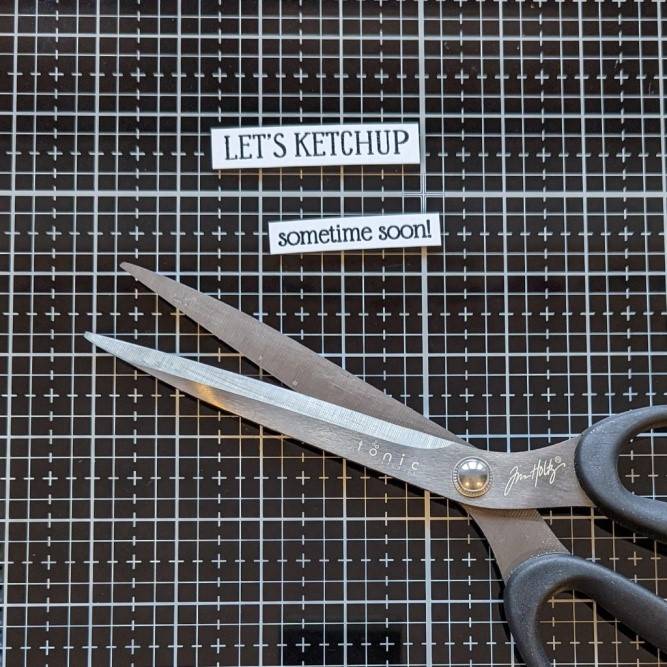
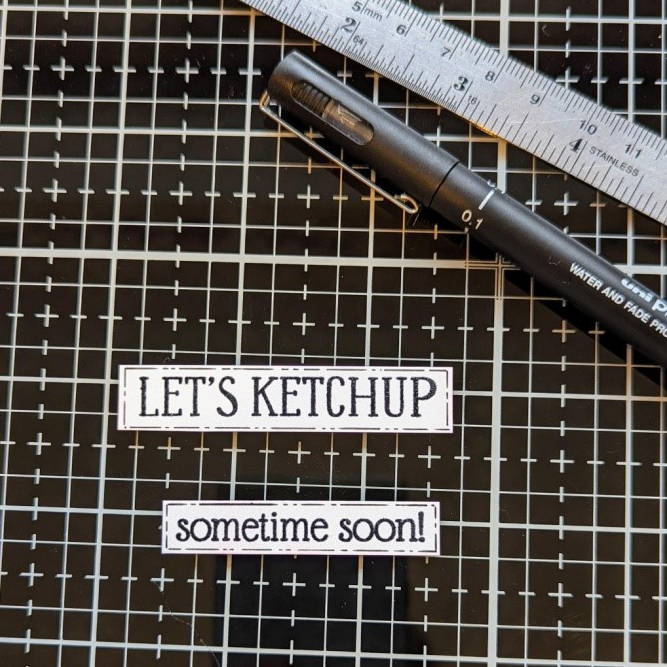
Stamp out the ‘Let’s Ketchup’ and ‘sometime soon’ sentiments in black ink onto white cardstock and trim down. I added a little border detail in fineliner using a ruler. This could be done freehand instead or alternatively kept plain if you prefer.
Step 17
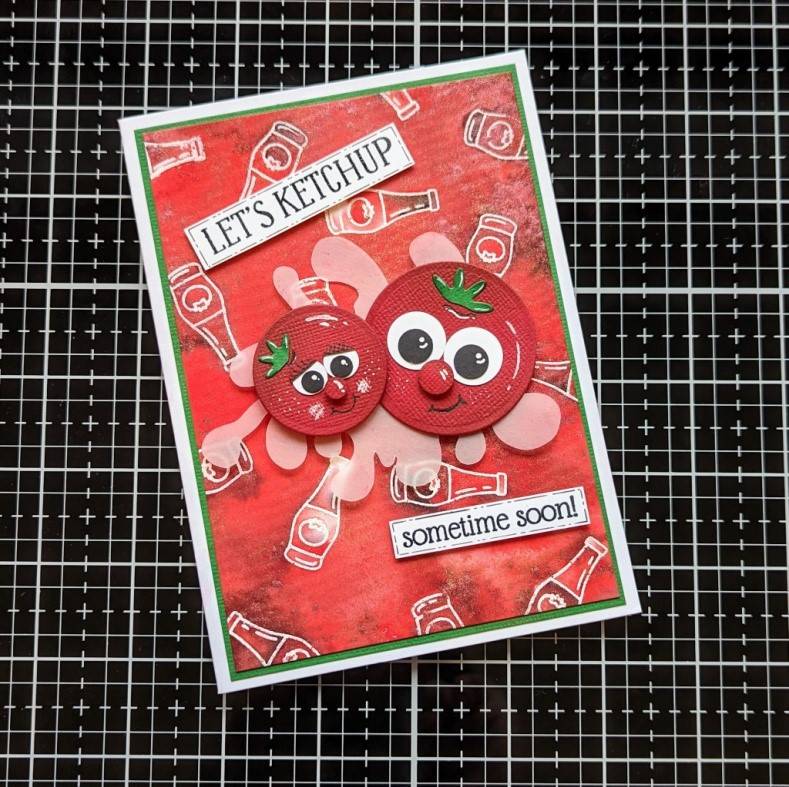
Apply adhesive foam pads to the back of your sentiments and attach. Again, you may wish to play around with positioning first and see where they work best with where your ketchup bottles happen to be. I originally saw both of my sentiments going top and bottom centre but found I didn’t like how they covered the bottles, so it’s worth having a little play.
Step 18
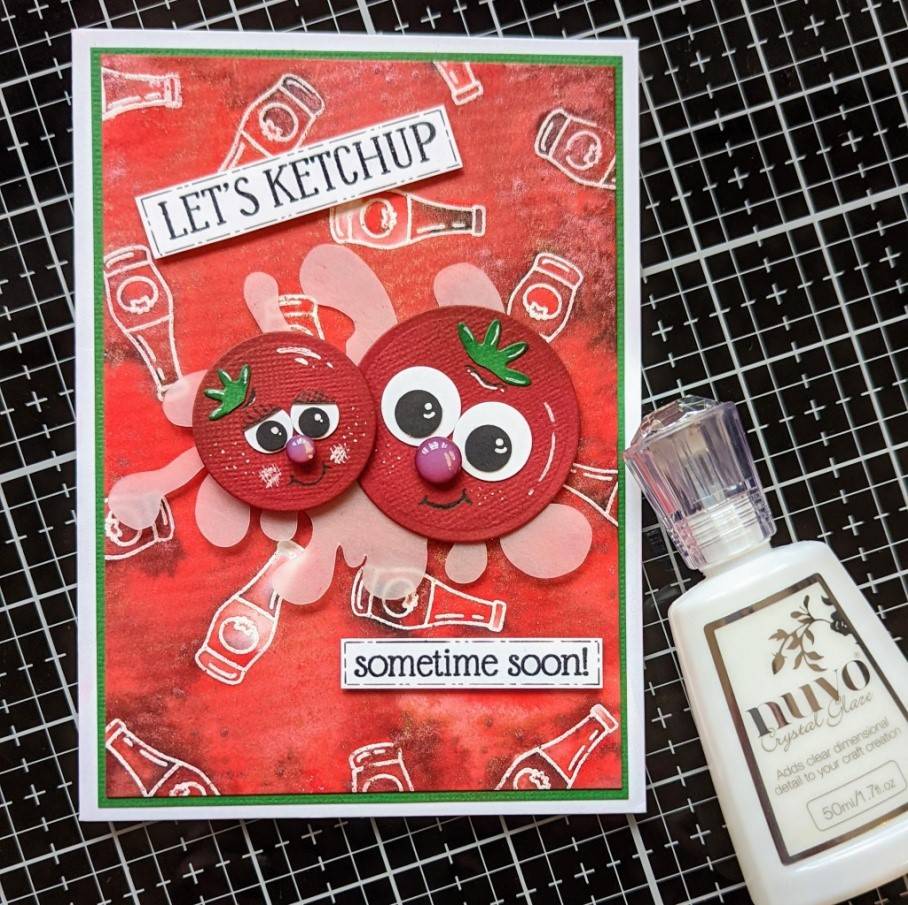
Finally, apply some Crystal Glaze to the noses of your cheeky toms to give them a bit of extra fun glossy pop! Leave to dry to go clear.
Alternatively, clear ‘Morning Dew’ Nuvo Crystal Drops would work just as well if you don’t have any Crystal Glaze.
And there you have it… A cute ‘punny’ card that is ideal for writing a note to someone you’ve not seen in a while or even as an invitation for a long-overdue catch up!
I hope that I’ve been able to show how if we look at some of our basic die shapes in slightly different ways, that they can be combined to create something totally different. Have a play and hopefully you’ll give creating your own fun little tomato characters a go!!
Thank you for visiting my post.
Happy crafting!
Kate x
Buy The Craft Project
