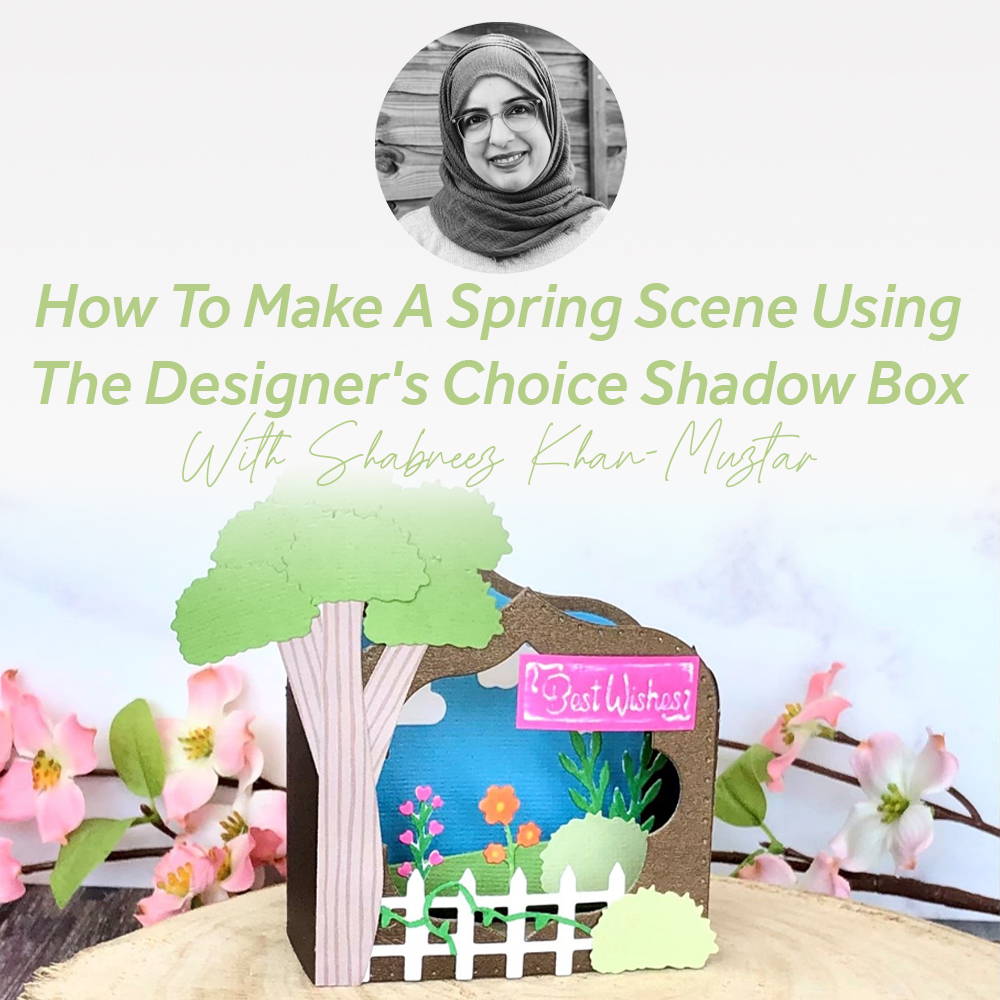
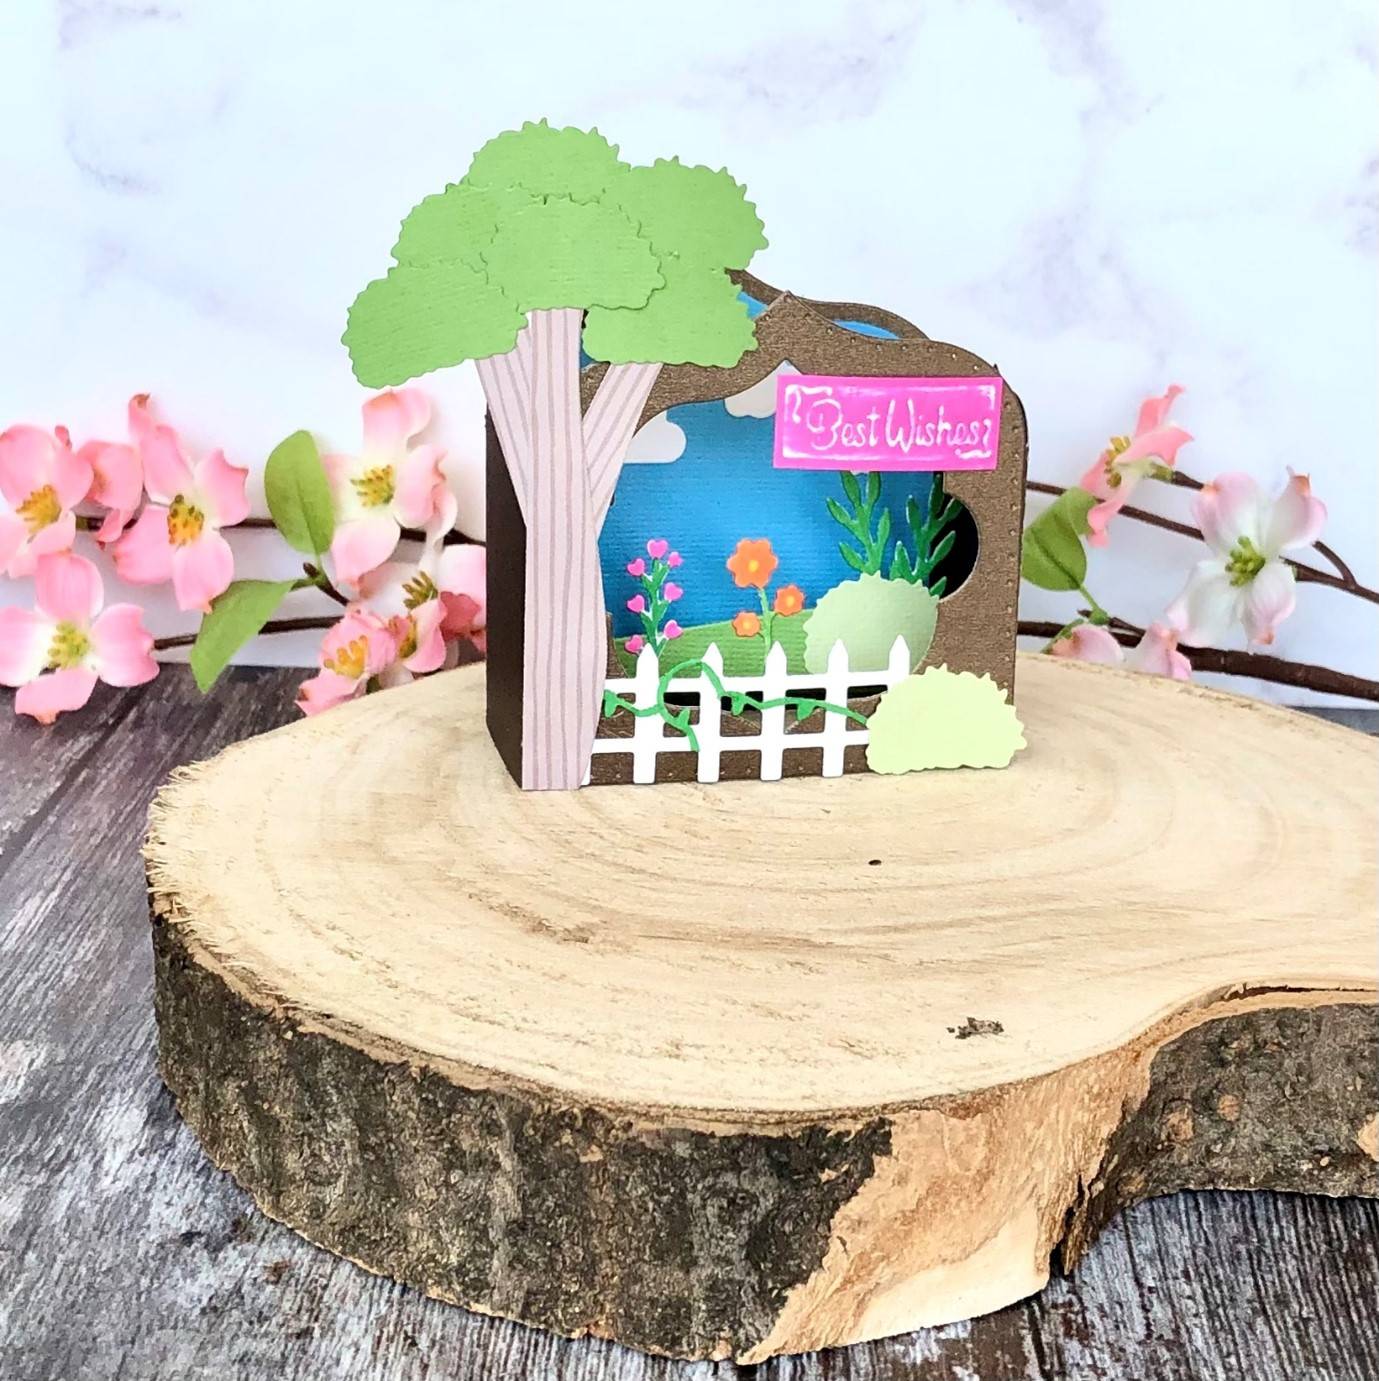
The Designers Choice Spring Shadow Box Die Set is a quick and simple set to make up and looks amazing when complete. There are so many possibilities to create with it. I have chosen to make a scenic box using the dies including in other ways so stretching your supplies even further! The best thing about the box is that it folds flat for posting!
What you will need
- Designer’s Choice Spring Shadow Box Die Set
- Pistachio Green Classic Card
- Glazed Chesnut Card
- Cornflower Blue Card
- Grass Green Card
- Smooth White Card
- Woodland Walk Paper Pad
- Nuvo Alcohol Pens: 453, 404, 393, 413 and 415
- Nuvo Hybrid Pad in Lotus Flower
- Tangerine Die Cutting Machine
- Glue
- Scissors
Step 1
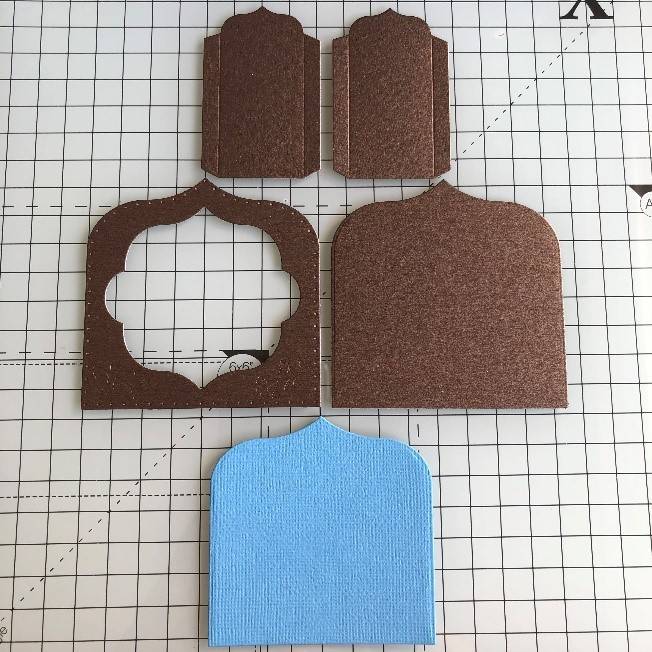
From brown card die cut 2 side panels, a front and back panel. From blue card die cut a smaller back panel.
Step 2
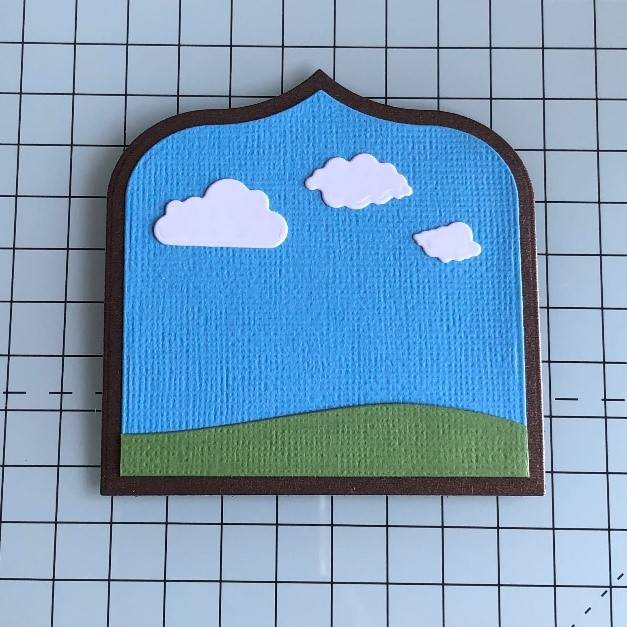
Make up the back panel of your shadow box first. To do this stick the blue card on the brown card base. Make sure you don’t add glue to the left and right edges but leave a little gap so that you can slip the tabs for the sides underneath. Die cut a green hill using the stage die and cut off the tabs. Die cut the clouds from white and adhere both as shown with glue.
Step 3
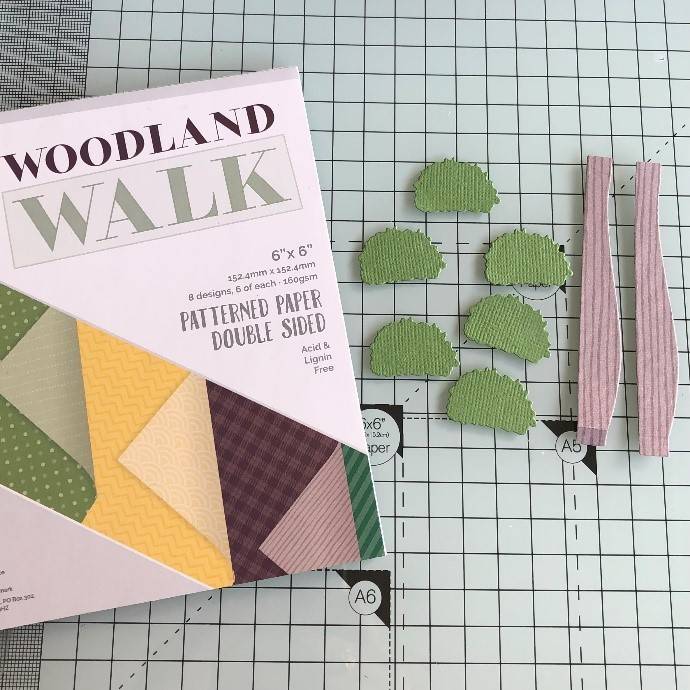
Next, create the tree for the front of the shadow box. For this you need to die cut 2 stage die pieces from the woodland walk paper which looks like bark and 6 hedge pieces from green card.
Step 4
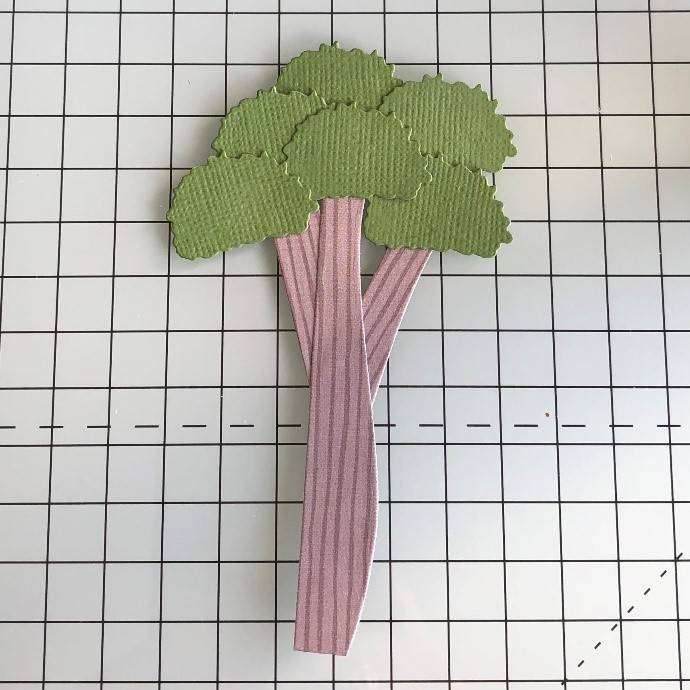
Assemble the tree by cutting one of the stage pieces in two and sticking them behind the other stage piece. Stick the bush pieces on top to create the foliage for the tree as shown with glue.
Step 5

Get the additional pieces ready for the rest of the shadow box by die cutting the fence, 2 flowers and 2 plants. Colour them in with your Nuvo pens as shown.
Step 6
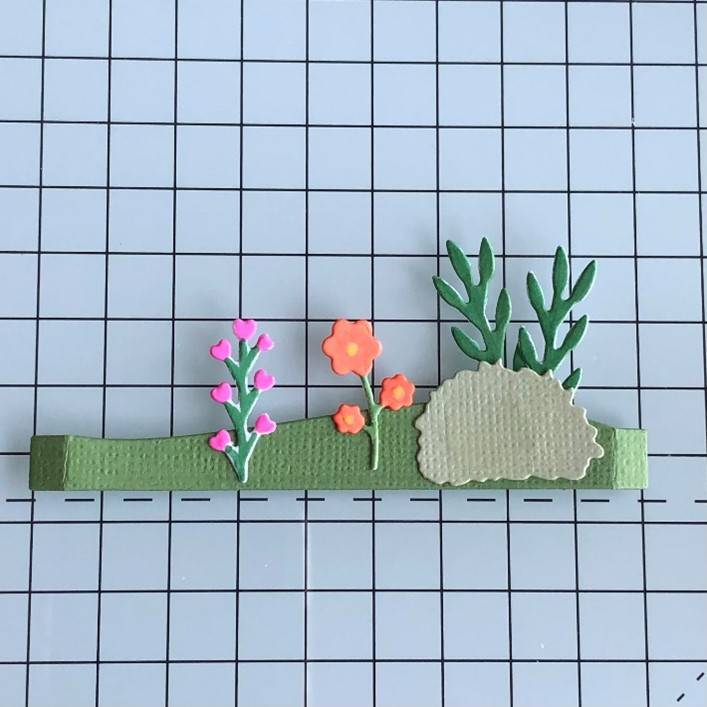
Assemble the stage piece by sticking on the flowers and foliage pieces with glue then adding a bush die cut with light green card.
Step 7
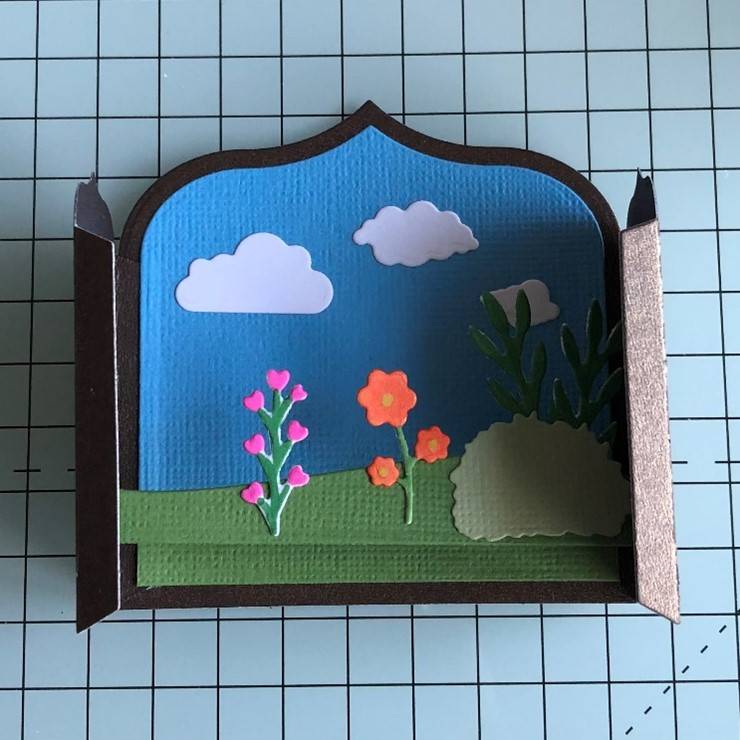
Begin assembling the box by sticking the side tabs to the back with glue then adhering the stage just above the green base.
Step 8
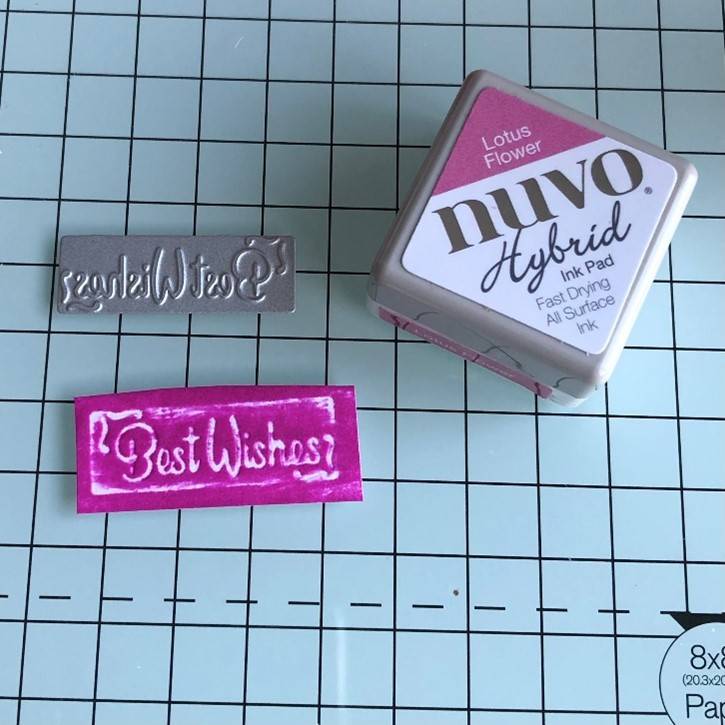
Emboss ‘Best Wishes’ onto white card and then use the Lotus Flower Nuvo pad lightly across it to colour it.
Step 9
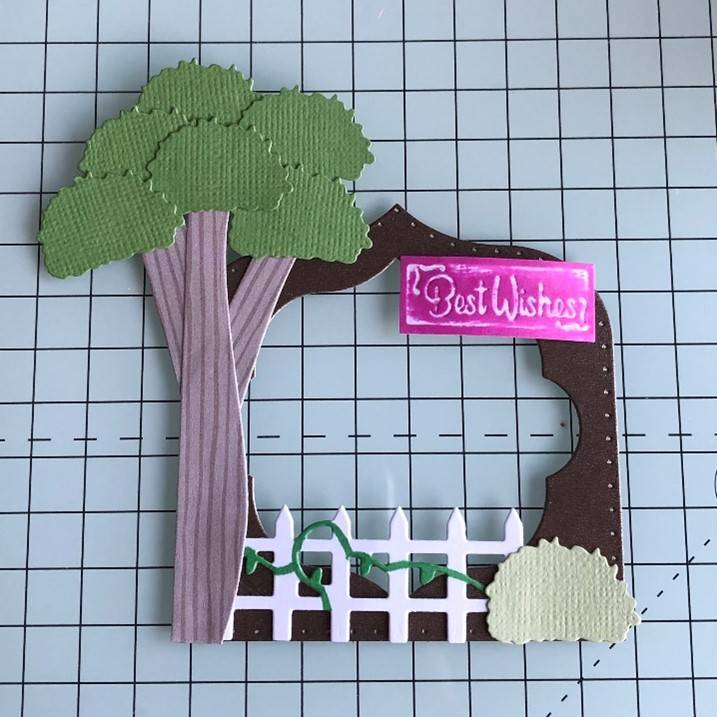
Assemble the front of the box by sticking the gate along the front with glue, the tree on the left side, bush to the right and the sentiment on the top right. Stick this completed panel to the front of the shadow box to the side tabs.
Buy The Craft Project