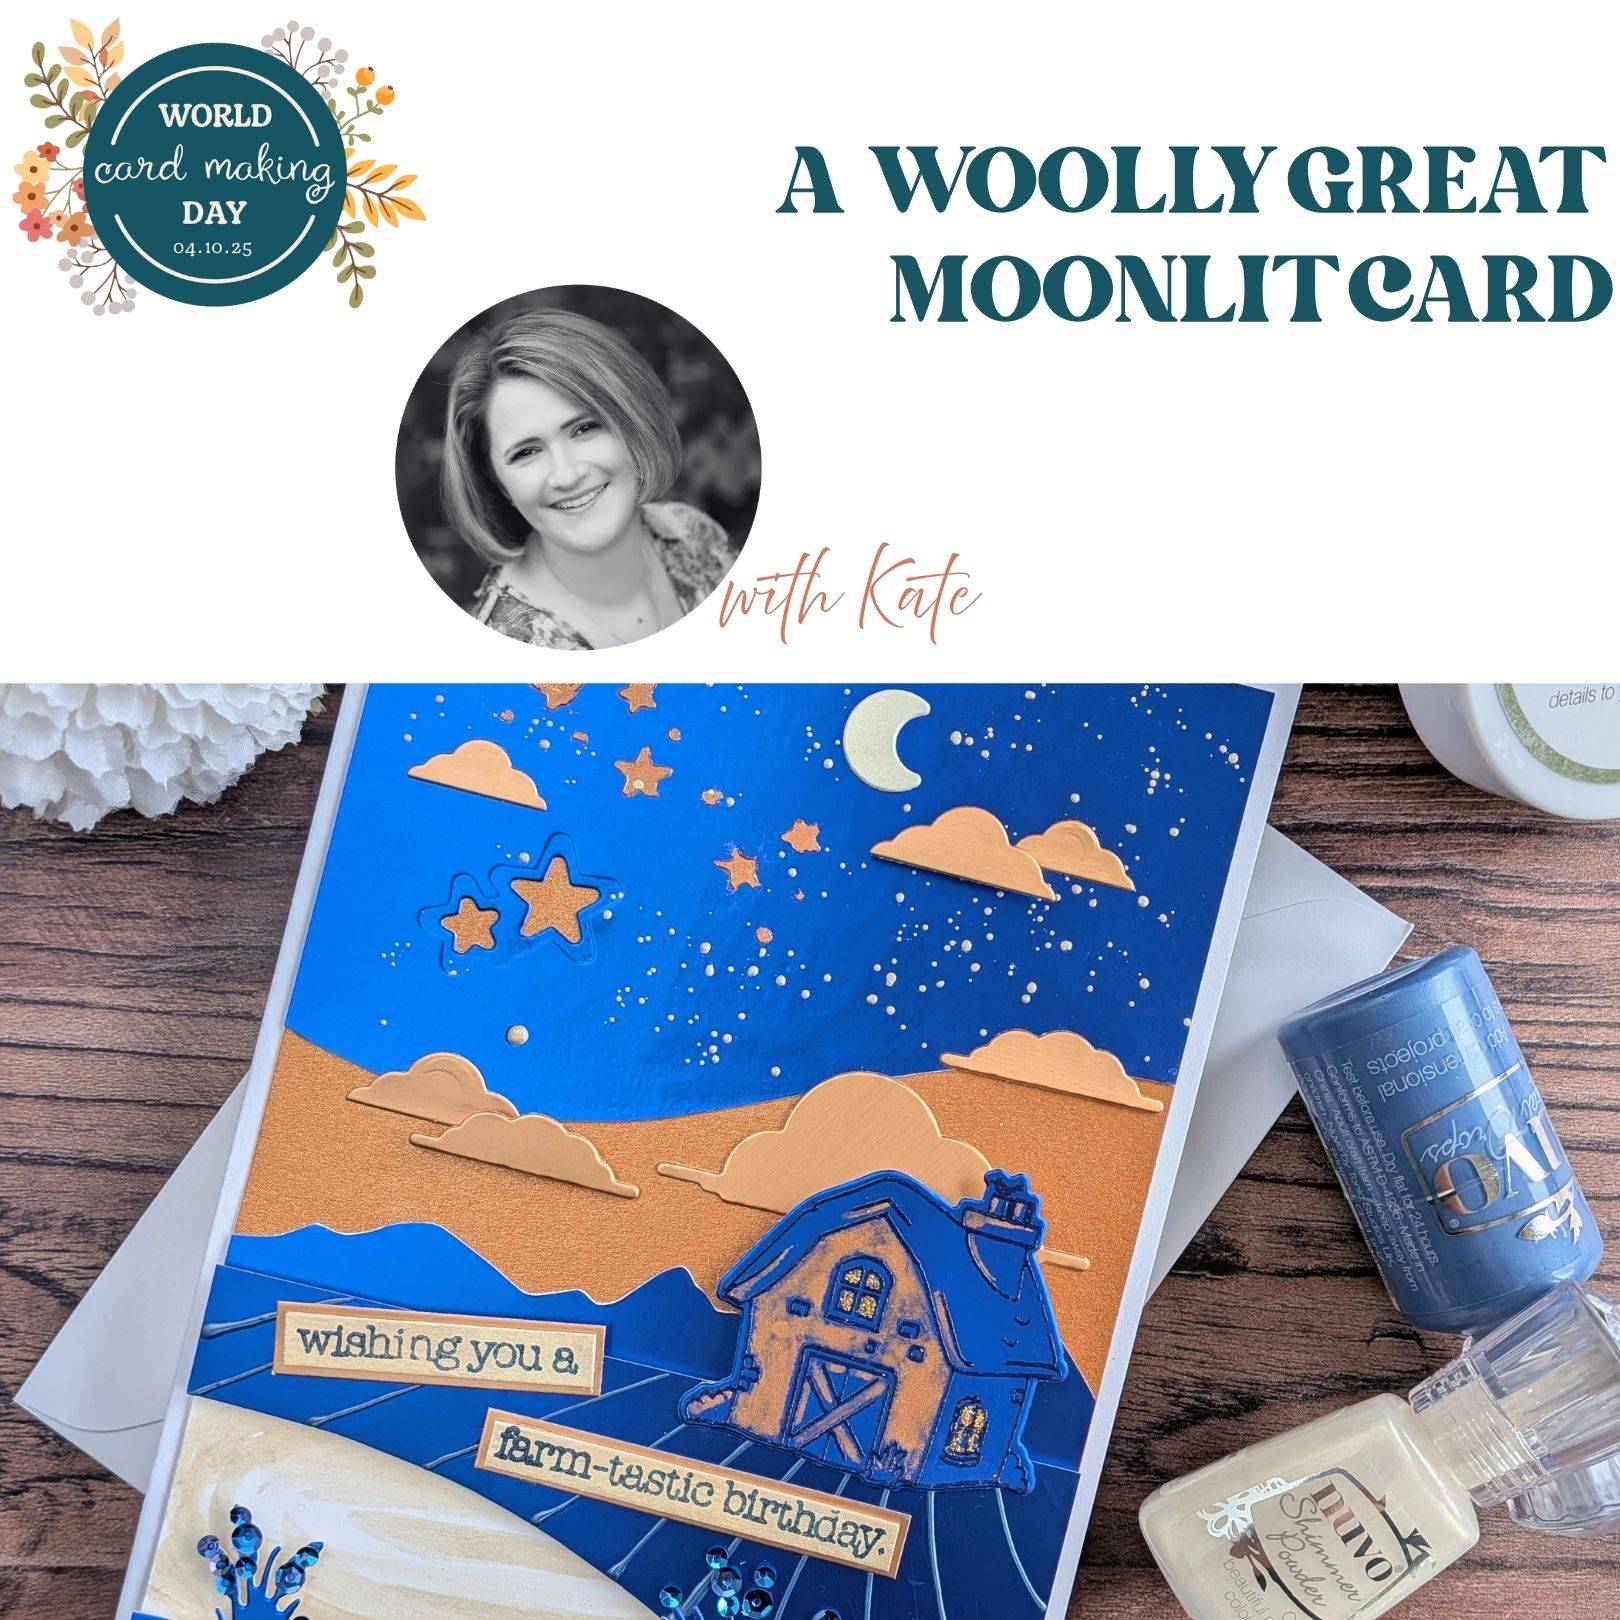

You can find more from Kate here:

To celebrate World Card Making Day 2025, our Design Team have created a range of stunning cards, using our recent Creative Collection launches.
For this project, Kate has created a stunning card, full of texture, using A Woolly Great Creative Collection. Check out the full step-by-step instructions below, and don't forget to check out the other projects we're sharing across World Card Making Day this year.
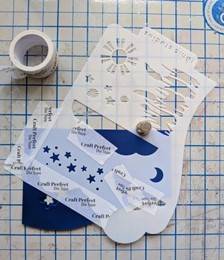
For this project you will need:
* A Woolly Great Creative Collection
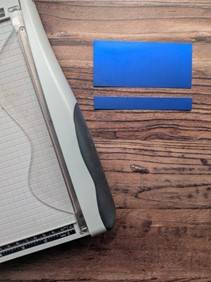
* Guillotine or long blade scissors
* Clear stamping block or stamping platform
* Embossing heat tool
* Small ruler
* Pencil
* Small paintbrush
* Die cutting machine
* Nuvo Deluxe Adhesive
* Nuvo Glue Pen
* Foam adhesive pads
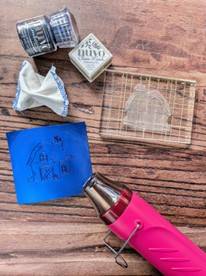
Step 1
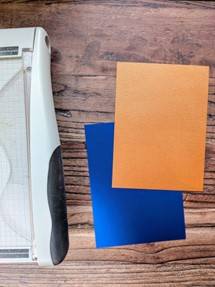
i) Cut a piece of ‘Cobalt Velour’ and ‘Copper Mine’ Craft Perfect Cardstock, both to measure 12.5 x 17cm
ii) Cut some white cardstock to measure 12.5 x 5.2cm
* 5x7” white card blank
* Craft Perfect Pearlescent Card - Cosmic Copper
* Craft Perfect Mirror Card - Copper Mine
* Craft Perfect Mirror Card - Cobalt Velour
* White cardstock
* Fine gold glitter
* Dark blue sequins (various sizes)
* Dark/Navy blue embossing powder
* Clear Ink
* Nuvo Shimmer Powder - Ivory Willow
* Nuvo Embellishment Mousse - Fresh Copper
* Nuvo Crystal Drops - Navy Blue
Step 2
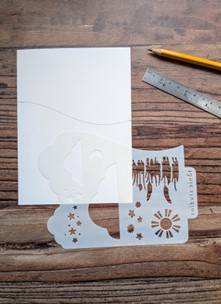

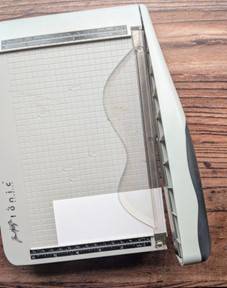
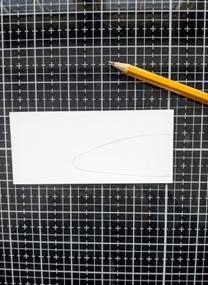
i) Turn over the blue card and measure down 8cm from the top (on the right hand side) and mark. Flip over your stencil so that the ‘Tonic Studios’ logo is reading backwards and line the lower curved edge up with your mark. Use the stencil edge to draw a curved line.
ii) Cut in two along your curved pencil line
Step 3
Place your double star die in the position shown, tape into place and run through your die cutting machine.
TOP TIP: Try to use as little tape as possible, concentrating on the centre of the large star, as the tape can dent the mirror card surface quite easily. Alternatively, cut your stars out of ‘Copper Mine’ cardstock and adhere in position instead.
Step 4
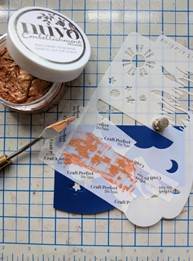
Position the star section of the stencil on a diagonal, above the die cut stars, as shown. Tape the surrounding areas to mask and then using a small spatula, apply the embellishment mousse.
Step 5
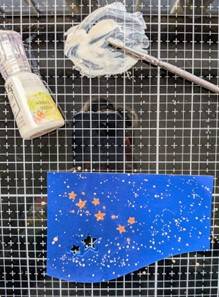
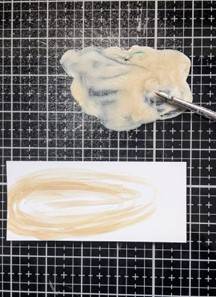
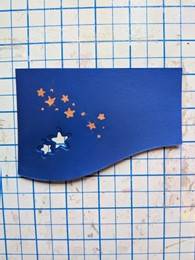
i) Squirt 3-4 puffs of Ivory Willow Shimmer Powder onto a mixing surface and add a little water and mix with a paintbrush to create a paintlike consistency - runny enough to flick off the end of the brush.
Using the paintbrush, splat your blue panel to create a night sky effect.
ii) On your pre-cut white card panel, swirl some of the paint mixture around as shown, focussing towards the lefthand side of the panel.
iii) Any left over mixture, paint onto a scrap piece of white cardstock to use later. Set them all aside to dry.
Step 6
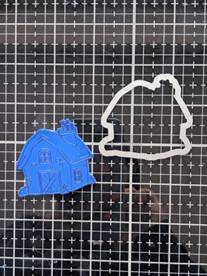
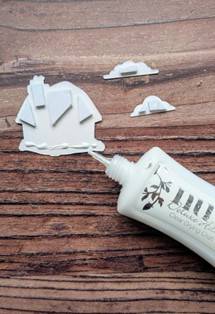
i) On a piece of Cobalt Velour card, stamp the barn image in clear ink and heat emboss with a dark blue embossing powder.
TOP TIP: Foil card can be very ‘clingy’ when using embossing powders. To stop unwanted powder from sticking to the card surface, I recommend using an anti-static powder beforehand, the excess of which can be easily wiped off after the embossing powder has been set and cooled.
ii) Cut out the barn image using the co-ordinating die.
Step 7
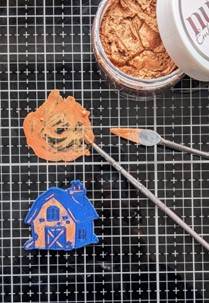
Add a little water to some embellishment mousse to make a paint-like consistency. Using a small brush, add some details to the barn, like as shown, to give the illusion of ‘light and shadow’ - You do not need to worry about being particularly neat with this as the embossed lines help to contain the paint.
I also then used some of my leftover paint to add contrasting copper splatters to my ‘night sky’ panel.
Step 8
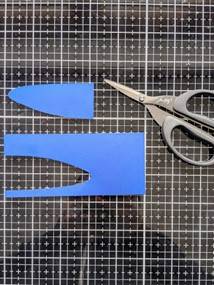
On the back of the leftover half of the blue panel, measure down 4cm down from the top of the left curve and 2cm down from the right curve. Draw a straight line and cut.
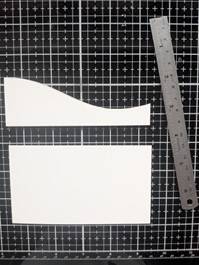
Step 9


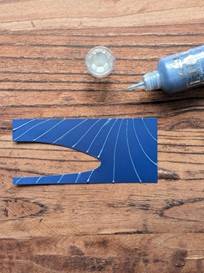
On the back of the smaller blue card piece, draw a line to resemble a mountainous landscape, like the one as shown. Then cut along the line.
Step 10
Trim the leftover blue card piece to measure 5.5cm tall - Discard the remaining piece.
Step 11
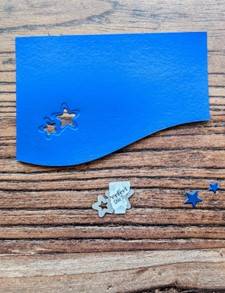
On the back draw half an oval shape as shown to resemble a pond. Cut out the shape.
Step 12
Use your Crystal drops to draw lines resembling ‘lawn lines’. Set aside to dry fully.
TOP TIP: It is recommended to practice this on a scrap piece of card first, to build up technique and confidence with the drops. You could also use a pencil to mark where you want your lines to be beforehand.
Step 13
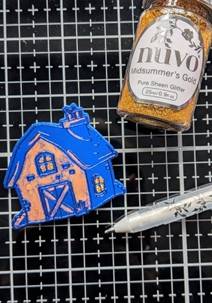
Using a Nuvo glue pen or fine precision glue applicator, pick out the windowpane details on the barn image and apply some fine gold glitter. Set aside to dry.
Step 14
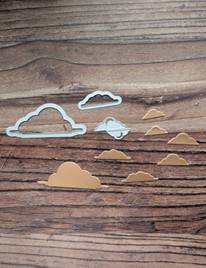
Using the larger and smaller single cloud dies and the double cloud die, die cut the following in ‘Copper Mine’ mirror cardstock:
● X1 large single cloud
● X2 small single clouds
● X2 sets of double clouds
You should have seven clouds in total.
Step 15
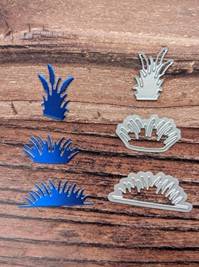

i) Die cut one of each of the above reeds and grass shapes in ‘Cobalt Velour’ cardstock.
ii) Attach with glue some blue sequins to enhance and pick out the detail of the reeds as shown.
Step 16
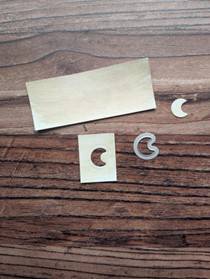
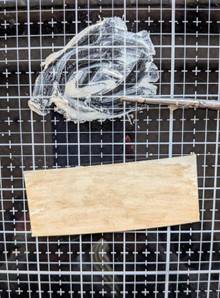
i) Using your piece of scrap card painted with the shimmer powder mixture, trim off a small section and die-cut a half moon from it.
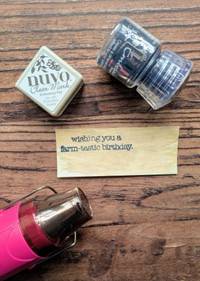
ii) On the remaining piece, stamp the ‘farm-tastic’ sentiment in clear ink and heat emboss with the dark blue embossing powder.
Step 17


Trim the sentiment to split it into two pieces and then mount it onto some ‘Copper Mine’ cardstock. Trim to create a thin border around the sentiment strips.
Step 18
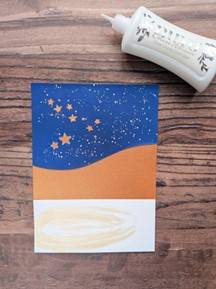
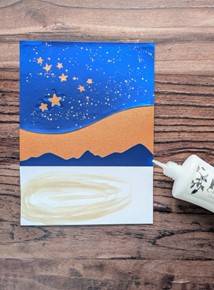
i) On your ‘Cosmic Copper’ panel, line up your night sky from the top and your white card panel along the bottom and glue into position (leaving an exposed copper section in the middle)
ii) Glue your landscape piece to directly line up above the white panel.
Step 19
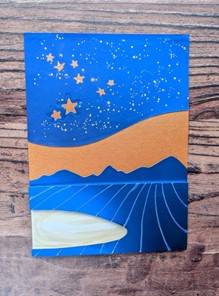
Trim and attach some foam adhesive pads to the ‘pond’ panel, line up with the bottom of your main panel and fix into place. (The top of this elevated section should ever so slightly overlap the mountains to hide the white card underneath)
TOP TIP: Apply some wet glue to the foam pads to allow some extra ‘wriggle’ and assist in lining up the panel edges accurately.
Step 20
Adhere five of the clouds as shown.
Step 21

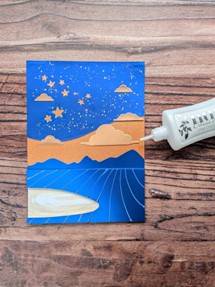
i) Trim and apply sticky foam pads to the back of the remaining two clouds and to the top half the barn. Add a line of wet glue to the bottom of the barn also.
Place the clouds into position (one towards the top, overlapping the righthand small cloud and the second one overlapping the bottom lefthand cloud)
ii) Position the barn as shown.
iii) Adhere the moon and reeds/grass tufts into place also.
Step 22
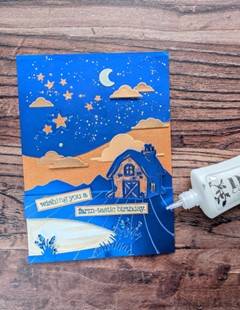
Attach your sentiment as shown.
Step 23
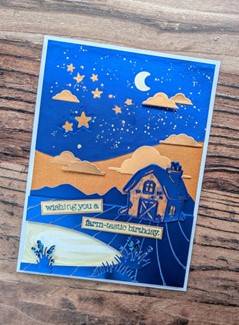
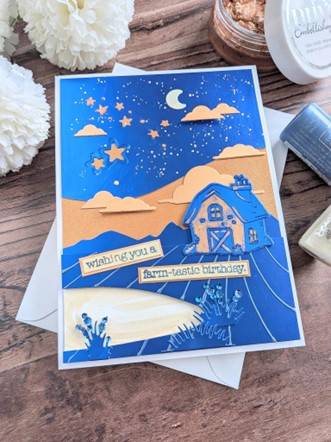
And finally, adhere your finished panel onto your card blank to complete your moonlit creation!
