You can find more from Jennifer here:


To celebrate World Card Making Day 2025, our Design Team have created a range of stunning cards, using our recent Creative Collection launches.
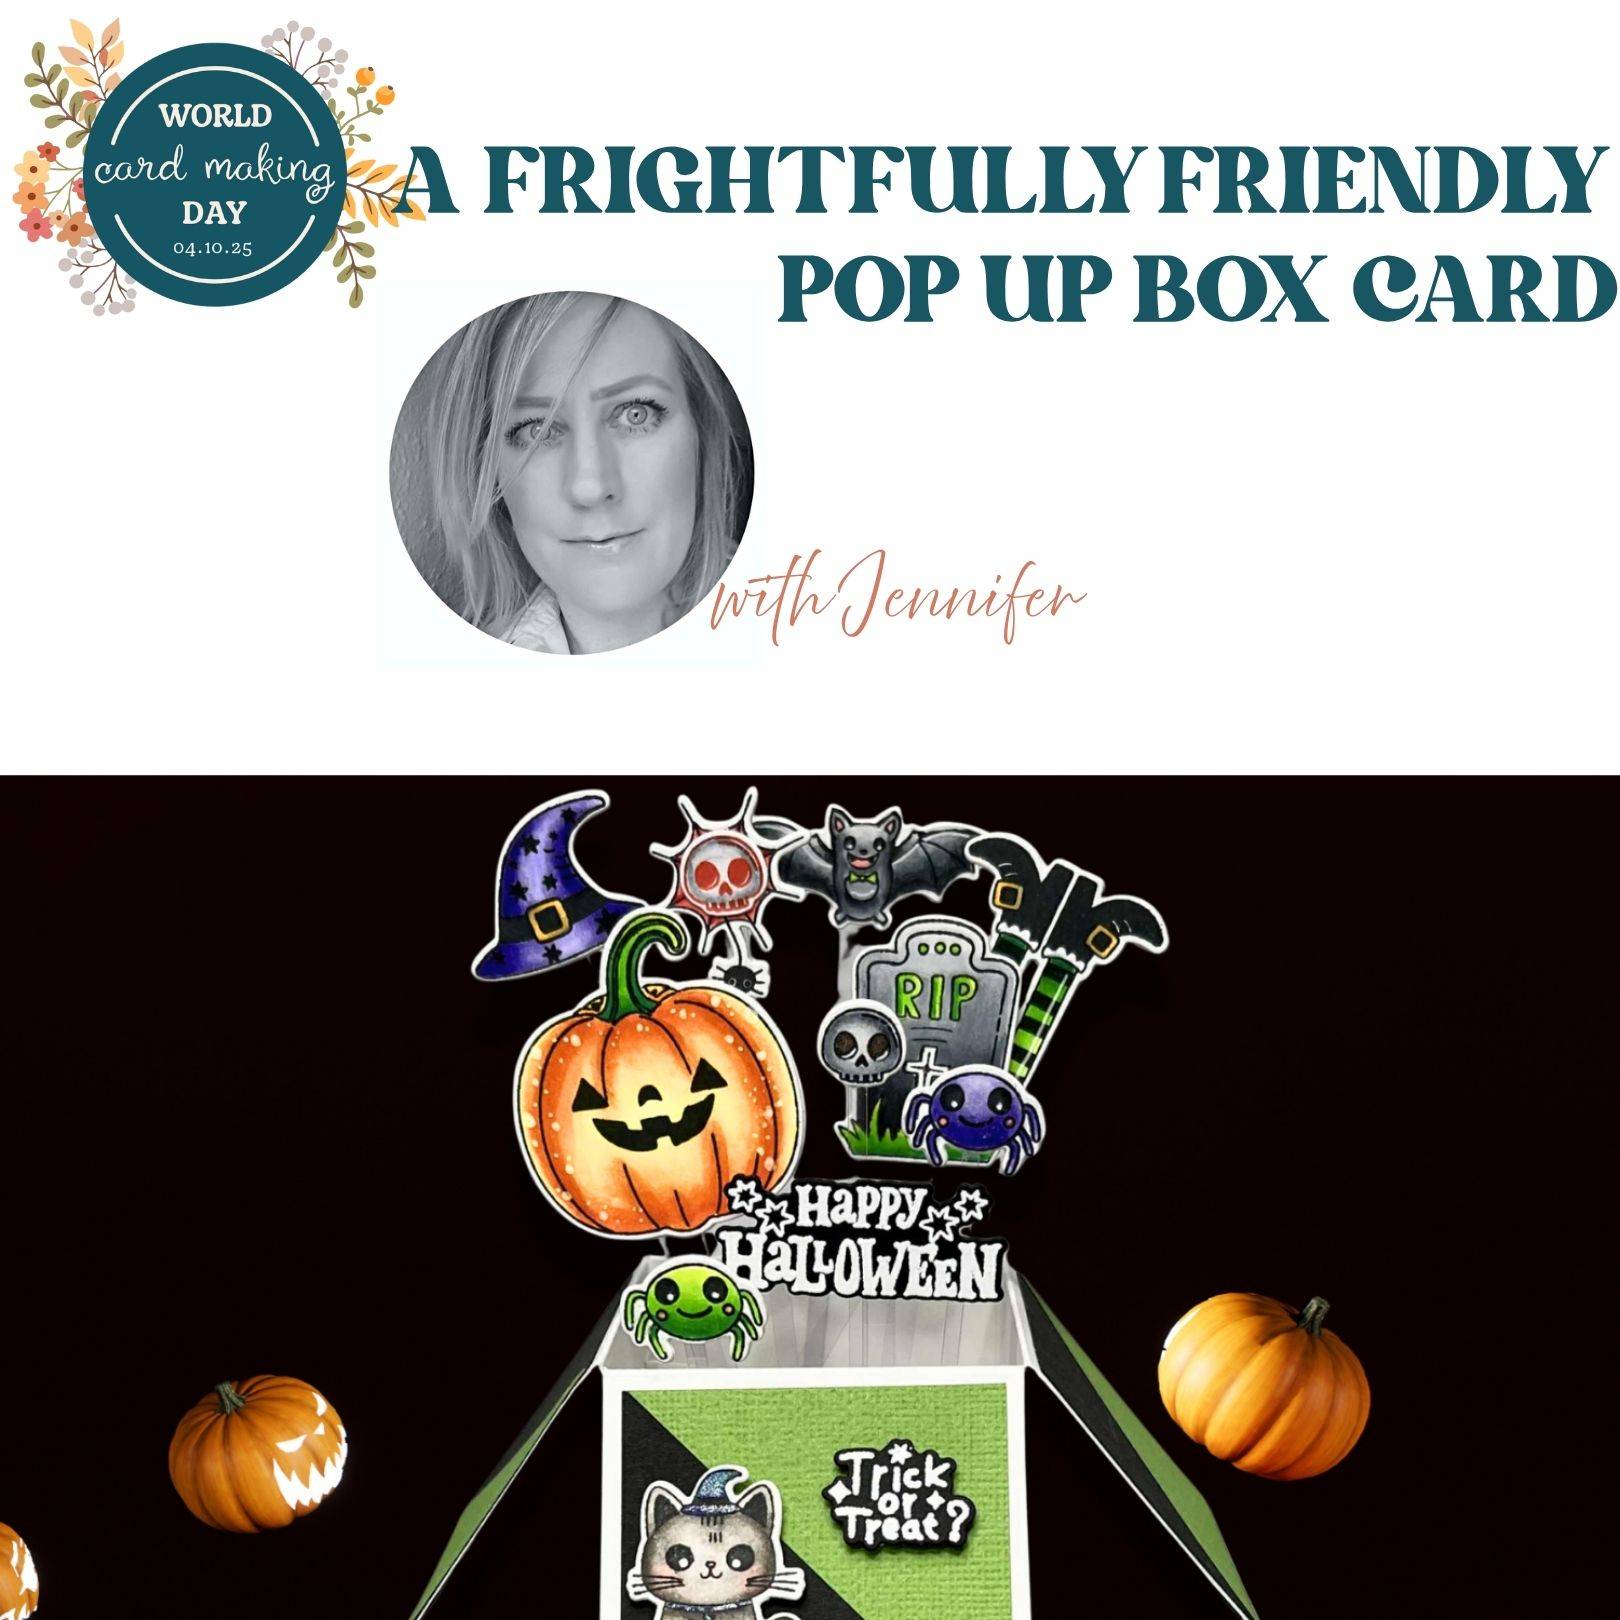
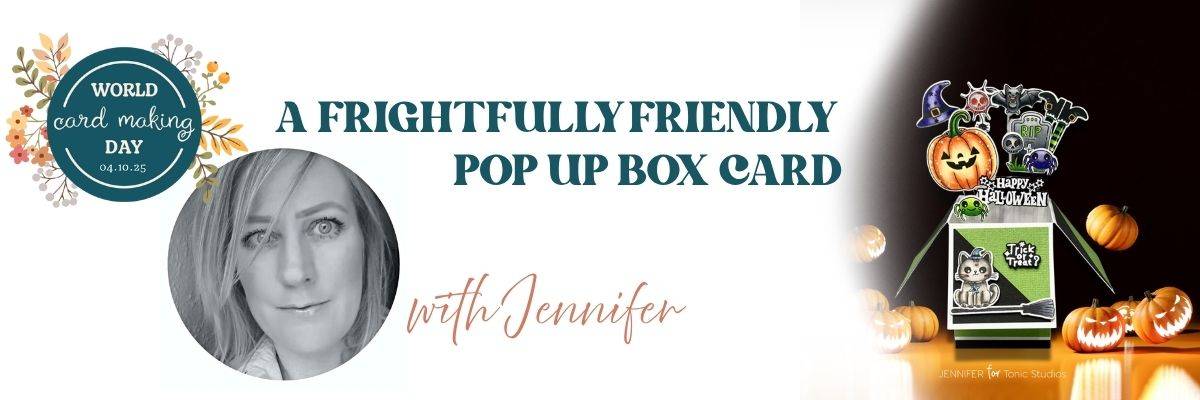
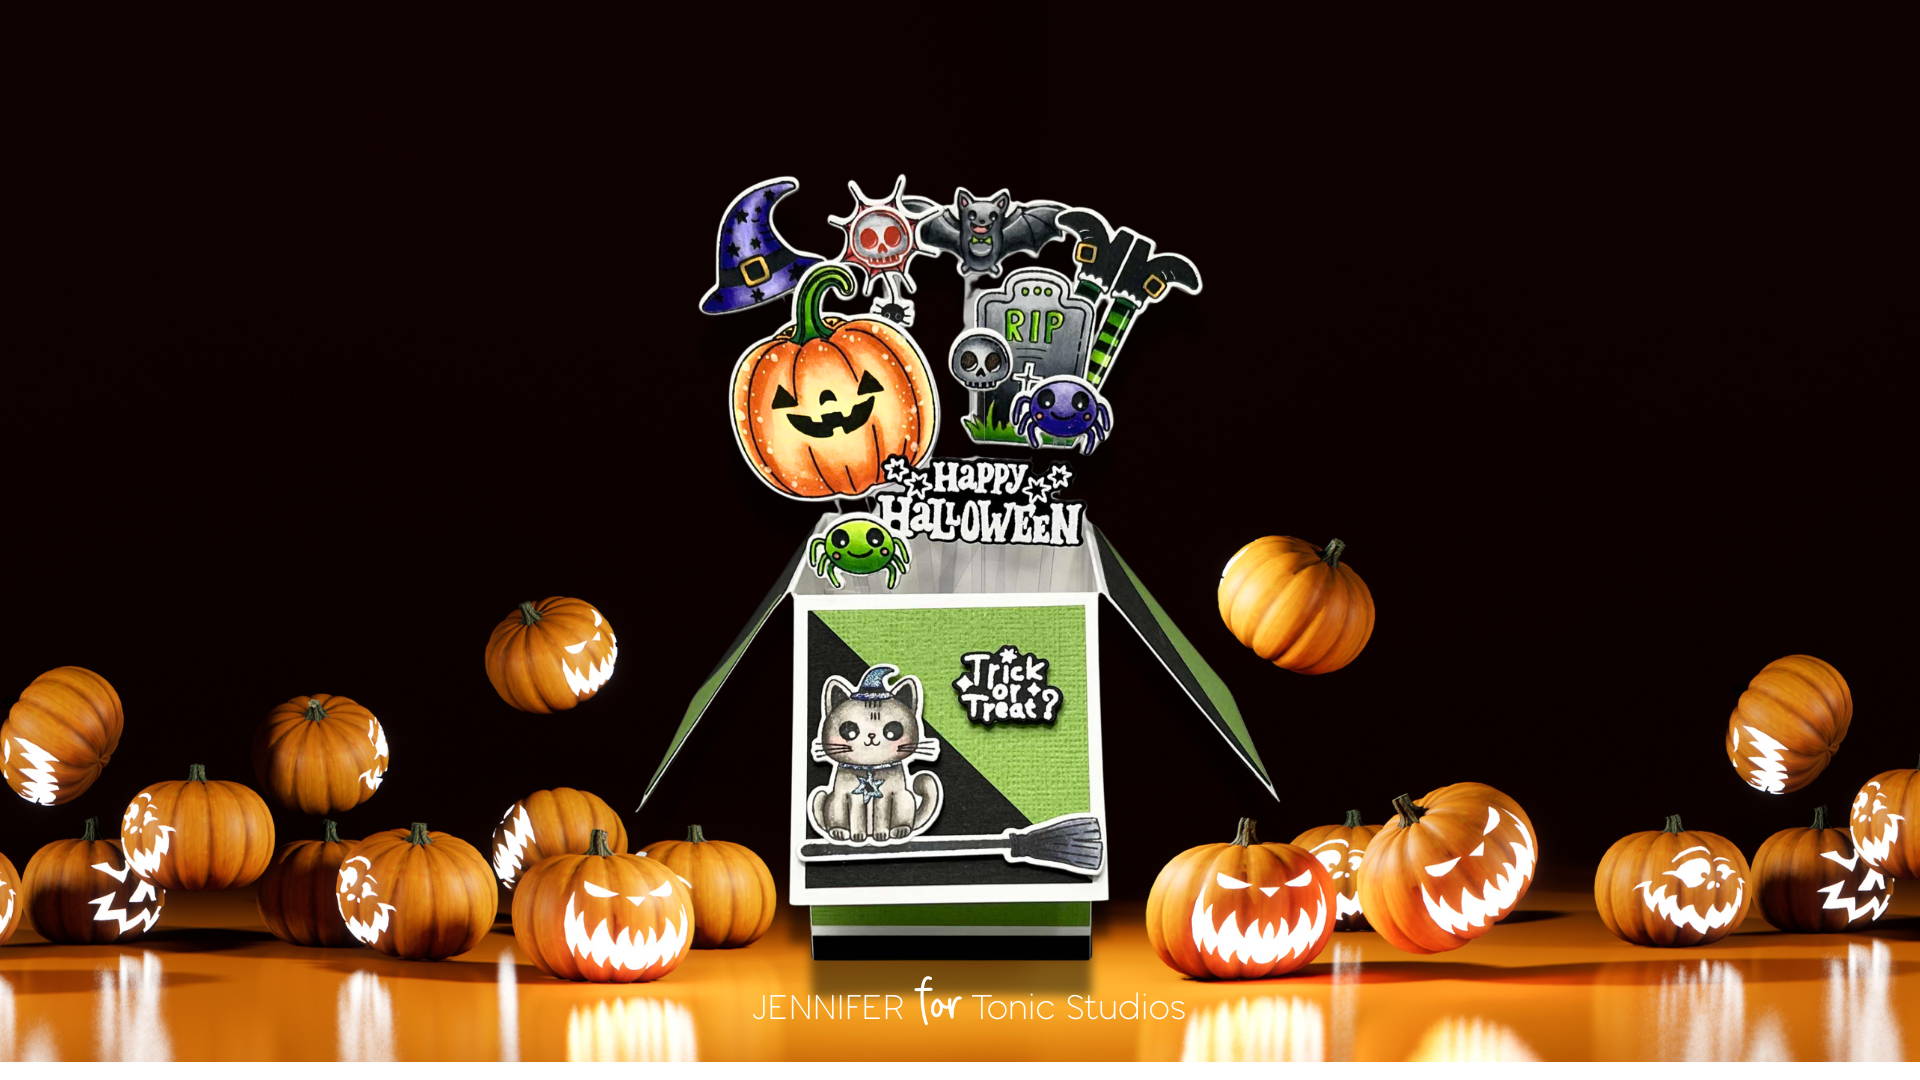
It’s World Cardmaking Day, which means the perfect excuse to spend a little extra time in the craft room. For today’s celebration, I’m sharing a pop-up box card that brings together all the things I love about papercraft, clever folds, crisp layers, and a space to show off a whole scene of stamped and coloured images. This design looks wonderfully impressive standing open yet folds flat to slip into a 5” x 7” envelope.
I’m absolutely thrilled to be joining you here on the Tonic Studios blog for World Cardmaking Day. It feels like such an honour to share a project on this platform, so I knew I had to create something a little special for the occasion. This pop-up box card has been made with plenty of care (and just a dash of mischief), and I hope you’ll enjoy it as much as I enjoyed putting it together.
For this project you will need:
* A Frightfully Friendly Creative Collection
* Tangerine Die Cutting Machine
* Tonic Studios Scissors
* Tim Holtz Rotary Trimmer
* Scoreboard
* Stamp Platform
Step 1-4 - Creating your pop-up box
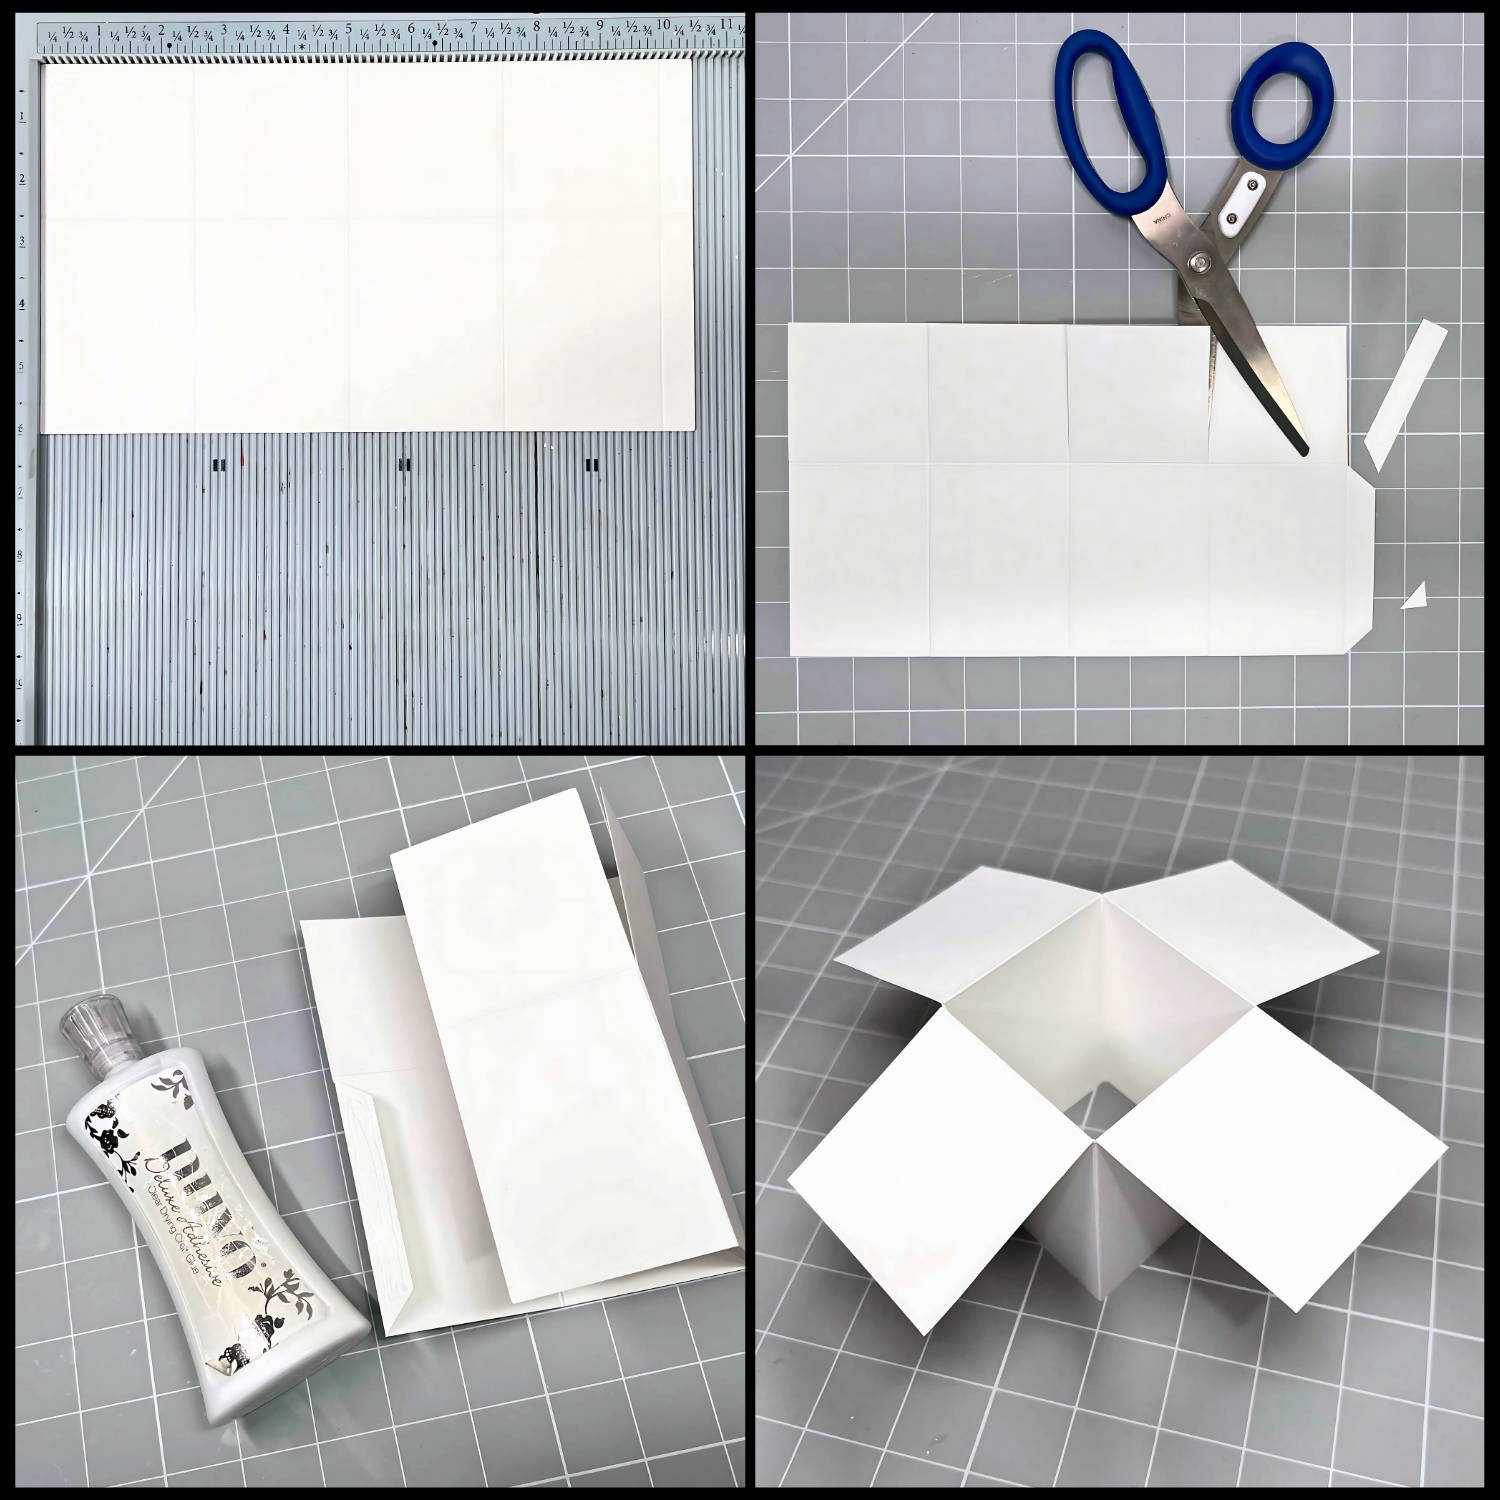
• Trim your cardstock to 10½" x 6". On the long edge, score at 2½", 5", 7½" and 10". Turn the card once and score at 2½".
• Cut up each of the 2½", 5" and 7½" score lines, stopping at the cross score. Trim away the small ½" section at the top.
• Add adhesive to the ½" glue tab, then fold and stick the sides together.
• Open it out and you now have the base pop up box.
* Alcohol Friendly Black Ink and Alcohol Markers
* Hammermill Paper (for stamping/colouring)
* Craft Perfect 240gsm Black and White
* Craft Perfect 216gsm Grass Green Card
* Craft Perfect Acetate
* Nuvo Deluxe Adhesive
* Craft Perfect Double Sided Tissue Tape and Low Tack Tape
Step 5-8 - Making the inserts
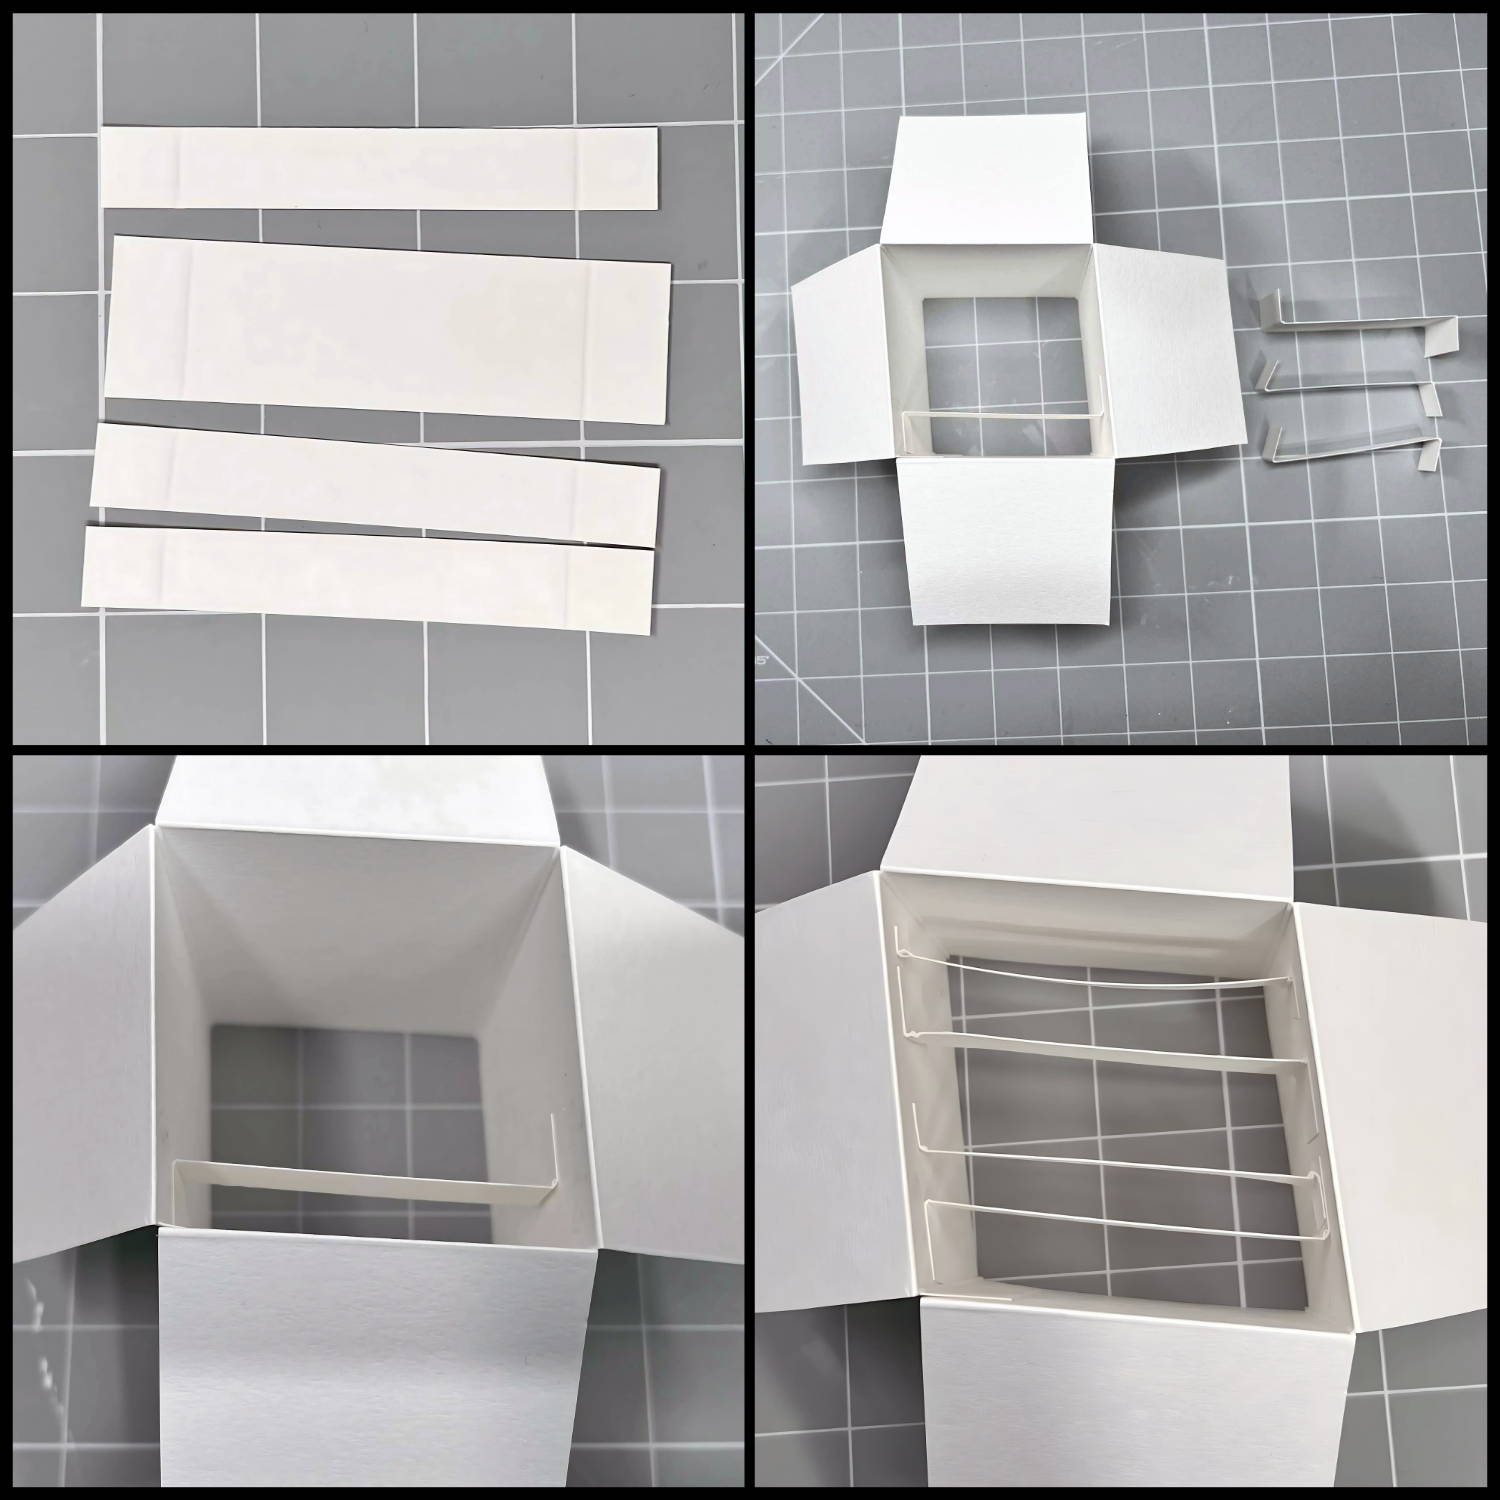
• Cut strips 3 inches long. Score at ½", 1", 2" and 2½". You can make the width whatever you like but mine are ½" and 1" wide.
• Fold each strip along the score lines.
• Add adhesive to the small end tabs on each strip.
• Stick the strips inside the box, spacing them evenly to create inserts for your decorations.
Step 9-12 - Adding the panels
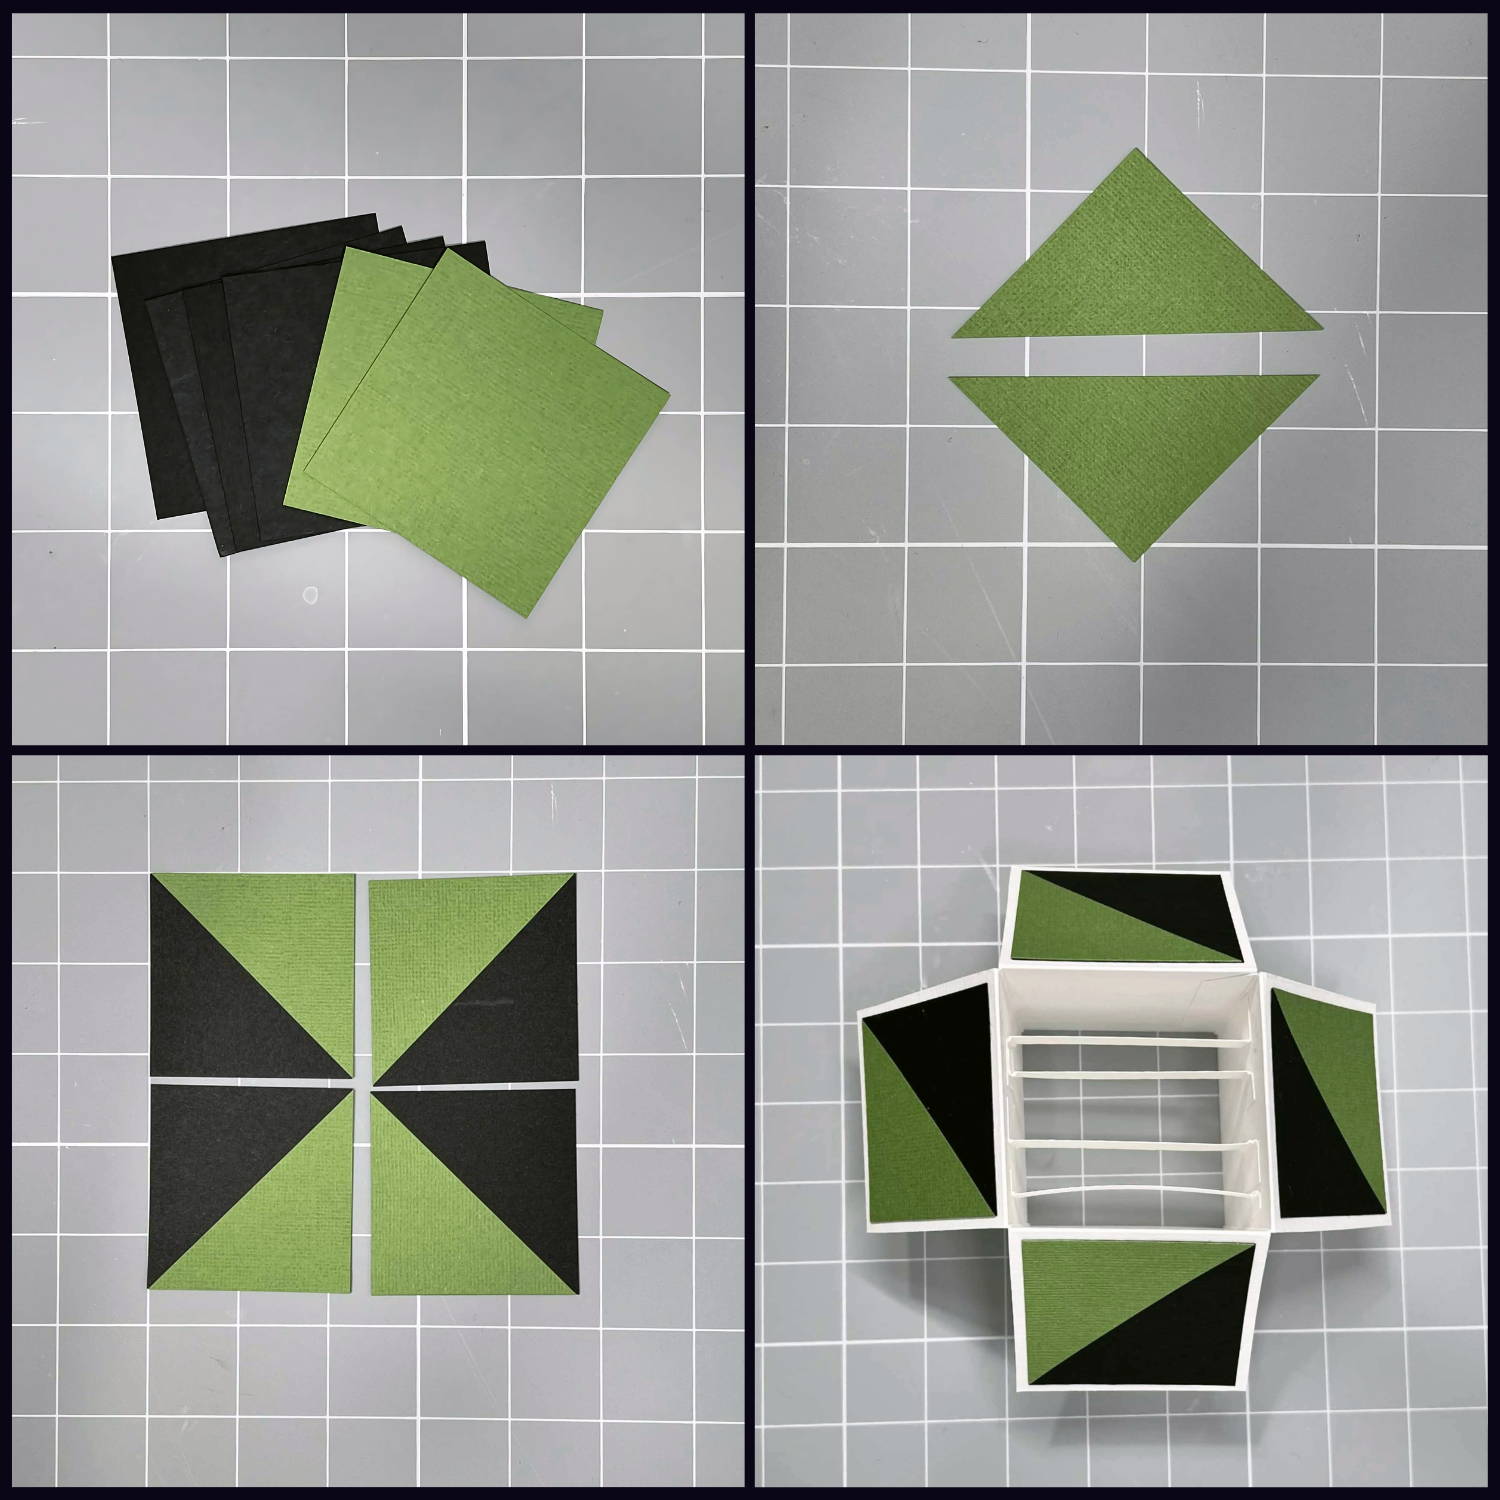
• Trim 4 black squares and 2 green squares to 2¼".
• Cut the green squares in half diagonally to make triangles.
• Adhere each green triangle on top of a black square.
• Add these layered panels to the flaps of your pop-up box.
Step 13-16 - Adding the stamped die cuts
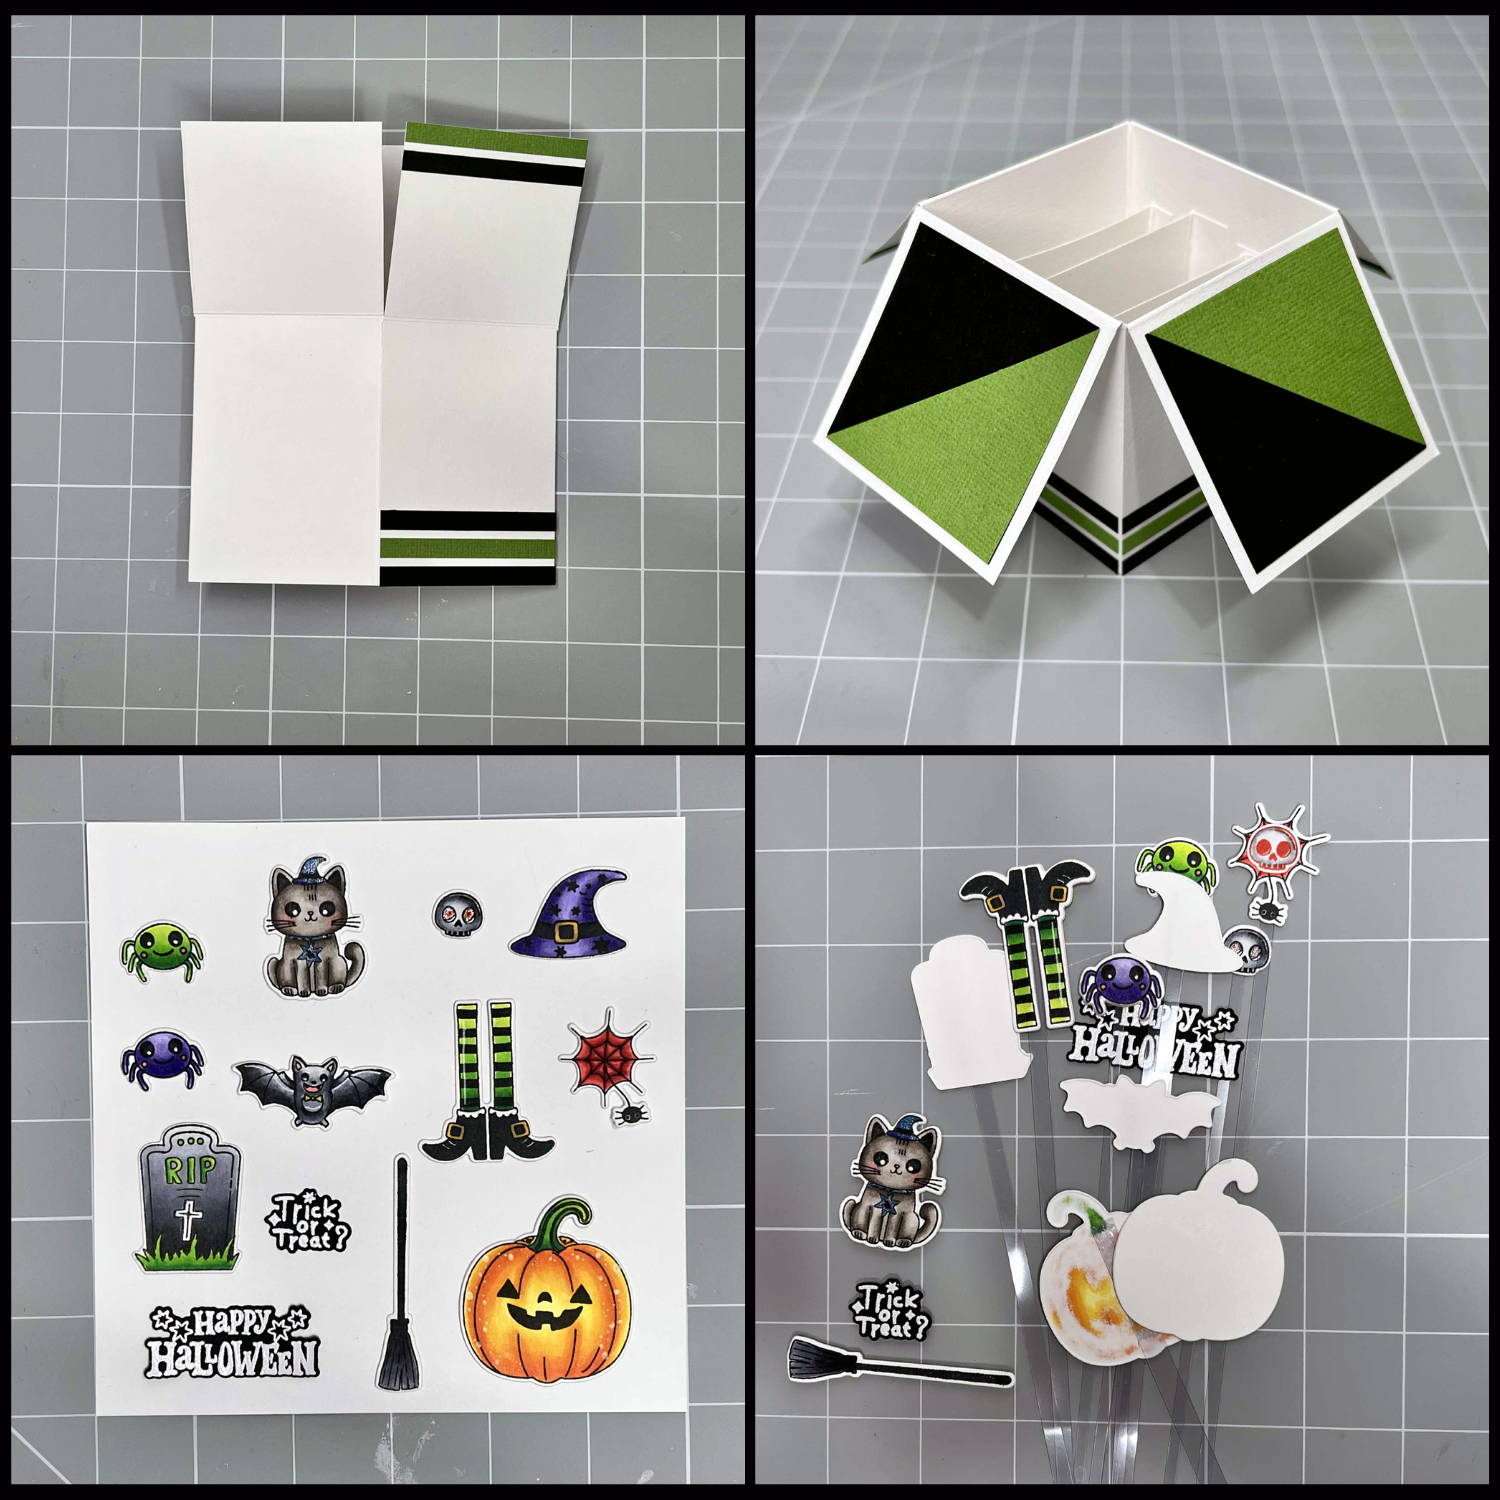
• Cut 12 black strips and 8 green strips measuring 2½" x ¼".
• Adhere black, green, black across the bottom panels, and green, black under the flaps.
• Stamp, colour and die cut your images. White heat emboss two sentiments on black card.
• Attach each image to a thin strip of acetate with double sided tape. Die cut the same shapes in plain white card and adhere to the back for a neat finish.
Step 17 - Bringing it all together
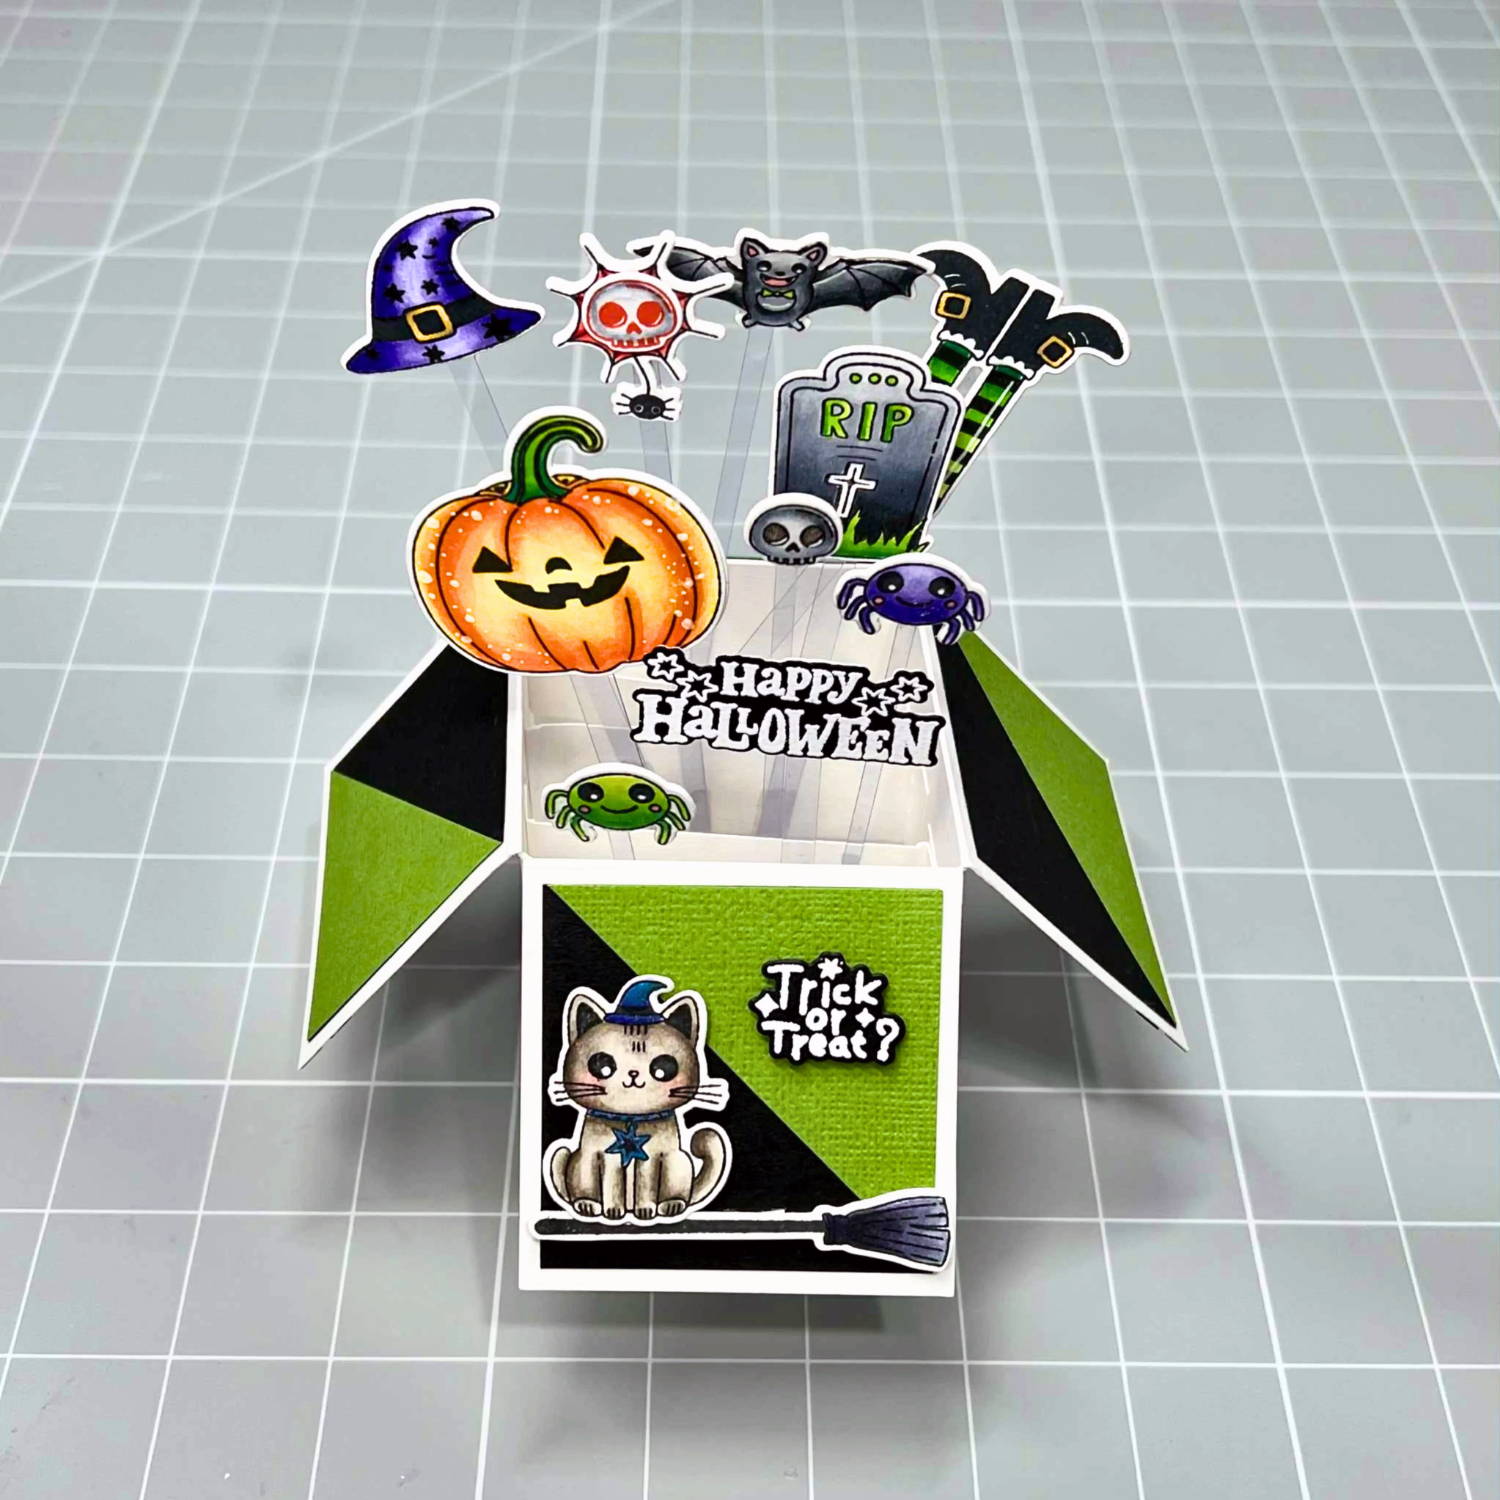
• Trim and adhere the acetate strips with images onto the inserts inside the box. Have fun with the composition and arrange your scene.
What do you think? This Pop Up Box Card fits beautifully into a standard 5" x 7" envelope, so it’s easy to send through the post. I’ve made my own envelope using the We R Memory Keepers Envelope Punch Board to finish the project off neatly.
Thank you so much for joining me here on the Tonic Studios blog for World Cardmaking Day. I hope this tutorial inspires you to have a go at your own Pop Up Box Card! They’re such a fun way to show off your stamping and die cutting.
I’m glad to share this space with you and hope you enjoy every moment of this special day!
