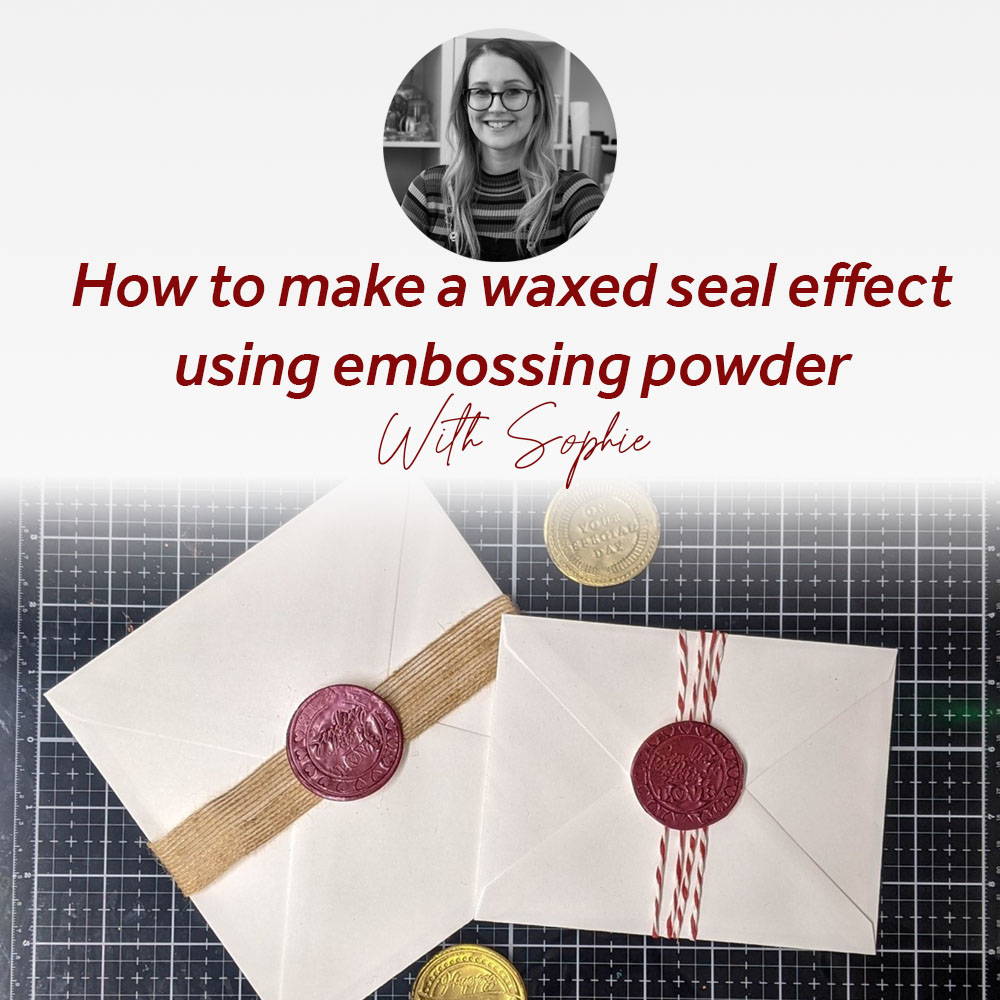

Hello, Sophie here with a quick project I made using the Simply Stamped die & stamp set.
As soon as I saw these stamps they reminded me of the wax seals you see on fancy letters in films, so I set out to make my own!
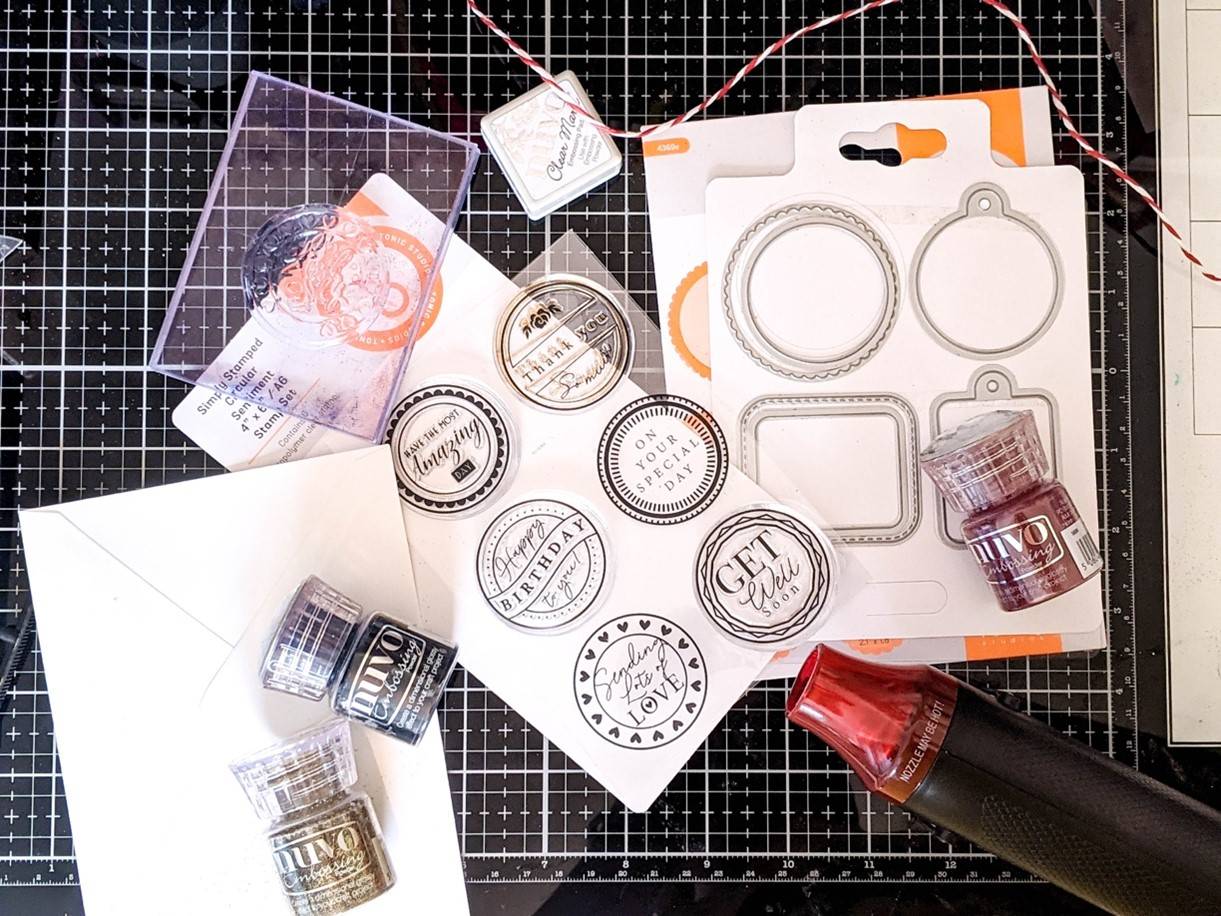
To make the wax seal you will need:
- Simply Stamped die & stamp set
- Die cutting machine
- Embossing powder
- Heat Gun
- Stamping Block/Platform
- Envelopes
- Twine
- Craft Perfect Redline Tape
Step 1
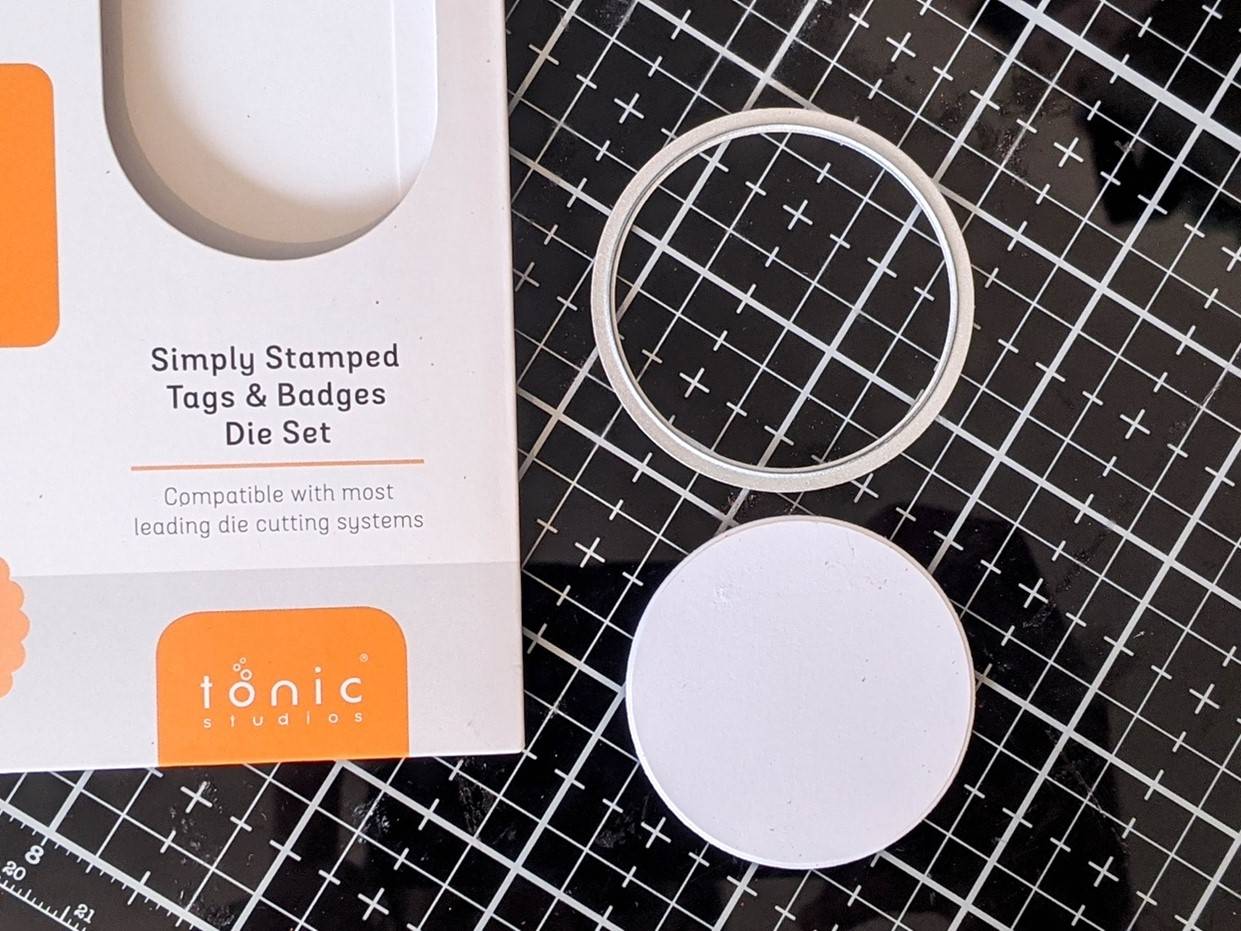
First, I cut out a circle using the die from the set and my Tangerine.
Step 2
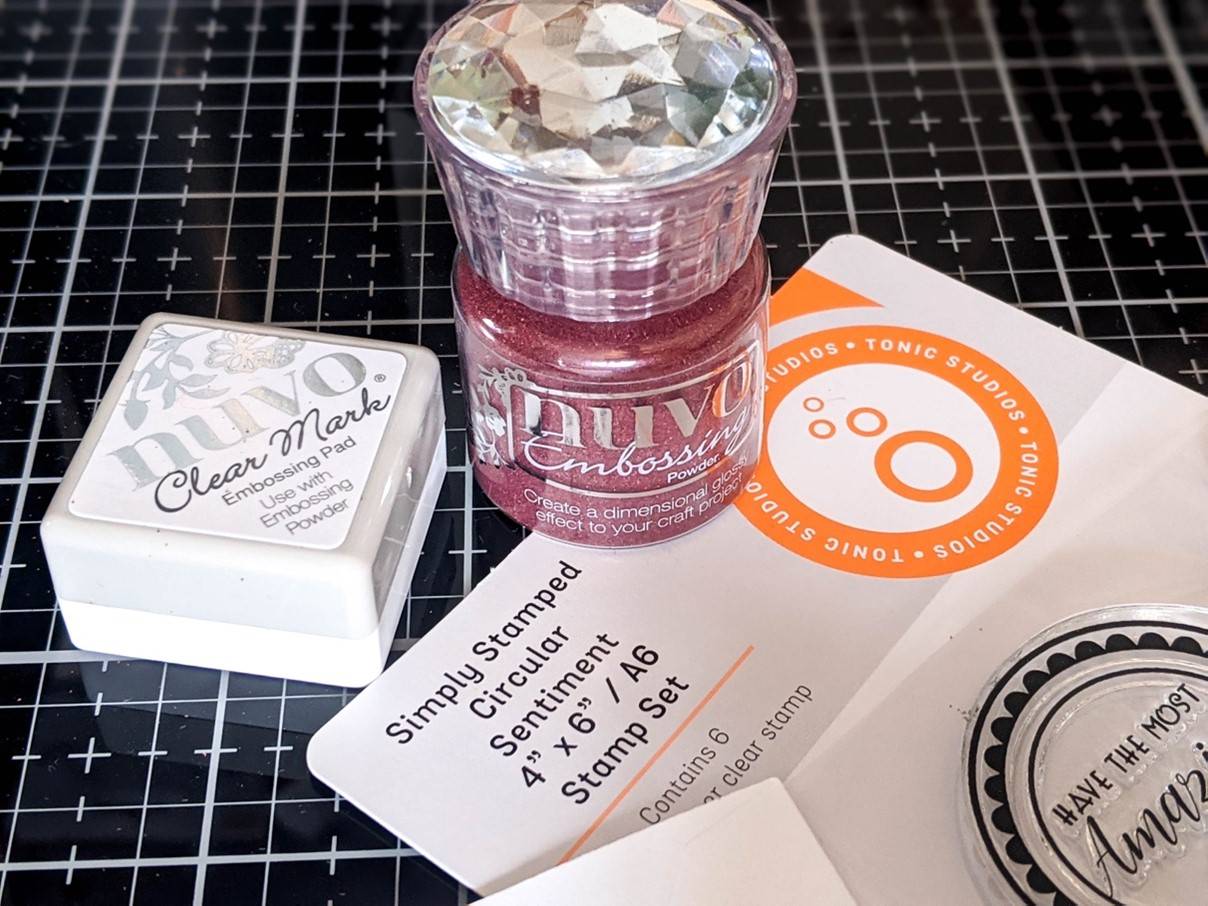
Then I used our Nuvo Clear mark ink and Embossing Powder in Medici Crimson to cover. I then used a heat gun to melt the embossing powder and let it cool.
I repeated this step 3-4 times to build up some layers. Then while the last layer was still hot, I carefully but firmly pressed in one of the stamps from the set to leave an imprint in the embossing powder.
Step 3
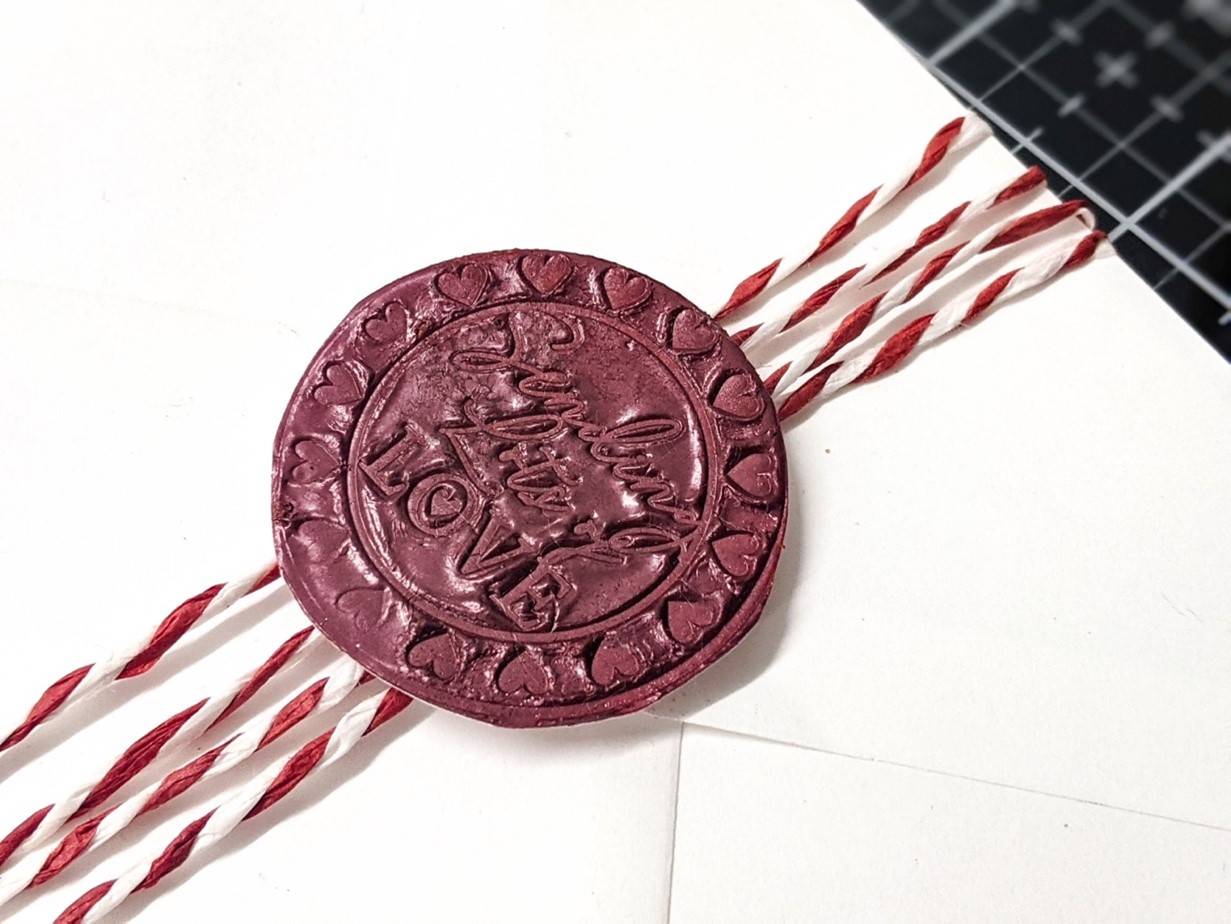
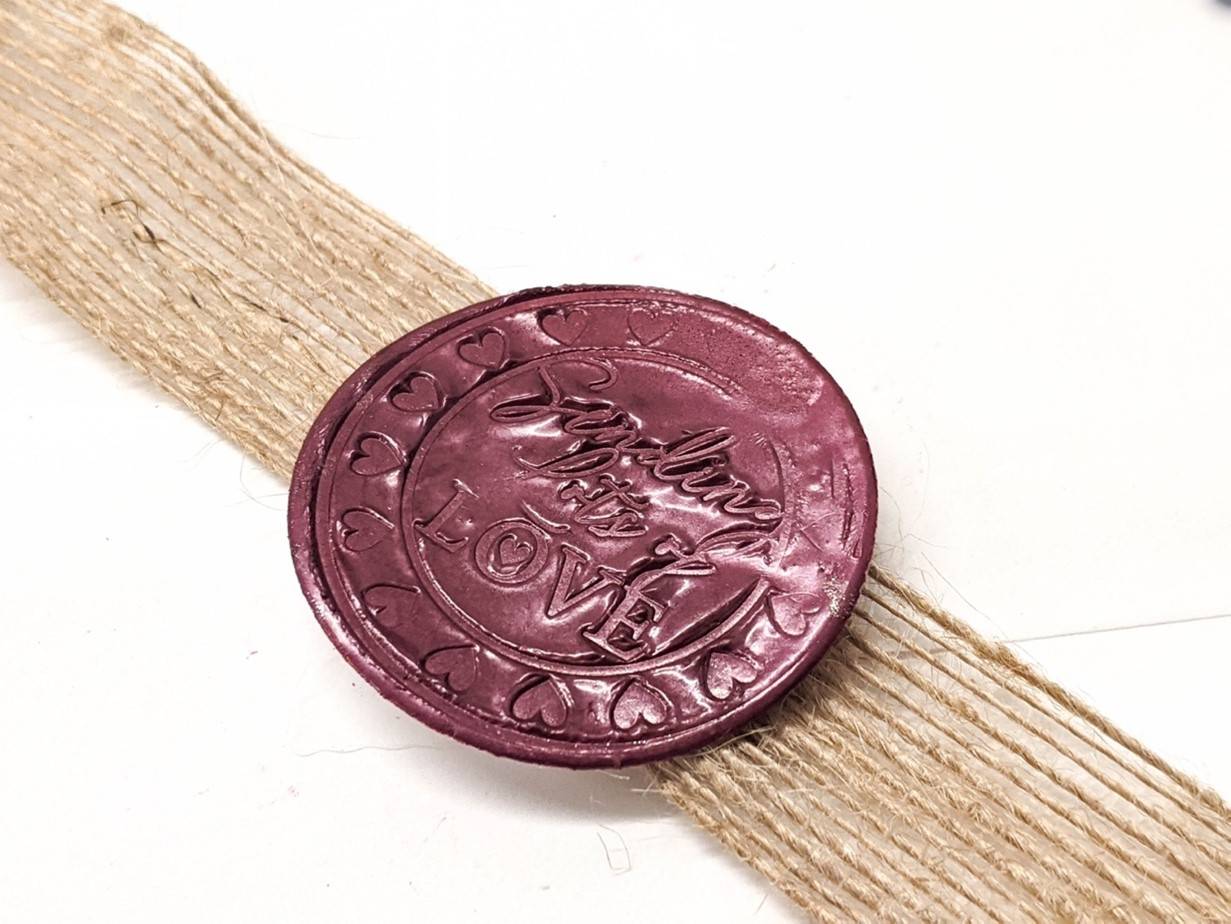
I added my “seals” to envelopes I’d decorated with some twine and jute banding, using Craft Perfect Redline Tape.
Step 4
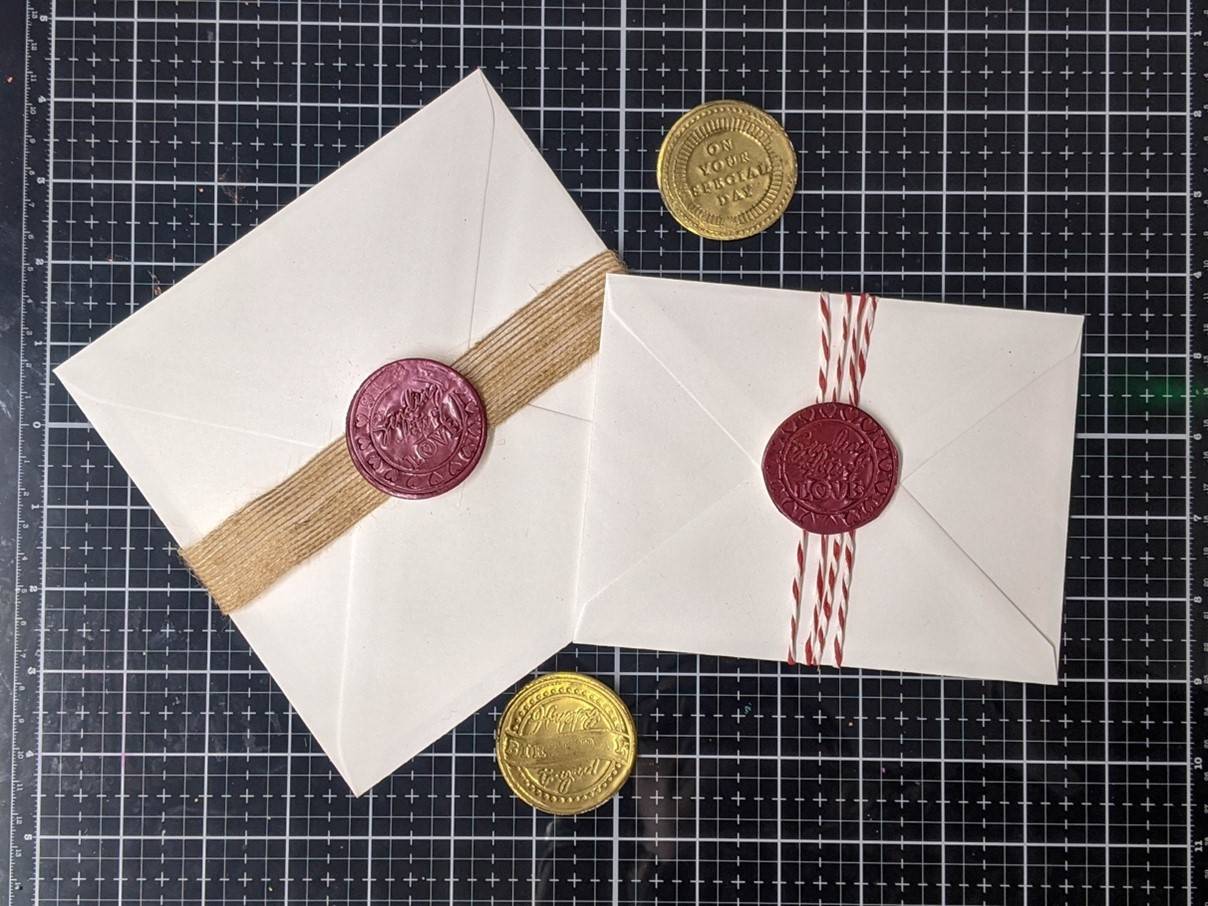
I also tried this technique out using Classic Gold Embossing powder to make what looked like gold coins.
I think this could also look cool using black embossing powder, using a glitter marker to pick out detail.
Buy The Craft Project
